The boxes have been camped out in the hallway since Thursday. One is long and flat, propped against the wall like it's waiting for its moment. The other is the kind of heavy that surprises you when you try to move it. You know exactly what they are. You've been tracking them since you ordered them during the Labor Day sale, and for three days now you've been stepping over them on the way to the kitchen, working from the dining table while your new setup waits in cardboard.
This is the part of the process nobody writes about. Shopping is fun. The shipping notification is fun. Unboxing is fun for about eight minutes. Then you're standing in a room full of parts and hardware bags, and it hits you: a standing desk and an ergonomic chair do not arrive ready to use. They arrive as a project, and the only thing between you and a proper workspace is assembly.
Here's what you should know before you start: this is genuinely a good way to spend an afternoon. It's mechanical, it's satisfying, and it's done in a day. Give yourself a clear block of time, a clean floor, and one patient friend for the two heavy steps, and you can have the desk and the chair assembled, calibrated, and feeling broken-in by dinner. This guide walks you through it in the order that prevents rework, so you only handle every heavy piece once. If you're here before you've ordered anything, the standing desk buyers guide is the better starting point. If the boxes are already in your hallway, you're in the right place.
It Arrived. Now What?
Resist the urge to start ripping boxes open in the hallway. Clear a workspace first. Pick the room where the desk will actually live, clear the floor, and give yourself room to lay out parts. If you can leave the project set up for a few hours, even better; assembly is a lot more pleasant when you're not racing the dinner hour.
Then unpack everything. Every box, every bag, every foam insert. Put the desktop somewhere soft; the flat cardboard it shipped in is perfect, and a towel on top of that is even better. Take the manual's parts list and check every item against it before you touch a single bolt. This is the ten-minute step that saves the most heartbreak. Finding out a part is missing before you start is one quick support message. Finding out halfway through a build is a stalled project and a wasted afternoon.
Treat the first unboxing like a small ceremony, because it kind of is. You're meeting the thing that will hold your work for the next several years. Peel the protective film off the desktop, run a hand over the surface, look at the legs and the controller and the little bag of bolts that connects them. It's a strange satisfaction, and it's the last quiet moment you'll get before the tools come out.
Lay the hardware out where you can see it. Keep the desk parts and the chair parts in separate zones, because the two kits share a similar look and you don't want to discover at step nine that you used the wrong bag's bolts. Read the manual once, start to finish, before you pick up a tool. You're not reading to memorize every step; you're reading to know where the heavy moments are, what order the frame goes together in, and whether anything has to happen before the desktop goes on. Ten minutes of reading now saves thirty minutes of undoing later.
You probably already know this, but you ordered during the Labor Day sale, when the 40×24 electric standing desk dropped to $599.99 and the L2 chair came in at $389.00. If you want the full rundown of what that event included, we rounded up the Labor Day desk deals here.
And keep the boxes. Both of them, plus the foam and the hardware bags. You'll want them if the setup ever has to go back, and the 30-day money-back guarantee means you have a month to decide whether it's right for you. Cardboard in the hallway is ugly. It's also your insurance policy.
Before You Start: What You Actually Need
Check the tool list on the first page of the manual. For most electric desk kits, the hex key in the hardware bag is the star of the show, and a screwdriver with a couple of common bits covers the rest. A level is worth having if you own one. A soft surface for the desktop is non-negotiable. Two people for the flip are strongly recommended. And time: plan for a good chunk of the afternoon, and don't schedule anything immediately after that needs your full attention.
A few setup notes before the first bolt turns. Don't assemble on carpet if you can avoid it; you want a firm, level surface so the frame goes together square, and a squishy floor makes that harder. If the desk will live in a room you have to carry it through, assemble it there. The parts are easy to move; a fully assembled desk is a heavy, awkward thing to navigate through doorways, and you will not enjoy discovering that at the end of the build.
Also worth doing now: check where the room's power comes from. The desk plugs into the wall, and so will your monitor, laptop, and everything else. Knowing where your outlets are before you mount the cable tray saves you from mounting it in the wrong spot and staring at a power strip on the floor. This is the kind of five-minute thought that saves a half hour later.
One more thing. If you've never assembled a standing desk before, this is normal: the first time feels slower than it should, and that's fine. Every step past the first is easier. By the time you're doing the chair, you'll feel like a professional. If your experience with tools begins and ends with a picture frame, you're still in good shape; this is a weekend project for regular people, not a job for the mechanically gifted.

Desk Assembly, Step by Step
The order that works: frame, desktop, cable tray, controller. Follow that sequence and you won't have to undo anything. Each step sets up the next.
Step 1: The frame. Lay the frame pieces out on the floor according to the manual. Attach the legs to the cross rails, and match the left and right orientation carefully; the legs aren't always interchangeable, and the manual's little arrows and labels exist because people skip them and pay for it later. The trick here is to snug the bolts without cranking them all the way down. You want the frame slightly adjustable until it's square, because a frame that goes together crooked is a desk that rocks later. Two small corrections now beat eight loosened bolts later.
Step 2: The desktop. Set the desktop upside down on your soft surface. Position the frame on the underside and line up the pilot holes. Start every screw before you tighten any of them; once they're all started, go around in a pattern, opposite corners first, and tighten evenly so the frame seats flat. Then flip the desk upright with two people, keeping it level as it goes over. Set it down gently. This is the moment the project stops being parts and becomes a desk, and it's worth pausing for.
Step 3: The cable tray. Mount the tray underneath, on the side where your power will actually come from. Think about where your monitor, laptop, and lamp plug in, because the tray is where the power strip lives and where the cable mess gets hidden. Run the desk's own power cable and the controller cable first, along the underside and out the back, before you start loading the tray with your own wiring. Cables you route before the tray is loaded are cables you never have to fight.
Step 4: The controller. Mount the controller where you'll actually reach it. The front edge works for most people; if the desk backs against a wall and you'll be standing most of the day, the side might suit you better. Plug the cables before you mount it so you're not wrestling connectors in a tight space. Then run the first test: plug the desk in and move it all the way down and all the way up before anything sits on it. A bare desktop is the best time to notice a problem, and a controller cable is a lot easier to fix when it's not hiding behind a monitor and a laptop.
How Long Does It Really Take?
Honest answer: give yourself a relaxed couple of hours for the desk the first time, and you'll probably finish early. It depends on how carefully you read the manual, how organized your workspace is, and whether you have a second person for the flip. The chair takes a fraction of that time. If you're methodical, you'll be faster than you think. If you're the dive-in-and-figure-it-out type, budget more time and fewer surprises.
Two people don't make assembly twice as fast. They make the two heavy moments dramatically less stressful, and they're a second set of eyes on the manual when you're not sure whether a piece goes in this way or that way. But the whole project is very doable solo, with patience. Nobody's timing you, and there's no award for finishing before lunch.
Don't rush. Rushing is how bolts get cross-threaded and brackets end up backwards, and those mistakes don't announce themselves on day one. They show up weeks later as a wobble, a squeak, or a desk that never quite sits right. The desk is going to live under your elbows for years. Slow is smooth, and smooth is fast.
Chair Assembly: Wheels First, Back Last
The chair is the easy half of the afternoon, and it follows a simple order: base, gas lift, backrest, headrest. Do it in that order and the whole thing clicks together.

The base. The star-shaped base goes on the floor first. The casters press into the ends of the legs, sometimes with a satisfying click and sometimes with a stubborn fight. If one resists, check that you're pressing straight in rather than at an angle, and don't be shy about using your weight. The base is the foundation of the whole chair, so take the thirty seconds to make sure every caster is fully seated; a caster that's half-in will wobble forever.
The gas lift. The cylinder goes into the center of the base. This is the step people overthink. If it doesn't seat with a firm push, don't wrestle it; set the base on the floor, drop the cylinder in, then lower the seat assembly onto it and let your weight seat it. Gravity is the tool here, and it's a very patient one.
The backrest. Attach the backrest to the seat frame with the bolts from the hardware bag. Start every bolt before you tighten any of them, then tighten in a pattern so the backrest seats evenly against the frame. Snug is right; you're not building a battleship, and over-tightening is how threads strip. If it feels tight, it is tight.
The headrest. The headrest goes on last, and it's the one piece you'll adjust once you're sitting in the chair, so just get it mounted and move on. The fine-tuning comes in the next section.
One note on the L2 specifically: it's the part of the afternoon people expect to be fussy, and it isn't. The whole chair is a straightforward project, and it's the payoff at the end of the build. When it's together, sit in it, roll around, test the height adjustment. If anything feels off, it's almost always a bolt that needs a snug, not a problem with the chair itself.
First-Day Calibration: Make It Fit You
The desk and the chair are assembled. Now you make them yours, and this step matters more than any bolt you tightened. A desk set to the wrong height is just furniture; a desk set to your height is equipment.
Your sit height. Sit at the desk with your feet flat on the floor. Raise the desk until your elbows rest at about a 90-degree angle, forearms parallel to the ground. That's your typing height, and it's the height that keeps your shoulders from hunching and your wrists from bending up or down. It will feel different from your old desk, and that's the point.
Your stand height. Stand up and raise the desk again until the same rule works standing: elbows at about 90 degrees, forearms parallel, shoulders relaxed, no reaching up and no slouching down. This is your standing height, and it will be higher than you guess. Most people set it too low the first time, because the eye wants to match it to the old sitting desk. Trust the elbow rule instead.
Save both. The 40×24 electric standing desk has memory presets. Save your sitting height as one preset and your standing height as another, and from now on, switching between work modes is a single button press. You never re-find your height, you never hover over the controls, and you never talk yourself out of standing because it feels like a project. This is the feature that turns a desk into a routine, and it's worth setting up properly on day one.
Then the chair. Set the seat height so your feet stay flat and your knees sit at roughly 90 degrees. Set the seat depth so there's a comfortable gap between the back of your knees and the edge of the seat; two finger widths is the old rule of thumb, and it's still a good one. Settle the lumbar support into the small of your back. If there's a headrest, position it at the base of your skull, not the middle of your neck, where it will just push your head forward.
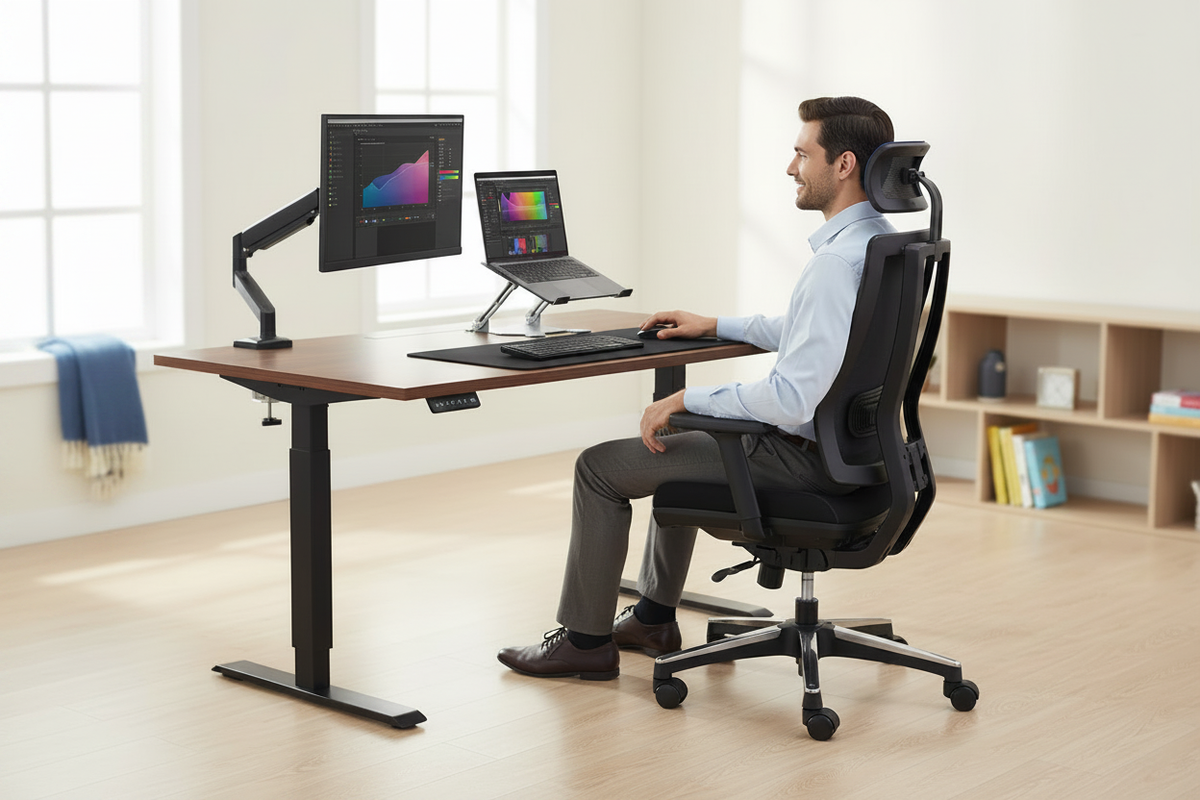
Then the screen. Your monitor should sit at roughly arm's length, with the top of the screen around eye level. A monitor that sits too low is the reason you hunch, and hunching is the reason your neck hurts by Thursday. If your laptop is your main screen, the simplest fix is a proper stand that brings it up to eye level like a real monitor; the Ergo Laptop Stand Elite Edition does exactly that, and it folds flat when you travel.
Then apply the ten-minute rule: use the setup for ten minutes and adjust again. Your first settings will be close but not perfect, and your body will tell you what's wrong faster than any guide can. Fine-tune over the first week. Day one isn't about perfect ergonomics; it's about getting close and then listening.
Troubleshooting: Wobble, Tilt, and the Cable Situation
Most setup problems have embarrassingly simple fixes, and they're the kind of thing you can solve in fifteen minutes with a hex key. Here are the ones that show up most.
Wobble at standing height. A little play at max height is normal physics. You've got a large desktop at a tall height, and it isn't bolted to the floor, so it will have some flex. If it rocks more than feels right, check the floor first. Is it level? If the desk rocks corner to corner, look for leveling feet under the legs and twist them until the desk sits flat. If it still rocks, the frame is the culprit: loosen the frame bolts, square the frame against the desktop, and retighten. This fixes more wobble than you'd believe, and it's the same fix support would walk you through.
Tilt. If one side of the desktop sits lower than the other, the usual cause is a leg that isn't at the same height as its partner, or a frame that's slightly racked. Same remedy: loosen, square, retighten. And check the leveling feet, since a single low corner reads as a tilt even when everything else is fine.
The cable situation. If you mounted the tray and routed cables first, this part is easy. The goal is simple: nothing dangles where your knees and feet live, and nothing pulls tight when the desk raises. Every cable that moves with the desk needs a little slack, and the tray should hold the power strip and the bulk of the wiring out of sight. Zip ties and velcro straps are cheap and worth every penny. The test is to raise and lower the desk once with all your gear plugged in and watch what moves; anything that strains is a cable that needs another inch of slack.
The 10-Minute Post-Install Checklist
You're assembled. Before you call it done, run through this list. It takes ten minutes, and it catches almost every problem you'd otherwise discover on a Tuesday morning at 9 a.m. with a deadline breathing down your neck.
- Raise the desk fully down and fully up once, watching that it travels smoothly and stays level.
- Save your sit and stand presets, then test both buttons.
- Check for wobble at sitting height, then at standing height.
- Sit in the chair and adjust seat height, seat depth, lumbar, and headrest.
- Roll the chair around your workspace. It should move freely in every direction.
- Give every bolt a final snug pass, but don't crank anything.
- Check the controller cable and the desk power cable for pinches.
- Route every cable through the tray and out the back, with slack.
- Sit down and confirm your monitor is at eye level and your keyboard at elbow height.
- Stand up and confirm nothing under the desk catches your knees.
Then put the boxes and foam somewhere out of the way but reachable. You have a 30-day window, and if the setup ever has to go back, you'll be glad you kept them. Nobody has ever regretted keeping the boxes for a month.
When to Call Support (and When Not To)
Some things are support issues. Some things are just assembly, and it genuinely helps to know the difference, because it decides whether your problem takes fifteen minutes or one message.
Call support when: a part is missing, a part arrived damaged, the controller doesn't respond after a full and careful setup, or the motor won't move the desk at all. Those are real problems, and they're exactly what support is for. You shouldn't have to fix a damaged frame or hunt for a missing bolt.
Don't call support yet when: the desk wobbles at max height (check the leveling feet and the frame bolts first), the chair squeaks (find the loose bolt and snug it), or the desk sits slightly off level (leveling feet again). These are the assembly fixes from above, and they take fifteen minutes and no special skill.
There's a practical benefit to doing the basics first. When you contact support with a real issue, you can tell them what you've already checked, and they can jump straight to making it right instead of walking you through the obvious stuff. And if something genuinely isn't right, you're covered: Rackora's returns are a 30-day money-back guarantee, so you have a month to live with the setup and decide whether it works for you.
Pro Tips From a Second Build
Nobody assembles a standing desk twice the same way. The first build is learning; the second is speed. You probably won't need a second build, but the habits that make builders fast are the same ones that keep the first build from becoming a saga. Here are the ones worth stealing.
Keep the manual open, physically. Place it at the step you're on, and close the pages you've finished. It sounds like a small thing, but it's the difference between a smooth build and the "wait, did I already do that?" loop that eats an hour.
Sort hardware by step. A muffin tin or a handful of small cups, one per step, is the classic move. Two minutes of sorting at the start saves ten minutes of hunting for every step after. If you have a magnet tray, use it for the steel bits; they have a talent for rolling exactly where you'll never find them.
Start every bolt before you tighten any. This is worth repeating, because it's the number one rookie mistake. A bolt that goes in cross-threaded is a bolt that stays cross-threaded, and cross-threading happens when you crank the first fastener while the rest are still out of alignment. Get them all started, then go around in a pattern.
Flip the desk like a page, not a deadlift. With two people, hands on opposite corners, keep it level as it goes over. Solo, lift one edge and walk your hands down as the desktop rotates; the weight transfers gradually instead of all at once. Either way, the soft surface underneath is not optional.
Photograph the underside before you load it. Once the frame and cables are on and the desktop is still bare, take a picture of the whole underside. Future you, trying to add a hub or swap a cable in month three, will be staring at a tangle and a mystery; that photo is the answer key. Every cable route looks obvious on day one and inexplicable by spring.
Remember the leveling feet exist. They're the answer to half of all "is my desk supposed to wobble?" questions, and they're easy to forget because they live at floor level, out of sight. When in doubt, twist them.
Snug beats cranked. Stripped threads are forever; snug bolts are just snug. The desk will never know the difference, and neither will you, except in the best way.
The real pro move is patience. The desk doesn't care whether you finish in an hour or three, and you'll live with this build for years. The extra twenty minutes you spend doing it carefully is the best investment in the whole project.
The First Week With Your New Setup
Assembly day is a honeymoon. Everything is new, the desk moves like it's showing off, and you catch yourself adjusting the height just to watch it work. The first week is when the setup actually becomes yours, and it follows a predictable arc.
Days two through four: the settle. Bolts settle, frames shift a fraction of a millimeter, and the desk quietly announces where it wants to be. This is the re-snug pass: one walk around with your hex key, snugging anything that loosened, checking the leveling feet now that the desk is carrying your real gear. Ten minutes, no drama, and it saves a month of mystery squeaks.
The presets get fine-tuned. Your sit height and stand height were set by the elbow rule on day one, which gets you close. The first week gets you exact: your sit height needs a nudge down, your stand height needs a nudge up, and the memory presets make each correction a ten-second change instead of a project. Don't expect to hit it perfectly on day one; expect to be dialed in by day five.
Your body adjusts too. Shoulders that were used to hunching, feet that weren't used to standing, eyes that were used to a monitor at the wrong height. The first couple of standing sessions feel deliberate; by Friday, you press the button without thinking, which is the whole point.
You'll notice what's missing. This is the week you discover whether your laptop needs a stand to meet eye level, or your monitor needs an arm to reclaim the desktop. The Ergo Laptop Stand Elite Edition is the answer to the first question, and the full-motion single monitor arm to the second. That's not a flaw in the plan; it's the setup growing up.
The window is real. The 30-day money-back guarantee exists for this exact week. Assemble, calibrate, live with it, and let the setup prove itself. If something's wrong, support makes it right. If it's genuinely not for you, the return window covers it, which is why you kept the boxes.
By the end of the first week, the boxes can go to the basement. The setup isn't new anymore. It's yours, it's calibrated, and it's exactly where it should be: under your elbows, doing its job.
FAQ
How long does standing desk assembly take? Give yourself a relaxed couple of hours for the desk the first time, with the manual open and no clock watching. Most people finish faster than they expect, and the unhurried pace is what prevents mistakes. The chair takes a fraction of that time.
Do I need tools? Check the manual's tool list before you start. For most of these kits, the hex key that ships in the hardware bag does the heavy lifting, and a screwdriver with a couple of common bits covers the rest. A level helps if you have one.
Is assembly hard to do alone? The chair is a solo project, no problem at all. The desk is doable alone, but the steps where you flip the assembled desktop upright are much easier with a second person. Recruit someone for twenty minutes and save yourself the drama.
How do I fix a wobbly desk? Check the floor and the leveling feet first, then check the frame. Loosen the frame bolts, square the frame, and retighten. Some flex at standing height is normal, but a desk that rocks corner to corner almost always has a simple fix.
Can I return it if something's wrong? Yes. Rackora's returns are a 30-day money-back guarantee. If a part is missing or damaged, contact support first and they'll make it right. If the setup just isn't for you, the same window covers that.
Should I loosen and retighten the bolts? If the desk rocks, yes. Loosen the frame bolts, square everything up, and retighten. It's also worth a quick re-snug pass after a couple of days of use, once everything has settled.
What height should I preset? Preset your sitting height with your elbows at about 90 degrees and your feet flat, and your standing height with the same elbow rule while standing. Save both, fine-tune them over the first week, and the desk does the rest.
What if a part is missing? Check the box and the foam first, because small parts love to hide in packing corners. If it's genuinely missing, contact support and they'll send it out. The 30-day money-back guarantee means you're not stuck either way.
You bought the desk and the chair because you wanted a better workday, and the assembly is a one-time toll to get there: a few hours, a clean floor, a handful of bolts. After that, the 40×24 electric standing desk with memory presets, $599.99 for Labor Day weekend (regularly $879.99), stands in your workspace at your exact heights, and the L2 Ergonomic Office Chair, $389.00 (regularly $449.00, and 4.9 stars across 418 reviews), rolls up underneath it. Set it up this weekend, and by Monday it's not a new setup anymore. It's just your setup.
Rackora ships free across the US, and every order is covered by the 30-day money-back guarantee, so the only thing you're risking this weekend is an afternoon. Start with the desk and the chair, then round it out: the Ergo Laptop Stand Elite Edition ($79.99, regularly $129.99) brings your laptop up to eye level, and the full-motion single monitor arm ($139.99, regularly $169.00) does the same for your monitor while giving you your desktop back. Assemble once, calibrate once, and you're done. That's the whole project, and you just finished it.
