Want to highlight art in your space with serious impact? LED strips instantly upgrade any décor, making your favorite pieces pop while adding a modern touch. You get gallery-worthy results right at home, and you don’t need special skills—just a bit of curiosity and a love for diy projects. LED strip lights use about 80% less energy than traditional bulbs, so you enjoy energy-efficient lighting that keeps your décor cool and your wallet happy. With endless options for color and placement, diy art lighting becomes a fun way to personalize your décor.
Key Takeaways
- LED strip lights make your art stand out with bright, even, and energy-efficient lighting that keeps your artwork safe from heat damage.
- Choose LED strips with a high Color Rendering Index (CRI 80 or above) to show your art’s true, vibrant colors and pick the right color temperature to match your art style.
- Select the right type of LED strip—like RGBW for color flexibility or high-density for bright, detailed lighting—to fit your display needs.
- Plan your lighting layout carefully by measuring your art and wall space, and use mounting channels or adhesive properly for a neat, professional look.
- Use dimmable and programmable LED strips to adjust brightness and color, creating the perfect mood and saving energy.
- Always prioritize quality and safety by choosing LED strips with proper certifications, matching power supplies, and ensuring good ventilation to avoid overheating.
- Layer your lighting with backlighting, accent lights, and downlights at the right angles to highlight textures and avoid glare for a stunning visual effect.
- Hide wires neatly using cable channels or clips to keep your art display clean and safe, and avoid common mistakes like wrong brightness or poor installation for the best results.
Why LED Strips
Art Illumination
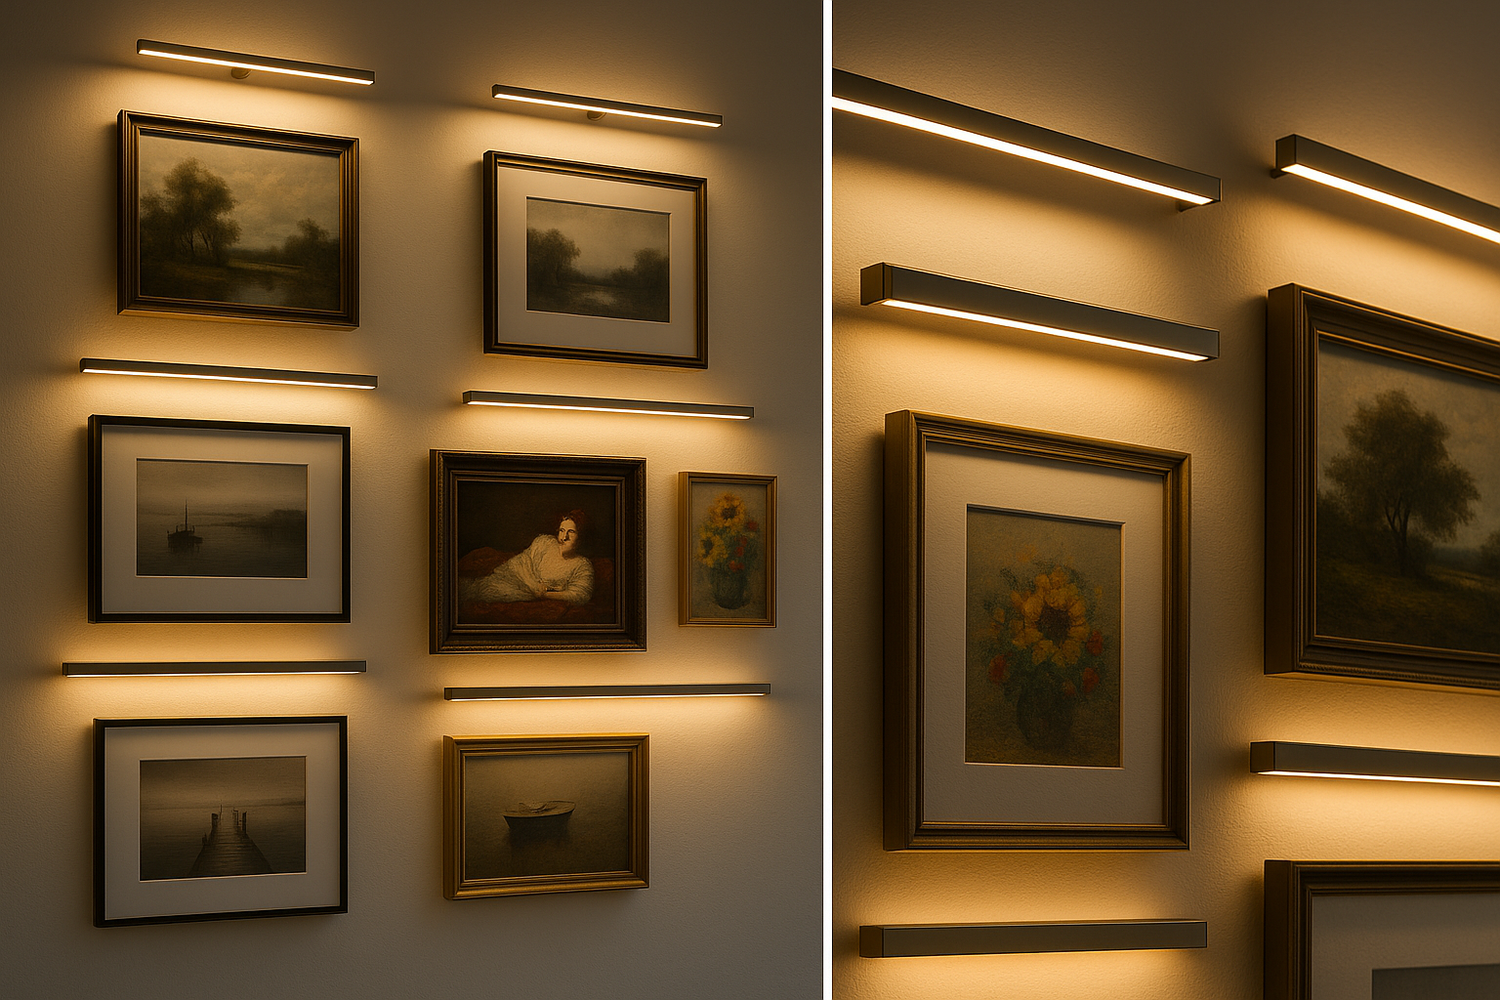
When you want your art to stand out, led strip lights give you the power to create a gallery vibe right at home. These lights deliver high brightness and even light distribution, so every detail in your artwork gets the attention it deserves. You can tuck led strips behind frames or along shelves, and they’ll cast a smooth, shadow-free glow that makes colors pop. Unlike old-school bulbs, led strip lights stay cool and emit almost no heat, so your favorite pieces stay safe from damage. Their slim, flexible design means you can fit them into tight spots or curve them around unique shapes, making them perfect for gallery and display areas.
Tip: Use led strip lights with a high Color Rendering Index (CRI) of 80 or above. This ensures your art looks vibrant and true to life, just like it would in a professional gallery.
Lighting Benefits
You get more than just good looks with led strip lights. Here’s why they’re a top pick for art lovers:
- Even, consistent light that highlights every brushstroke and texture.
- Energy efficiency that keeps your electric bill low and your conscience clear.
- Long lifespan, so you won’t have to replace bulbs every few months.
- Minimal heat output, which protects delicate materials and colors.
- Easy installation—just peel, stick, and plug in.
- Customizable features like dimming and adjustable color temperature for the perfect mood.
- UV control to help preserve your artwork over time.
With led strips, you avoid the glare, heat, and uneven lighting that come with traditional bulbs. You also get more control over how your art looks, whether you want a soft glow or a dramatic spotlight.
Color Options
Choosing the right color temperature can make or break your art display. Led strip lights come in a wide range of color temperatures, from warm and cozy to crisp and daylight-bright. Lower temperatures (around 2700K-3000K) give you a warm, inviting light that’s great for classic paintings or cozy spaces. Mid-range options (4000K-4500K) offer a neutral white that works well in modern rooms. Higher temperatures (5000K-6500K) mimic daylight, which is perfect when you want to see every colour and detail in your art.
Here’s a quick look at common color temperatures for led strip lights:
|
Color Temperature (K) |
Description / Typical Use |
Example Product Lines |
|---|---|---|
|
1900K - 2700K |
Warm white, cozy, candlelight to incandescent; ideal for inviting atmospheres |
CENTRIC WARM™ (1900K-2700K), DynaWhite™ Dim-to-Warm 95 CRI |
|
2700K - 3000K |
Warm white, great for bedrooms, museums, art galleries |
CENTRIC HOME™ 95 CRI (2700K, 3000K) |
|
4000K |
Neutral white, midpoint between warm and cool; common in retail |
CENTRIC DAYLIGHT™ 95 CRI (4000K) |
|
5000K - 6500K |
Cool white to daylight, simulates natural daylight; used in film, photography |
ABSOLUTE SERIES™ (5000K, 6500K), FilmGrade™ (3200K-6500K) |
If you want your art to look its best, go for led strip lights with a high CRI (90+). This makes every colour in your artwork appear rich, vibrant, and true to the original. Some advanced led technologies, like Nichia Optisolis and SunLike, offer near-daylight spectra, so your art shines with natural brilliance.
Choosing LED Strips
Types of LED Strip Lights
You have a lot of choices when it comes to led strip lights for art. Each type brings something special to your display. Here’s a quick guide to help you pick the right one for your space:
- RGBW LED Strip Lights: These combine RGB colors with a dedicated white LED. You get both vibrant colours and pure white light. This makes them perfect for art displays where you want flexibility—sometimes you want a splash of color, other times you need crisp white to see every detail.
- Pixel RGB LED Strips: Each LED on these strips can show a different color at the same time. You can create dynamic, moving effects that turn your art into an interactive experience. These are great if you love creative lighting or want to make your display stand out.
- High-Density LED Strips: These pack more LEDs per foot, giving you intense brightness. Use them when you want your art to make a bold statement or need to highlight fine details.
- Low-Density LED Strips: These offer a softer, more ambient glow. They work well for subtle accent lighting or when you want to create a cozy atmosphere around your art.
- Color-Tunable LED Strips: You can adjust the color temperature from warm to cool. This lets you match the lighting to traditional or modern art styles, or even change the mood for different occasions.
- LED Strips with UV Filtering: These protect sensitive artworks from harmful ultraviolet rays, keeping your pieces safe over time.
Tip: Adjustable LED track lighting gives you control over direction and intensity. It’s a smart choice if you want to highlight specific pieces or change your display often.
Brightness & CRI
Getting the right brightness and color accuracy is key when you want your art to look its best. You don’t want your led strip lights to overpower your artwork, but you also don’t want them to fade into the background.
- Brightness: Look for led strips with enough lumens to light up your art without causing glare. High-density strips give you more brightness, which works well for large or detailed pieces. For smaller or softer displays, lower density strips create a gentle, inviting glow.
- CRI (Color Rendering Index): This number tells you how accurately the light shows colors. A CRI of 80 or above is good, but if you want your art to look truly vibrant and true to life, go for a CRI of 90 or higher. High CRI led strip lights make every colour in your artwork pop, so reds look rich, blues look deep, and whites stay crisp.
|
Feature |
What to Look For |
Why It Matters for Art |
|---|---|---|
|
Brightness |
300-800 lumens per meter |
Enough light to highlight details |
|
CRI |
80+ (90+ for best results) |
Accurate, vibrant colour rendering |
|
Color Temp |
Adjustable (2700K-6500K) |
Matches art style and room mood |
Note: Always check the specs before you buy. Not all led strips are created equal, and the right combination of brightness and CRI will make your art shine.
Dimmable & Programmable
You can take your art lighting to the next level with dimmable and programmable led strip lights. These features give you total control over how your art looks, day or night.
- Dimmable led strips let you adjust the brightness to suit your mood or the time of day. Want a soft glow for a cozy evening? Dim the lights. Need a bright, clear view for a party or gallery night? Turn them up.
- Programmable led strip lights allow you to change colors, set schedules, or create dynamic effects. You can use a remote, a wall switch, or even a smart app on your phone. This means you can set the perfect scene for any occasion, from a quiet night in to a dramatic art reveal.
- Some led strips offer "dim to warm" technology. As you lower the brightness, the light shifts to a warmer tone, just like candlelight. This creates a comfortable, inviting atmosphere that’s perfect for living spaces and art displays.
- Programmable features also help you save energy. You can set your lights to turn off automatically or adjust based on the time of day.
Pro Tip: Dimmable and programmable led strip lights give you creative freedom. Try different settings to see how your art changes with the light. You might discover a whole new side to your favorite pieces!
Quality & Safety
When you choose LED strip lights for your art, quality and safety should always come first. You want your lighting to last, look great, and keep your home safe. Not all LED strips are created equal, so it pays to know what to look for before you buy.
Start by checking the build quality. High-quality LED strips use better materials, which means they last longer and give you more consistent light. Look for strips with thick, flexible circuit boards and strong adhesive backing. Cheap strips often flicker, lose brightness, or even stop working after a few months. You don’t want your art display to fade or fail because of poor-quality lighting.
Safety is just as important as quality. LED strips run on electricity, so you need to make sure they meet strict safety standards. Reliable brands will list their certifications right on the packaging or in the product description. These certifications show that the strips have passed tests for electrical, mechanical, and thermal safety. They also prove that the lights are safe for your health and the environment.
Here’s a quick guide to the most important certifications and standards for LED strip lights used in art installations:
|
Certification / Standard |
Description |
Relevance to LED Strip Lights for Art Installations |
|---|---|---|
|
EN 60598 Series (especially EN 60598-2-14) |
European electrical safety standards for lighting equipment, including neon lamps; covers electrical, mechanical, and thermal safety |
Ensures basic safety and reliability of LED strips in installation and use |
|
IEC/EN 61347-2-11 |
Safety requirements for neon strip power supply equipment |
Guarantees safe operation of power supplies used with LED strips |
|
UL 8750 and UL 2108 |
North American safety standards for LED devices and low-voltage lighting systems |
Compliance needed for North American markets, ensuring device and system safety |
|
RoHS and REACH |
Environmental directives restricting hazardous substances and chemicals |
Ensures materials are safe and environmentally compliant |
|
ErP Directive (2009/125/EC) |
Energy efficiency and eco-design requirements for LED products |
Promotes energy-efficient lighting solutions |
|
EN 62471 |
Photobiological safety standard evaluating risks from light radiation (UV, blue light) |
Protects users from potential eye and skin damage due to light exposure |
|
EMC Testing (Conducted Emission, Radiated Emission, Immunity tests) |
Electromagnetic compatibility tests to reduce interference and ensure device stability |
Ensures LED strips do not cause or suffer from electromagnetic interference |
|
IP Protection Level (e.g., IP65, IP68) |
Tests for water and dust resistance |
Critical for durability and safety in various installation environments, especially outdoor or humid conditions |
Tip: Always check for UL, RoHS, and IP ratings when shopping for LED strips. These marks mean your lights are safe, eco-friendly, and built to last.
You also want to think about the power supply. Use only the recommended power adapters for your LED strips. Never overload your circuits or use cheap, untested adapters. A good power supply keeps your lights running smoothly and prevents overheating or electrical hazards.
If you plan to install LED strips in kitchens, bathrooms, or outdoor spaces, look for a high IP rating. IP65 or higher means your strips can handle splashes, dust, and even rain. This keeps your art lighting safe and reliable, no matter where you use it.
Downlights play a big role in art lighting, too. When you combine LED strips with downlights, you get layered illumination that brings out the best in your artwork. Downlights can focus attention on a single piece or create a soft wash of light across a gallery wall. For the best results, choose downlights that match the quality and safety standards of your LED strips. This approach works well for both modern and classic art displays.
You might see products labeled as "led downlights for art." These are designed to work with art installations and often come with high CRI, adjustable brightness, and safety certifications. By maximizing impact with led downlights, you can highlight textures, colors, and details that might otherwise go unnoticed.
Here are a few quick checks to keep your art lighting safe and stunning:
- Inspect all wiring and connectors before installation.
- Avoid bending LED strips sharply or cutting them in the wrong place.
- Keep power supplies and controllers away from moisture.
- Hide wires and adapters to prevent tripping or accidental damage.
- Test your setup before mounting everything permanently.
Note: Quality lighting not only protects your art but also makes your space feel more inviting. When you invest in safe, certified LED strips and downlights, you get peace of mind and a professional look.
Choosing the right LED strips and downlights means your art will shine for years. You get reliable performance, beautiful light, and a safer home. Take your time, check the details, and enjoy the creative process.
Lighting Design
Great lighting can turn your art into the star of any room. You have many options for placement, and each one brings out something special in your collection. Let’s break down the best ways to use LED strips and downlights for maximum impact.
Placement for Art
Backlighting
Backlighting creates a soft glow around your art. This effect makes your pieces look like they float off the wall. To get it right, keep your LED strips at least one inch away from the back wall. This space lets the light bounce and spread evenly. You avoid harsh shadows and get a smooth, even wash of light. Many people use aluminum channels or extrusions to hold the strips. These not only protect the LEDs but also diffuse the light for a softer look.
If you want to highlight multiple pieces, try using several strips at different heights. This adds depth and drama to your display. Backlighting works well for modern art, shadow boxes, and even photo frames. It’s a simple way to make your collection stand out.
Accent Lighting
Accent lighting puts the focus right where you want it. Place LED strips above or below your art at an angle. This method helps you avoid glare and harsh reflections. You can also use downlights to create a spotlighting effect. Downlights work well for spotlighting art pieces, especially when you want to draw attention to texture or color.
Try layering your lighting. Use both LED strips and downlights to create a gallery feel. Downlights can add a dramatic touch, while strips provide even coverage. If you want to change things up, use programmable strips to shift colors or brightness. This keeps your display fresh and exciting.
Measuring & Mapping
Before you start, grab a tape measure. Measure your art and the wall space around it. This step helps you plan where each strip and downlight will go. Mark the spots with painter’s tape or a pencil. Mapping out your lighting ensures you get even coverage and avoid dark spots.
Clean your mounting surfaces with isopropyl alcohol. This step helps the adhesive stick better. When you cut your LED strips, do it only at the marked points. This keeps the lights working and prevents damage. Use mounting clips for tricky spots or heavy strips.
If you want to create dramatic effects, try using multiple downlights at different angles. This technique adds layers and makes your art pop. For a softer look, use diffusers or frosted covers on your strips. These tools spread the light and reduce harshness.
Tip: Always test your setup before you stick everything down. Move your downlights and strips around until you find the perfect look. You can always adjust later for the best results.
LED Strip Lights Installation
Ready to make your art shine? Let’s walk through the installation process step by step. You’ll see how easy it is to get professional-looking results with just a little planning and the right tools.
Materials & Tools
Before you start, gather everything you need. Having the right materials and tools on hand makes the job smoother and helps you avoid last-minute trips to the store.
Here’s what you’ll want for a successful install:
- Quality led strip lights (choose the right brightness, CRI, and color temperature for your art)
- DC power supply that matches your led strip lights (usually 12V or 24V)
- Connectors (soldered or solderless) for linking strips and connecting to power
- Aluminum channels with diffuser covers (these help with mounting and give your setup a clean, finished look)
- Dimmers or controllers for adjusting brightness and color
- Double-sided adhesive backing (most led strip lights come with this, but you can add extra tape if needed)
- Soldering equipment (if you prefer soldered connections)
- Solderless connectors (for a no-solder, plug-and-play approach)
- Measuring tape and pencil for marking placement
Tip: Aluminum channels are great for mounting and diffusing light, but they don’t really help with heat management. Focus on aesthetics and even light distribution.
Surface Prep
A little prep work goes a long way. If you want your led strip lights to stay put and look great, you need to get the surface ready first.
- Clean the area where you’ll attach the strips. Use a sponge or paper towel with a bit of isopropyl alcohol or acetone. This removes dirt, grease, and anything else that might mess with the adhesive.
- Test your cleaning solution on a hidden spot. You don’t want to damage your paint or finish.
- Make sure the surface is completely dry before you move on.
- Plan your layout. Measure your art and the wall or frame. Mark where you want the led strip lights to go using a pencil or painter’s tape.
- If you’re using adhesive, make sure it’s designed for led strip lights. This helps your lights stay up for the long haul.
Note: For tricky surfaces or extra security, you can use mounting brackets or specialized prep products to boost adhesion.
Attaching Strips
Now comes the fun part—putting your led strip lights in place. You have a couple of options, depending on your setup and the look you want.
Adhesive Tips
Most led strip lights come with a sticky backing. It’s quick and easy, but you’ll get the best results if you follow these tips:
- Peel off a small section of the adhesive liner at a time. This keeps things neat and helps you avoid mistakes.
- Press the strip firmly along the marked path. Work slowly to keep the strip straight and avoid bubbles.
- For extra hold, add double-sided tape or a mounting adhesive, especially if the built-in adhesive feels weak.
- In humid or high-traffic areas, consider using mounting glue designed for plastic or metal. Hold the strip in place for a few minutes to let the glue set.
- Give adhesives up to 24 hours to fully cure before you turn on the lights or move your art.
Pro Tip: Always clean and degrease the surface before sticking anything down. This simple step makes a huge difference in how well your led strip lights stay put.
Mounting Channels
If you want a polished, gallery-style look, try using aluminum mounting channels with diffuser covers. These not only make your led strip lights look sleek but also help spread the light evenly.
- Cut the channel to the right length using a hacksaw or snips.
- Attach the channel to your wall or frame with screws, mounting clips, or strong adhesive.
- Snap the led strip lights into the channel. Make sure they sit flat for the best effect.
- Add the diffuser cover to soften the light and hide the LEDs.
- For extra stability, use mounting clips or brackets, especially in areas with lots of humidity or temperature changes.
Tip: Protect the ends of your led strip lights with silicone caps or plugs if you’re installing them in damp spaces. This keeps moisture out and extends the life of your lights.
With these steps, you’ll have a secure, professional-looking installation that makes your art the star of the show.
Power & Controls
Getting the power and controls right is key to making your art lighting both safe and easy to use. You want your LED strips to shine bright without any flicker or risk. Let’s break down what you need to know.
First, check the voltage of your LED strips. Most art lighting strips use either 12V or 24V DC. Always match your power supply voltage to your LED strip. If you use a 12V strip, pick a 12V power supply. The same goes for 24V strips.
Next, figure out how much power your setup needs. Here’s a simple way to do it:
- Find out how many watts each foot of your LED strip uses.
- Multiply that number by the total length of your strips.
- Add 25% to your total. This extra bit covers power surges and keeps your system running smoothly.
For example, if your strip uses 4 watts per foot and you have 10 feet, that’s 40 watts. Add 25%, and you’ll want a power supply that can handle at least 50 watts. It’s smart to run your system at about 80% of the power supply’s max output. This helps your equipment last longer and keeps things safe.
You have a few power supply options:
- Plug-in adapters: Great for small projects or temporary displays.
- Hardwired power supplies: Best for permanent installations and larger art walls.
- Battery-powered or rechargeable packs: Perfect for art that moves or when you want a clean, wire-free look.
- CCTV power supply boxes: Handy if you’re lighting multiple pieces and want each one on its own fuse.
Tip: Always plan where you’ll put your power supply and controllers. Keep them in a spot with good airflow and easy access.
Controls make your lighting flexible and fun. You can use:
- Dimmers: Adjust brightness for the perfect mood.
- Remote controls: Change colors or turn lights on and off from across the room.
- Smartphone apps: Set schedules, create scenes, or sync lights with music.
- Wall switches or timers: Keep things simple and hands-free.
If you want to get creative, try programmable controllers. These let you set up color-changing effects, fades, or even light shows. You can make your art wall come alive with just a few taps.
Note: Always use controllers and dimmers that match your LED strip’s voltage and type. This keeps your system working smoothly and avoids damage.
Safety Check
You’ve installed your LED strips and set up the power. Now it’s time for a quick safety check. This step protects your art, your home, and your peace of mind.
Follow these steps before you call your project done:
- Use a power supply with built-in fuses. This helps prevent electrical hazards if something goes wrong.
- Check that your LED strips are not in tight, closed spaces. Good airflow keeps them cool and safe.
- Make sure the total amps your strips draw do not go over your power supply’s rating. Overloading can cause overheating or even failure.
- Turn on your lights and watch for heat. If the strips get hot fast, turn them off and double-check your setup.
- If you’re lighting several pieces, consider a power supply box with multiple outputs and fuses. This way, each strip has its own protection.
- Remember, most heat comes from the power supply, not the strips. Place your power supply where it can breathe.
Safety Tip: Never hide power supplies in sealed boxes or behind heavy furniture. Always leave space for air to move around.
If you spot any flickering, buzzing, or overheating, unplug everything and check your wiring. Sometimes a loose connection or the wrong power supply can cause problems. Fix these issues before you enjoy your new art lighting.
A quick safety check now saves you headaches later. You get a beautiful, reliable display that you can trust for years to come.
Adjusting Lighting
Brightness Control
You have the power to shape the mood of your art display just by adjusting the brightness. Sometimes, you want your artwork to stand out boldly. Other times, a softer glow feels right. Modern led strip lights make this easy. You can use dimmers or remote controls to set the perfect intensity for any piece. Adjustable lighting fixtures let you control not just the brightness, but also the direction and angle of the light. This means you can highlight fine details or create a gentle wash across your collection.
- Dimming systems let you create different scenes for different types of artwork.
- Directional lighting helps you focus on specific areas, reducing glare and reflections.
- Using led track lighting or small bulbs gives you even more control over how each piece looks.
Tip: Try different brightness levels at various times of day. You might notice your art changes with the light, revealing new textures and colors.
Color Temperature
Color temperature has a huge impact on how your art feels and looks. The warmth or coolness of the light can change the mood of your entire space. Warm lighting (around 2700K) works well for traditional art, making reds and yellows pop. Cool lighting (around 4000K) suits modern pieces, bringing out blues and greens. Neutral tones, like 3000K, often strike the best balance for most collections.
If you use tunable led strips, you can adjust both brightness and color temperature at the same time. This flexibility lets you match the lighting to each artwork and the room’s ambiance. Consistency matters, too. Mixing different color temperatures can make your display look chaotic. Stick with one tone or use tunable systems to keep everything balanced.
- Warm light can soften cool colors, making them appear muted.
- Cool light can wash out warm tones, reducing their vibrancy.
- Neutral light helps all colors look accurate and natural.
Note: Fine-tuning your lighting setup, including beam angles and dimmer levels, helps avoid hotspots and ensures your art always looks its best.
Smart Features
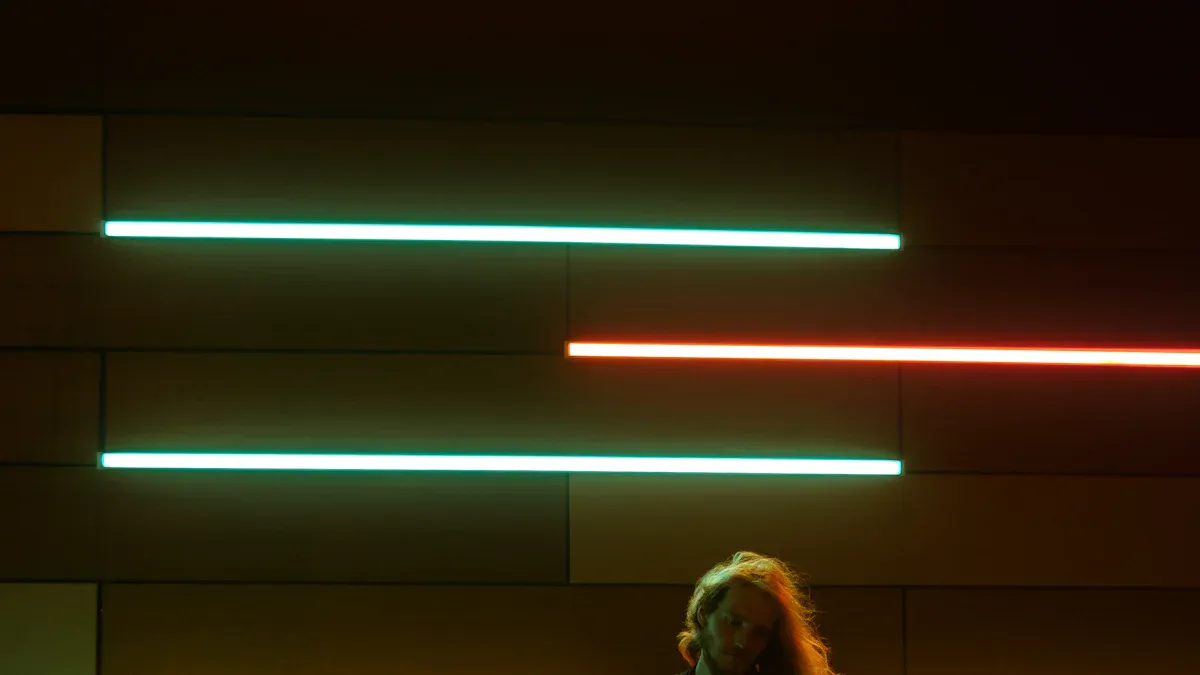
Smart features take your art lighting to the next level. Many modern led strip systems come with app-based controls, so you can change settings from your phone. You can set up scenes, adjust color, or even schedule your lights to turn on and off automatically. Some systems offer RGB or RGBW options, letting you play with color-changing effects for special occasions.
- Digital pixel strips let you control each segment for dynamic effects.
- Dim-to-warm technology mimics the cozy feel of old-school bulbs.
- Smart home integration means you can use voice commands or sensors for hands-free control.
These features give you endless ways to personalize your display and create a real visual impact. You can easily switch from a calm, gallery-like atmosphere to a vibrant, party-ready look with just a tap.
Dynamic Effects
Dynamic effects can take your art display from ordinary to unforgettable. When you use LED strips with advanced controls, you unlock a whole new world of possibilities. You can create scenes that change with the time of day, highlight different textures, or even set your art in motion with color fades and light shows.
Layering your lighting is a great place to start. Try combining ambient, accent, and task lights. This approach adds depth and dimension to your space. You can use ambient light to set the overall mood, accent lights to draw attention to specific pieces, and task lighting for close-up viewing. When you layer these effects, your artwork stands out and feels more alive.
Tip: Use adjustable fixtures and dimmers to direct light exactly where you want it. This helps you highlight brush strokes, textures, and details from different angles.
Color tuning is another powerful tool. Many modern LED strips let you change the color temperature and brightness with just a tap on your phone or remote. You can make your art look warm and cozy or cool and modern, depending on your mood. This flexibility means you can always show your artwork in the best possible light.
Dynamic lighting effects also let you create movement and drama. Imagine a slow fade from warm to cool tones, or a gentle pulse that draws the eye to a certain part of your painting. Some systems even let you sync your lights with music or set up a light show for special occasions. These effects engage your guests and make your art the star of the room.
Here are a few ways to use dynamic effects for maximum impact:
- Set up a sunrise-to-sunset schedule that changes the lighting throughout the day.
- Use color-changing scenes for parties or themed events.
- Highlight different pieces at different times with programmable spotlights.
- Create a soft glow behind your art for a floating effect.
Dynamic lighting does more than just look cool. It helps you control the mood, emphasize details, and create a personal connection with your art. When you experiment with these effects, you turn your home into a gallery that always feels fresh and exciting.
Pro Tips to Highlight Art
Angles & Layering
Getting the right angle makes a huge difference when you highlight art. You want your led strips and downlights to show off every detail without creating harsh shadows or glare. Try these tips for the best results:
- Place your led strips or downlights at a 30-degree angle to the artwork. This angle works well for most pieces and helps prevent glare.
- For textured or oil paintings, drop the angle to about 25 degrees. This brings out the texture and brushstrokes without making the surface too shiny.
- If you have a large piece, bump the angle up to 35 degrees. This covers more of the surface and keeps the light even.
- For 3D art or sculptures, stick with a 30-degree angle but use multiple downlights from different sides. This highlights the shape and avoids deep shadows.
Layering light is another pro move. You don’t want just one type of lighting. Combine ambient, task, and accent lighting to create a dynamic display. Use led strips as accent lighting to make your art the focal point. Downlights add drama and help you control where the light falls. Accent lighting should be at least three times brighter than your ambient light. This contrast draws the eye right to your art.
Tip: Use dimmers and smart controls to adjust each layer. You can change the mood or highlight different pieces with just a tap.
Avoiding Glare
Glare can ruin the look of your art. You want your guests to see the colors and details, not reflections or bright spots. Here’s how you can keep glare under control:
- Pick led fixtures with adjustable color temperature. Warmer tones (under 3000K) create softer, less glaring light.
- Always use dimmers. Lowering the brightness helps you find the perfect balance for each piece.
- Add diffusers or frosted covers to your led strips and downlights. These spread the light and soften harsh edges.
- Position your lights so they don’t shine directly into anyone’s eyes. Aim them at the wall or ceiling if possible.
- Choose high-quality led strips with a high color rendering index (CRI). This gives you accurate colors without harsh glare.
- Avoid placing lights with high blue content near your art. Blue light can cause eye strain and make colors look off.
Note: Filters, covers, and smart controls all help you fine-tune your lighting and keep your art looking its best.
Hiding Wires
Nothing distracts from a beautiful art display like messy wires. You want your setup to look clean and professional. Here are some easy ways to hide those cables:
- Run wires along the top of drop ceilings or behind crown molding. Cable hider channels blend right in with your walls.
- Tuck cables under shelves or behind furniture. Use clips to keep them secure and out of sight.
- Try plastic moldings or wooden trays shaped to fit your space. Paint them to match your walls for a seamless look.
- Use cable hiders or concealers that match your décor. These keep wires neat and almost invisible.
- Hide power supplies in cabinets, closets, or behind furniture. Make sure there’s enough airflow to prevent overheating.
- For a permanent solution, build custom housings or use cove lighting to conceal both led strips and wires.
- Secure everything with wire nails or adhesive clips. This keeps your setup safe and tidy.
Pro Tip: Always avoid hiding wires near anything flammable. Safety comes first, even when you want a clean look.
Common Mistakes
When you set up LED strips to highlight your art, it’s easy to run into a few common pitfalls. Knowing what to watch out for helps you avoid frustration and get the best results. Here are the mistakes you’ll want to dodge—and how to fix them:
-
Choosing the Wrong Brightness
You might pick LED strips that are too bright or too dim. If the lights overpower your art, colors look washed out. If they’re too weak, details disappear. Always check the lumens rating. Aim for a brightness that makes your art pop without causing glare. -
Ignoring Color Temperature
The wrong color temperature can ruin the mood. Warm light (around 2700K) feels cozy, while cool light (5000K+) looks crisp and modern. Match the Kelvin value to your art style and room vibe. This small choice changes everything. -
Overlooking Color Rendering Index (CRI)
Low CRI strips make colors look dull or off. High CRI (90+) strips show your art’s true colors. If you want reds, blues, and greens to look vibrant, always check the CRI before you buy. -
Not Checking Color Consistency
Some LED strips show uneven color along their length. This happens when manufacturers use loose quality controls. Look for strips with tight binning or low MacAdam Ellipse steps. You’ll get smooth, even lighting every time. -
Forgetting About LED Density
Low-density strips can create visible dots or stripes on your wall. High-density strips give you a smooth, continuous glow. If you want a professional look, go for more LEDs per foot. -
Mismatching Voltage and Power Supply
Using the wrong voltage can damage your lights or power supply. Always match the strip’s voltage (12V or 24V) to your power source. Double-check before you plug anything in. -
Skipping Power Calculations
If you don’t plan for enough wattage, your lights might flicker or fail. Add up the total watts your strips need, then choose a power supply that can handle at least 20% more. This keeps everything running safely. -
Improper Installation
Loose strips, poor ventilation, or reversed polarity can shorten the life of your setup. Secure your strips well, allow for airflow, and follow the wiring instructions. Take your time—rushing leads to mistakes. -
Neglecting Dimming and Controls
Without dimmers or smart controls, you lose flexibility. Dimmable strips let you set the perfect mood for any occasion. Invest in a good controller for easy adjustments. -
Ignoring Waterproofing
If you install LED strips in kitchens, bathrooms, or outdoors, you need the right IP rating. Waterproof strips (IP65 or higher) prevent damage from moisture. -
Buying Cheap, Low-Quality Strips
Poor-quality strips flicker, fade, or fail fast. Look for products with a solid warranty and good customer support. It’s worth spending a little more for reliability.
Tip: Take a few minutes to double-check your choices before you start. A little planning saves you time, money, and headaches down the road.
Creative Art Lighting Ideas
Back-Lit Wall Art
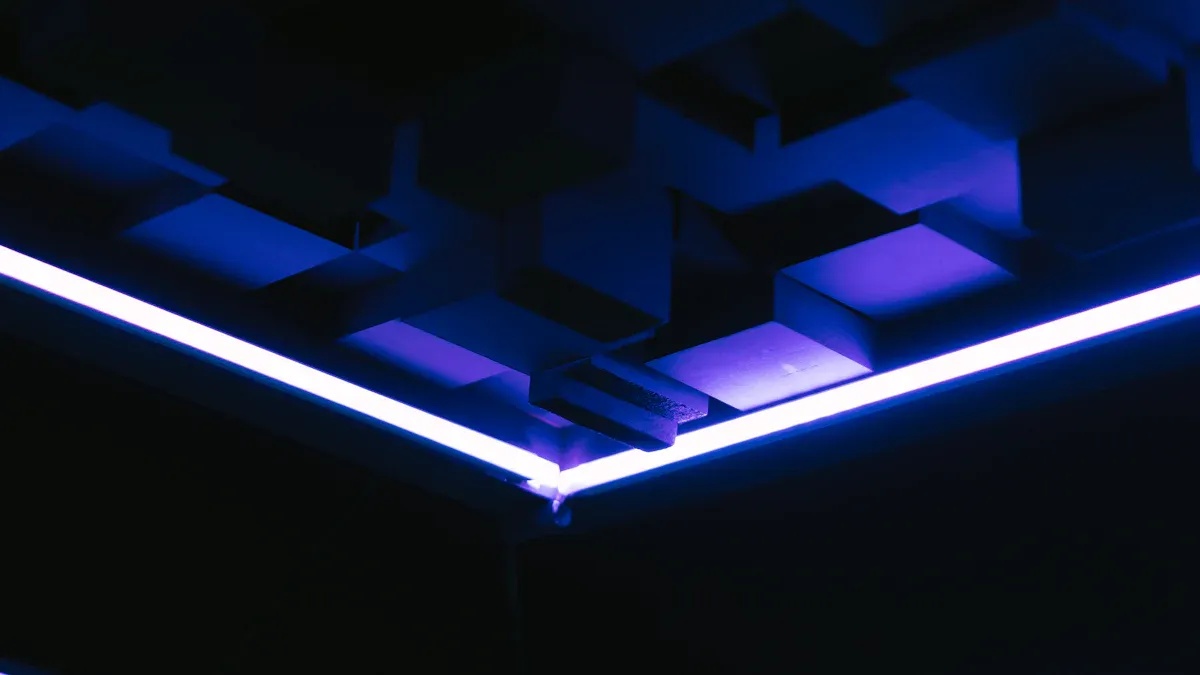
You can turn any room into a gallery with back-lit wall art. Flexible LED strips let you shape light into geometric patterns, initials, or even freestyle designs right on your wall. This approach blends technology with artistic expression and gives your décor a modern twist. Try outlining your favorite artwork or an illuminated picture frame with LED strips. This subtle glow creates a curated display that feels straight out of a museum.
Want to add more drama? Frame a mirror with LED strips to create a halo effect. This not only looks stunning but also adds function to your décor. You can even outline ceiling murals or recessed panels with LED strips. This trick adds depth and turns your ceiling into a design feature. If you love parties, sync your LED strips with music using sound-responsive controllers. The lights will pulse and change with the beat, making your space feel alive.
Tip: Use LED strips around home bars or drink shelves to complement your wall art and boost the room’s ambiance.
Interactive Art
Interactive art takes your décor to the next level. You can use LED strips to create installations that respond to touch, sound, or movement. Imagine a diy led light sculpture that changes color when someone walks by or claps their hands. This kind of project grabs attention and invites everyone to engage with your art.
If you want to build something big, break your project into stages. Start with the design, then source your parts, build, and test. You might need to work with electricians or tech experts for complex setups. Always make sure your wiring and equipment are safe for everyone. LED strips use less energy than traditional lighting, so your interactive art stays eco-friendly.
Note: Get permission if you plan to install your led light art in public spaces or galleries. Safety and legal checks keep your creative diy ideas on track.
Home Decor Integration
LED strips fit right into your everyday décor. You can highlight shelves, outline furniture, or add a soft glow under cabinets. Try a led light sculpture hanging above your dining table for a modern centerpiece. If you love diy projects, integrate LED strips with smart home electronics. Set up timers, motion sensors, or voice controls for a personalized touch.
Here are a few ways to blend LED strips into your décor:
- Accent your headboard for a cozy bedroom vibe.
- Add a glow behind your TV for movie nights.
- Light up staircases or hallways for safety and style.
- Use color-changing strips to match your mood or the season.
You don’t need to be a pro to get started. With a little creativity and some basic tools, you can transform your space and make your art the star of your home.
You’ve seen how LED strips can transform your décor and make your art shine. With just a few simple steps, you can create gallery-quality displays that fit your style. Here’s why LED strips work so well for art and décor:
- They save energy and last longer, so you spend less time on maintenance.
- You get flexible design options to match any décor or mood.
- Colors look brighter and more accurate, making your art pop.
- Lower heat keeps your décor and artwork safe.
Don’t be afraid to experiment. Try new placements, play with color, and make your décor truly yours. Start today and watch your space come alive!
FAQ
How do I choose the right LED strip for my artwork?
Look for high CRI (90+), adjustable brightness, and the right color temperature. Match the strip’s features to your art style. Always check the product specs before you buy.
Can I install LED strips without professional help?
Yes! Most LED strips use peel-and-stick backing. You can follow simple instructions and use basic tools. If you want a complex setup, ask for help or watch a tutorial.
Will LED strips damage my art over time?
No, LED strips stay cool and emit little UV. Your art stays safe. For extra protection, pick strips with UV filtering and avoid direct contact with delicate surfaces.
How do I hide wires for a clean look?
You can use cable channels, hide wires behind frames, or tuck them under furniture. Adhesive clips and cable concealers work well. Plan your layout before you start.
Can I control LED strips with my phone?
Absolutely! Many modern LED strips come with smart controls. Download the app, connect your lights, and adjust brightness, color, or effects right from your phone.
What if my LED strips flicker or don’t turn on?
Check your power supply and connections. Make sure you matched the voltage. If you see flickering, try a different dimmer or controller. Replace any damaged parts.
Are LED strips safe for use in bathrooms or outdoors?
Yes, if you choose waterproof LED strips with a high IP rating (like IP65 or higher). Always keep power supplies dry and follow safety instructions.
How do I avoid glare on my artwork?
Aim your lights at a 30-degree angle. Use diffusers or frosted covers. Lower the brightness if needed. Test different positions until you find the best look.