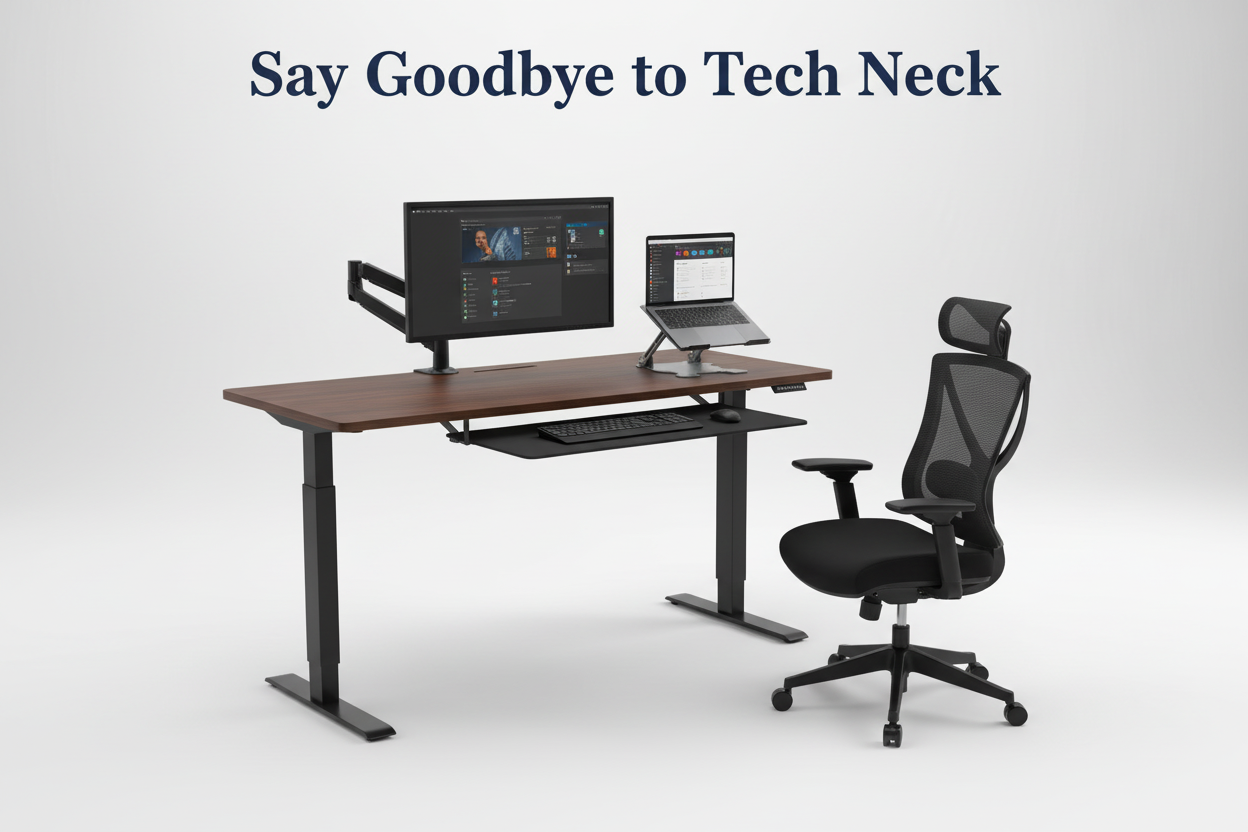
Kennst du dieses nagende Ziehen am Hinterkopf? Das, das so gegen 14 Uhr anfängt und erst aufhört, wenn du endlich deinen Laptop zuklappst? Das ist der sogenannte „Tech-Nacken“ – und wenn du das hier liest, hast du ihn wahrscheinlich schon mal gespürt.
Folgendes ist wichtig: Sie brauchen weder eine komplette Büroumgestaltung noch einen 2.000-Euro-Ergonomiestuhl, um das Problem zu beheben. Die meisten Nackenschmerzen durch Büroarbeit lassen sich auf fünf einfache Haltungsfehler zurückführen. Korrigieren Sie diese, und Sie werden den Unterschied schon nach wenigen Tagen bemerken.
Dieser Leitfaden erklärt Ihnen genau, welche Anpassungen wichtig sind, warum sie funktionieren und wie Sie sie umsetzen können, ohne Ihren Nachmittag mit dem Umstellen von Möbeln zu verbringen.
Was ist ein „Handy-Nacken“ und warum schmerzt er so sehr?
Der sogenannte „Handy-Nacken“ ist nicht nur ein griffiger Begriff – es handelt sich um eine ernstzunehmende Erkrankung, die Physiotherapeuten häufig sehen. Wenn man den Kopf nach vorne neigt, um auf einen Bildschirm zu schauen, müssen die Nackenmuskeln übermäßig arbeiten, um das Gewicht des Schädels zu stützen.
Ihr Kopf wiegt in neutraler Position etwa 4,5 bis 5,5 Kilogramm. Neigt man ihn um 15 Grad nach vorn, erhöht sich die effektive Belastung des Nackens auf 12 Kilogramm. Bei 30 Grad (dem typischen Betrachtungswinkel beim Laptop) sind es 18 Kilogramm. Bei 60 Grad – etwa wenn man über sein Handy gebeugt ist – lastet ein Druck von 27 Kilogramm auf dem Nacken.

Das ist, als würde man ein 8-jähriges Kind auf den Schultern tragen. Den ganzen Tag. Jeden Tag.
Die Folge? Muskelverspannungen, Spannungskopfschmerzen, eingeschränkte Beweglichkeit und chronische Schmerzen, die vom Nacken in die Schultern und den oberen Rücken ausstrahlen. Unbehandelt kann dies zu langfristigen Haltungsproblemen und sogar Nervenkompressionen führen.
Die gute Nachricht: Die meisten Fälle von Tech-Nacken sind durch die richtige Schreibtischergonomie vollständig heilbar.
Die Ursache: Ihr Bildschirm befindet sich am falschen Ort
Bevor wir uns mit Lösungsansätzen befassen, sollten wir das Problem identifizieren. Gehen Sie jetzt zu Ihrem Schreibtisch und setzen Sie sich wie gewohnt hin. Wohin schauen Sie?
Lautet Ihre Antwort „unten“, haben Sie den Übeltäter gefunden.
Die meisten Leute positionieren ihre Bildschirme zu niedrig. Laptops sind da besonders problematisch – Tastatur und Bildschirm sind fest verbunden, sodass man sich zwischen bequemen Händen und bequemen Augen entscheiden muss. Beides geht nicht.
Desktop-Monitore sind kaum besser, wenn sie direkt auf dem Schreibtisch stehen. In der Standardposition befindet sich die Oberkante des Bildschirms auf oder unter Augenhöhe, was bedeutet, dass man den Kopf stundenlang nach unten neigt.
Die Lösung ist nicht kompliziert, erfordert aber einige gezielte Anpassungen. Schauen wir uns diese genauer an.
Anpassung Nr. 1: Stellen Sie Ihren Monitor auf Augenhöhe.
Dies ist die mit Abstand wichtigste Änderung, die Sie vornehmen können. Ihr Monitor sollte so positioniert sein, dass sich das obere Drittel des Bildschirms auf Augenhöhe oder etwas darunter befindet, wenn Sie aufrecht sitzen.
Warum das obere Drittel? Weil Ihr natürlicher Blickwinkel leicht nach unten gerichtet ist – etwa 10–20 Grad. So können Sie den Bildschirm bequem betrachten, ohne den Kopf nach vorne oder hinten zu neigen.
So geht's
Wer einen Laptop benutzt, braucht einen Laptopständer. Punkt. Der eingebaute Bildschirm ist von allein nie hoch genug.
Der Rackora Ergo Laptopständer Elite Edition (79,99 €) wurde speziell für diesen Zweck entwickelt. Er hebt Ihren Laptop-Bildschirm auf die optimale Höhe und sorgt gleichzeitig für Stabilität – kein Wackeln beim Tippen. Dank des verstellbaren Designs ist er für Körpergrößen von 1,57 m bis 1,93 m geeignet.

Für Desktop-Monitore bietet ein Monitorarm volle Kontrolle über Höhe, Tiefe und Winkel. Der Full Motion Single Monitor Arm (139,99 €) ist für Bildschirme von 13 bis 32 Zoll geeignet und lässt sich dank Gasdruckfeder mühelos verstellen. Sie können die perfekte Position einstellen und diese im Laufe des Tages nach Bedarf anpassen.

Bei einem Dual-Monitor-Setup ermöglicht die Rackora Dual Monitor Desk Mount (99–139 US-Dollar) die Positionierung beider Bildschirme in der richtigen Höhe und im optimalen Winkel. Dies ist besonders praktisch, wenn Sie auf einem Bildschirm Dokumente einsehen, während Sie auf dem anderen arbeiten.
Der Schnelltest
Setzen Sie sich mit geschlossenen Augen an Ihren Schreibtisch. Öffnen Sie sie und achten Sie darauf, wohin Ihr Blick natürlich wandert. Dort sollte sich die Mitte Ihres Bildschirms befinden. Wenn Sie nach unten schauen müssen, stellen Sie den Monitor höher. Wenn Sie nach oben schauen müssen, stellen Sie ihn tiefer.
Anpassung Nr. 2: Positionieren Sie Ihren Bildschirm in Armlänge
Die Höhe ist wichtig, aber auch der Abstand. Ihr Monitor sollte etwa eine Armlänge entfernt stehen – ungefähr 50 bis 65 Zentimeter von Ihren Augen entfernt.
Ist man zu nah dran, beugt man sich nach vorn, rundet die Schultern und überstreckt den Hals. Ist man zu weit weg, kneift man die Augen zusammen und beugt sich trotzdem vor, was den Zweck verfehlt.
Warum Entfernung wichtig ist
Wenn der Bildschirm zu nah ist, müssen die Augen stärker arbeiten, um scharf zu sehen. Das führt zu Augenbelastung und dazu, dass man sich unbewusst nach vorne beugt, um besser sehen zu können. Diese Vorwärtsneigung bringt den Kopf aus der natürlichen Position zur Wirbelsäule und belastet die Nackenmuskulatur.
Die Armlängenregel funktioniert, weil sie der natürlichen Fokusdistanz der meisten Menschen entspricht. Man kann den Bildschirm klar und ohne Anstrengung sehen und sich somit entspannt zurücklehnen, mit dem Kopf in einer neutralen Position.
So passen Sie die Einstellungen an
Bei Verwendung eines Monitorarms ist das ganz einfach: Ziehen Sie den Monitor näher heran oder schieben Sie ihn weiter weg, bis der Abstand stimmt. Steht Ihr Monitor auf einem Standfuß, müssen Sie möglicherweise Tastatur und Maus nach vorne oder hinten verschieben, um den richtigen Abstand beizubehalten und gleichzeitig eine bequeme Armhaltung zu gewährleisten.
Auch für Laptop-Nutzer ist ein Ständer hilfreich. Sobald der Laptop erhöht steht, lässt er sich im richtigen Abstand positionieren, und die Verwendung einer externen Tastatur und Maus sorgt für eine korrekte Arm- und Handgelenkshaltung.
Anpassung Nr. 3: Umstieg auf einen Steh-Sitz-Schreibtisch (oder Einlegen von Stehintervallen)
Den ganzen Tag zu sitzen ist nicht nur schlecht für den Nacken – es ist für den ganzen Körper schädlich. Aber auch das ganze Stehen ist keine Lösung. Wichtig ist die Abwechslung.
Ein höhenverstellbarer Schreibtisch ermöglicht es Ihnen, im Laufe des Tages zwischen Sitzen und Stehen zu wechseln. Dies hält Ihre Muskulatur beansprucht, verbessert die Durchblutung und beugt statischer Belastung vor, die Nacken- und Rückenschmerzen verursachen kann.
Die Wissenschaft hinter Steh-Sitz-Schreibtischen
Langes Sitzen führt zu verkürzten Hüftbeugern und einer Entspannung der Rumpfmuskulatur. Dadurch wird das Becken nach vorn gezogen, was zu einer Rundung des unteren Rückens und einer nach vorn geneigten Kopfhaltung führt. Die Folge: der sogenannte „Handy-Nacken“.
Stehen verbessert Ihre Körperhaltung. Es aktiviert Ihre Rumpfmuskulatur, richtet Ihre Wirbelsäule auf und bringt Ihren Kopf wieder in die richtige Position. Schon kurze Stehphasen – 10 bis 15 Minuten pro Stunde – können einen deutlichen Unterschied machen.
Den richtigen Schreibtisch auswählen
Wenn Sie in einen Stehschreibtisch investieren möchten, ist der ergonomische, elektrisch höhenverstellbare Stehschreibtisch (40 x 24 Zoll , 599,99 $) eine gute Wahl. Er lässt sich per Knopfdruck stufenlos verstellen und bietet mit einer Breite von 40 Zoll ausreichend Platz für Monitor, Tastatur und einige wichtige Utensilien, ohne dass es eng wird.
Die elektrische Höhenverstellung ist entscheidend. Manuell verstellbare Schreibtische erfordern Kraftaufwand beim Anheben und Absenken, wodurch diese Funktion seltener genutzt wird. Bei einem elektrischen Schreibtisch dauert der Positionswechsel nur zwei Sekunden.
Wie man einen Stehtisch richtig benutzt
Nicht einfach da stehen bleiben. Hier ist das Vorgehen, das funktioniert:
- Beginnen Sie mit 10-15 Minuten Stehen pro Stunde.
- Steigern Sie die Dauer allmählich auf 20-30 Minuten, sobald sich Ihr Körper daran gewöhnt hat.
- Halten Sie Ihren Monitor sowohl im Sitzen als auch im Stehen auf Augenhöhe (hier spielt ein Monitorarm seine Stärken voll aus).
- Tragen Sie stützende Schuhe oder verwenden Sie eine Anti-Ermüdungsmatte.
- Die Knie nicht ganz durchdrücken – leicht beugen und das Gewicht regelmäßig verlagern.
Ziel ist es nicht, den ganzen Tag zu stehen. Vielmehr geht es darum, zwischen verschiedenen Positionen zu wechseln, damit der Körper nie zu lange in einer einzigen Haltung verharrt.
Einstellung Nr. 4: Stellen Sie Ihren Stuhl für eine optimale Lendenwirbelstütze ein.
Ihre Nackenschmerzen könnten tatsächlich im unteren Rückenbereich ihren Ursprung haben. Wenn Ihre Lendenwirbelsäule nicht ausreichend gestützt wird, kippt Ihr Becken nach hinten, Ihr oberer Rücken rundet sich und Ihr Kopf neigt sich nach vorn, um Ihre Augen auf den Bildschirm zu richten.
Eine korrekte Lendenwirbelstütze erhält die natürliche Krümmung Ihres unteren Rückens, wodurch Ihre Wirbelsäule aufrecht und Ihr Kopf in einer neutralen Position bleibt.
Worauf Sie bei einem Stuhl achten sollten
Ein guter ergonomischer Stuhl sollte folgende Eigenschaften aufweisen:
- Verstellbare Lendenwirbelstütze, die sich der Krümmung Ihres unteren Rückens anpasst
- Sitzhöhenverstellung, damit Ihre Füße flach auf dem Boden stehen.
- Sitztiefenverstellung, sodass zwischen Sitzkante und Kniekehle ein Abstand von 2-3 Zoll besteht.
- Verstellbare Armlehnen, die Ihre Schultern entspannen, während Ihre Ellbogen in einem 90-Grad-Winkel ruhen.
- Eine Liegefunktion, mit der Sie im Laufe des Tages Ihre Position verändern können.
Der ergonomische Bürostuhl mit Lendenwirbelstütze (459 €) erfüllt all diese Anforderungen. Die 3D-Armlehnen sind in Höhe, Breite und Winkel verstellbar, die Lendenwirbelstütze ist separat einstellbar und die Netzrückenlehne sorgt für angenehme Kühlung auch bei langen Arbeitssitzungen. Mit einer Belastbarkeit von bis zu 136 kg ist er besonders langlebig.

So stellen Sie Ihren Stuhl richtig ein
Hier die schrittweise Anleitung:
- Sitzhöhe: Stellen Sie den Sitz so ein, dass Ihre Füße flach auf dem Boden stehen und Ihre Oberschenkel parallel zum Boden verlaufen. Ihre Knie sollten einen 90-Grad-Winkel bilden.
- Sitztiefe: Schieben Sie die Sitzfläche nach vorne oder hinten, sodass zwischen der Sitzkante und der Rückseite Ihrer Knie 2-3 Zoll Platz sind.
- Lendenwirbelstütze: Passen Sie die Lendenwirbelstütze so an, dass sie sich optimal an die natürliche Krümmung Ihres unteren Rückens anpasst. Sie sollten sich gestützt und nicht nach vorne gedrückt fühlen.
- Armlehnen: Stellen Sie die Armlehnen so ein, dass Ihre Schultern entspannt sind und Ihre Ellbogen bequem in einem 90-Grad-Winkel ruhen. Ihre Handgelenke sollten beim Tippen gerade sein.
- Rückenlehnenwinkel: Eine leichte Neigung (100–110 Grad) entlastet Ihre Wirbelsäule. Sitzen Sie nicht kerzengerade – das ist tatsächlich ermüdender.
Sobald alles richtig eingestellt ist, sollten Sie sich entspannt zurücklehnen können, mit Kopf, Schultern und Hüfte in einer geraden Linie. Kein Zusammensacken, kein Vorbeugen, keine Nackenverspannungen.
Anpassung Nr. 5: Organisieren Sie Ihren Schreibtisch so, dass Dreh- und Streckbewegungen minimiert werden.
Selbst bei optimaler Monitorhöhe und einem guten Stuhl können Nackenschmerzen auftreten, wenn die Anordnung Ihres Schreibtisches Sie zu unbequemen Dreh-, Streck- oder Haltungsbewegungen zwingt.
Überdenken Sie Ihre Arbeitsabläufe. Wenn Sie ständig nach Ihrem Handy greifen, einen Notizblock holen oder sich drehen, um einen zweiten Monitor zu sehen, belasten Sie Ihren Nacken ungleichmäßig. Mit der Zeit entstehen dadurch muskuläre Dysbalancen und Triggerpunkte.
Die ergonomische Schreibtischgestaltung
So richten Sie Ihren Schreibtisch ein, um die Belastung zu minimieren:
- Hauptmonitor: Direkt vor Ihnen, oberes Drittel auf Augenhöhe, Armlänge entfernt
- Tastatur und Maus: So nah beieinander, dass Ihre Ellbogen einen 90-Grad-Winkel bilden und Ihre Handgelenke gerade bleiben.
- Telefon: In Reichweite, aber nicht so nah, dass man in Versuchung gerät, sich darüber zu beugen.
- Häufig verwendete Gegenstände: Innerhalb der „primären Zone“ – dem Bereich, den Sie erreichen können, ohne sich zu bücken oder zu drehen
- Zweitmonitor (falls zutreffend): Leicht zu Ihnen geneigt, auf gleicher Höhe wie Ihr Hauptmonitor.
Wenn Sie zwei Monitore gleich häufig nutzen, stellen Sie sie nebeneinander, sodass sich die Rahmen berühren, und setzen Sie sich mittig dazwischen. Wenn Sie einen Monitor häufiger nutzen als den anderen, platzieren Sie den Hauptmonitor direkt vor sich und den zweiten Monitor daneben.
Kabelmanagement ist wichtig
Verhedderte Kabel sehen nicht nur unordentlich aus, sie schränken auch die Möglichkeiten zur optimalen Positionierung ein. Wenn Sie Ihren Monitor aufgrund zu kurzer oder verhedderter Kabel nicht bewegen können, werden Sie sich auch nicht die Mühe machen, ergonomische Einstellungen vorzunehmen.
Verwenden Sie Kabelclips, Kabelkanäle oder eine Kabelwanne, um alles ordentlich zu verstauen. So können Sie Geräte bei Bedarf einfach umpositionieren und Ihr Schreibtisch bleibt aufgeräumt und funktional.
Bonus-Tipps: Kleine Veränderungen, die sich summieren
Neben den fünf Haupteinstellungen gibt es noch einige kleinere Anpassungen, die die Nackenverspannung reduzieren können:
Verwenden Sie einen Dokumentenhalter
Wenn Sie häufig gedruckte Dokumente verwenden, legen Sie diese nicht flach auf Ihren Schreibtisch. Dadurch werden Sie gezwungen, nach unten zu schauen, was den Zweck der Monitorerhöhung zunichtemacht. Verwenden Sie stattdessen eine Dokumentenhalterung, die die Dokumente auf gleicher Höhe und im gleichen Abstand wie Ihren Bildschirm positioniert.
Machen Sie Mikro-Pausen
Machen Sie alle 20–30 Minuten eine 20-sekündige Pause, schauen Sie vom Bildschirm weg und bewegen Sie Ihren Nacken in seinem vollen Bewegungsumfang. Einfache Nackenkreisen, Schulterzucken und Kinn-Einziehen können Verspannungen vorbeugen und Ihre Muskulatur locker halten.
Passen Sie Ihre Beleuchtung an
Ist Ihr Bildschirm im Vergleich zur Umgebungsbeleuchtung zu hell oder zu dunkel, müssen Sie die Augen zusammenkneifen und sich nach vorne beugen. Passen Sie die Bildschirmhelligkeit an Ihre Umgebung an und positionieren Sie Ihren Schreibtisch so, dass Spiegelungen durch Fenster oder Deckenleuchten vermieden werden.
Überprüfen Sie Ihre Brille
Wenn Sie Gleitsicht- oder Bifokalbrillen tragen, neigen Sie möglicherweise Ihren Kopf nach hinten, um durch den richtigen Bereich des Brillenglases zu sehen. Sprechen Sie mit Ihrem Optiker über Computerbrillen, die für den optimalen Abstand zum Bildschirm geeignet sind.
Wie lange dauert es, bis Sie sich besser fühlen?
Wenn Sie diese Anpassungen heute umsetzen, werden Sie wahrscheinlich schon nach wenigen Tagen eine Linderung verspüren. Ihre Muskeln brauchen Zeit, sich an die neue Haltung zu gewöhnen. Wundern Sie sich also nicht, wenn Sie sich anfangs etwas steif fühlen – das ist normal.
Innerhalb von zwei Wochen berichten die meisten Anwender von einer deutlichen Linderung ihrer Nackenschmerzen und Spannungskopfschmerzen. Nach einem Monat sollte sich die richtige Körperhaltung ganz natürlich anfühlen und Ihre Nackenschmerzen sollten weitgehend verschwunden sein.
Wenn Sie jedoch schon seit Monaten oder Jahren unter chronischen Nackenschmerzen leiden, kann die vollständige Genesung länger dauern. Ziehen Sie einen Physiotherapeuten in Betracht, der Ihre Haltung beurteilen und Ihnen gezielte Übungen zur Stärkung schwacher und zur Lockerung verspannter Muskeln zeigen kann.
Die wahren Kosten der Vernachlässigung des Tech-Nackens
Seien wir ehrlich: Ergonomische Verbesserungen aufzuschieben ist einfach. Man ist beschäftigt, die aktuelle Einrichtung „funktioniert“ und die Schmerzen sind noch nicht unerträglich.
Doch was passiert, wenn man das Problem nicht angeht?
- Chronischer Schmerz: Was mit gelegentlicher Steifheit beginnt, wird zu einem ständigen Unbehagen, das die Arbeit, den Schlaf und die täglichen Aktivitäten beeinträchtigt.
- Geringere Produktivität: Schmerzen lenken ab. Wenn der Nacken schmerzt, kann man sich nicht konzentrieren, und die Arbeit leidet.
- Langfristige Haltungsänderungen: Mit der Zeit wird eine schlechte Haltung strukturell. Die Muskulatur passt sich der nach vorne geneigten Kopfhaltung an, wodurch eine Korrektur erschwert wird.
- Medizinische Kosten: Physiotherapie, Besuche beim Chiropraktiker, Schmerzmittel und bildgebende Verfahren summieren sich schnell. Vorbeugung ist günstiger.
Wer jetzt in die richtige Ergonomie investiert, spart später Zeit, Geld und Schmerzen.
Ihr Aktionsplan: Starten Sie noch heute!
Sie müssen Ihren gesamten Arbeitsplatz nicht an einem Nachmittag umgestalten. Beginnen Sie mit der Anpassung, die für Sie den größten Unterschied macht:
- Wenn Sie einen Laptop benutzen, besorgen Sie sich einen Laptopständer und stellen Sie den Bildschirm auf Augenhöhe ein.
- Wenn Sie einen Desktop-Monitor besitzen, können Sie einen Monitorarm hinzufügen, um Höhe und Abstand präzise einzustellen.
- Wenn Sie den ganzen Tag sitzen, sollten Sie über einen höhenverstellbaren Schreibtisch nachdenken, um zwischendurch Stehpausen einzulegen.
- Wenn Ihr Stuhl Ihren unteren Rücken nicht ausreichend stützt, sollten Sie auf einen ergonomischen Stuhl mit ausreichender Lendenwirbelstütze umsteigen.
- Wenn Ihr Schreibtisch unordentlich ist, sollten Sie ihn neu organisieren, um Dreh- und Streckbewegungen zu minimieren.
Verändern Sie diese Woche etwas. Fügen Sie nächste Woche eine weitere Änderung hinzu. Kleine, stetige Verbesserungen summieren sich mit der Zeit.
Häufig gestellte Fragen
Woran erkenne ich, ob mein Monitor die richtige Höhe hat?
Setzen Sie sich mit geschlossenen Augen und neutraler Kopfhaltung an Ihren Schreibtisch. Öffnen Sie die Augen und achten Sie darauf, wohin Ihr Blick natürlich wandert. Die Bildschirmmitte sollte sich auf Höhe dieses Punktes oder etwas darunter befinden. Das obere Drittel des Bildschirms sollte sich auf Augenhöhe oder knapp darunter befinden.
Kann ich meinen Tech-Nacken behandeln, ohne neue Geräte kaufen zu müssen?
Sie können mit dem, was Sie bereits haben, einige Verbesserungen erzielen – stapeln Sie Bücher unter Ihren Monitor, um ihn höher zu stellen, passen Sie die Einstellungen Ihres Stuhls an und ordnen Sie Ihren Schreibtisch neu an. Speziell entwickelte ergonomische Geräte erleichtern es jedoch erheblich, die richtige Sitzposition zu erreichen und beizubehalten.
Wie oft sollte ich zwischen Sitzen und Stehen wechseln?
Beginnen Sie mit 10–15 Minuten Stehen pro Stunde und steigern Sie die Dauer allmählich auf 20–30 Minuten, sobald sich Ihr Körper daran gewöhnt hat. Wichtig ist die Abwechslung – sitzen oder stehen Sie nicht länger als eine Stunde am Stück.
Wird ein Stehtisch meine Nackenschmerzen heilen?
Ein Stehtisch fördert Bewegung und eine bessere Haltung, ist aber kein Allheilmittel. Sie müssen Ihren Monitor weiterhin richtig positionieren, auf eine korrekte Haltung achten und Pausen einlegen. Stehen mit schlechter Haltung ist genauso schädlich wie Sitzen mit schlechter Haltung.
Welcher Stuhl eignet sich am besten zur Vorbeugung von Nackenverspannungen durch Handynutzung?
Achten Sie auf einen Stuhl mit verstellbarer Lendenwirbelstütze, Sitzhöhe, Sitztiefe und Armlehnen. Der ergonomische Bürostuhl mit Lendenwirbelstütze ist eine solide Option, die alle wichtigen Kriterien erfüllt.
Wie weit sollte mein Monitor von meinen Augen entfernt sein?
Etwa eine Armlänge – ungefähr 50 bis 65 Zentimeter. In diesem Abstand können Sie den Bildschirm klar sehen, ohne sich nach vorne beugen oder Ihre Augen anstrengen zu müssen.
Sollte ich einen Laptopständer verwenden, wenn ich einen externen Monitor habe?
Wenn Sie einen externen Monitor als Hauptbildschirm verwenden, benötigen Sie nicht unbedingt einen Laptopständer. Nutzen Sie jedoch den Laptop-Bildschirm als zweiten Monitor, hilft ein Ständer dabei, ihn in der richtigen Höhe neben Ihrem Hauptbildschirm zu positionieren.
Kann ein durch Handynutzung verursachter Nacken Kopfschmerzen verursachen?
Ja. Verspannungen der Nackenmuskulatur können Kopfschmerzen verursachen, die in den Kopf ausstrahlen. Diese fühlen sich typischerweise wie ein enges Band um die Stirn oder Druck am Hinterkopf an.
Wie lange dauert es, einen Tech-Nacken zu heilen?
Die meisten Menschen bemerken innerhalb weniger Tage nach der Umsetzung ergonomischer Anpassungen eine Besserung. Eine deutliche Linderung tritt in der Regel innerhalb von zwei Wochen ein, und die vollständige Genesung kann je nach Dauer des Problems einen Monat oder länger dauern.
Benötige ich eine spezielle Tastatur und Maus?
Nicht unbedingt, aber wenn Sie neben Nackenschmerzen auch Schmerzen im Handgelenk oder Unterarm verspüren, können eine ergonomische Tastatur und Maus Abhilfe schaffen. Wichtig ist, die Handgelenke beim Tippen gerade und die Ellbogen im 90-Grad-Winkel zu halten.
Schlussbetrachtung
Ein durch das Smartphone verursachter Nacken ist nicht unvermeidlich. Er ist eine direkte Folge Ihrer Sitzhaltung am Schreibtisch, und das bedeutet, dass Sie ihn selbst in der Hand haben, um ihn zu beheben.
Die fünf in diesem Ratgeber beschriebenen Maßnahmen – Monitor höher stellen, richtigen Abstand einstellen, regelmäßig zwischen Sitzen und Stehen wechseln, den unteren Rücken stützen und den Schreibtisch organisieren – gehen den Hauptursachen von Nackenschmerzen auf den Grund. Setzen Sie sie um, und Sie werden den Unterschied spüren.
Ihr Nacken wird es Ihnen danken. Ihre Produktivität wird sich steigern. Und Sie werden sich fragen, warum Sie diese Änderungen nicht schon früher vorgenommen haben.
Fang noch heute an. Dein zukünftiges Ich wird es dir danken.
Haftungsausschluss: Dieser Inhalt dient ausschließlich Informationszwecken und stellt keine medizinische Beratung dar.