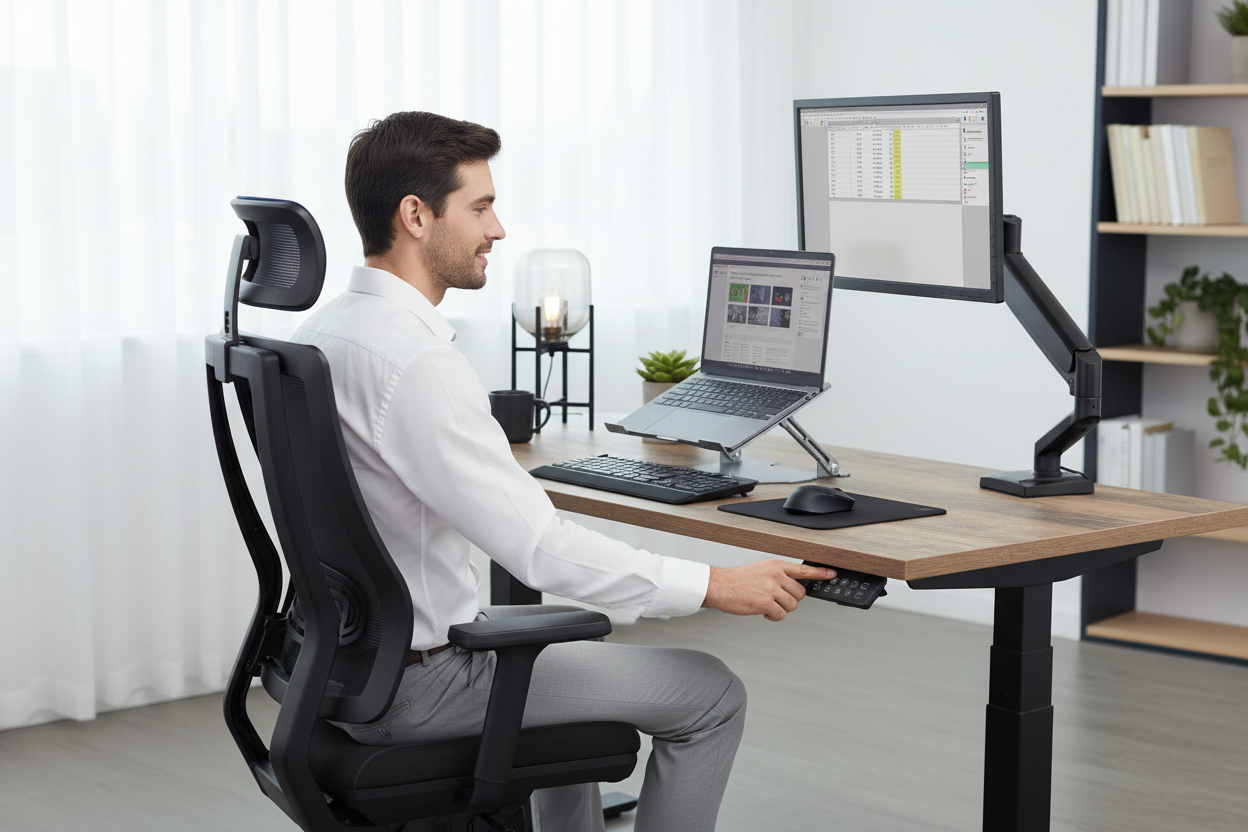
It starts the same way for everyone. You clear off the kitchen table, stack the mail on top of the microwave, and tell yourself this is temporary. Then three months go by, your neck files a formal complaint, and suddenly "temporary" is the most expensive word in your vocabulary.
So you do what any reasonable person does on a Saturday morning. You open a browser tab and search for home office setups. And there it is: the $3,000 standing desk, the $1,200 chair with a name you can't pronounce, monitor arms priced like small appliances. You close the tab. You go back to the kitchen table. The cycle repeats.
Here's the thing nobody in those glossy setup videos tells you: you don't need any of that. A serious, comfortable, genuinely ergonomic home office can be built at $500, at $1000, and at $1500. Not "starting at" prices. Not "as seen in the catalog" prices. Exact lists, exact totals, all of it added up in plain sight so you can check the math yourself. Every product in this guide is from Rackora, priced in US dollars, with no fine print surprises.
And every single build below follows one rule, which we'll get to in a second: chair first, desk second, extras last. That rule is worth more than any individual product on the lists. Here's the whole guide, in order.
The Build Order Rule: Chair First, Desk Second, Extras Last
There's a classic home office mistake, and you've probably watched someone make it. They buy a gorgeous desk, an industrial-strength monitor arm, a cable tray, a wrist rest, a headset stand shaped like a cat, and then they sit down in a chair they grabbed from the dining room. A week later their shoulders hurt. The desk wasn't the problem. The monitor arm wasn't the problem. The chair was, and it was the cheapest thing in the room.
The build order rule is simple: chair first, desk second, extras last.
Why the chair first? Because it's the piece of furniture with the most contact hours. You sit in it for your whole workday, every workday. The desk holds your stuff. The monitor arm holds your monitor. The chair holds you, for hours a day, all year long. When your budget only stretches to one serious purchase, the serious purchase should be the thing you sit in. We've written a separate guide on how much you should actually spend on an ergonomic chair, and the short version is: more than you want to, less than the luxury brands charge. If you're still in the "what should I spend" phase, that guide will save you from underbuying and overbuying in one sitting.
Why the desk second? Because your work surface sets the height of your hands, and your hands set the height of your shoulders, and your shoulders set the height of your neck. A chair sets your pelvis and spine. The desk sets everything above them. When the chair and the desk disagree about heights, your body pays the difference, in ways you feel by three in the afternoon.
Why extras last? Because stands, arms, and holders are upgrades, not foundations. A monitor arm is genuinely great, and we sell one we're proud of, but it's a finishing move. It's the thing you buy after the chair and the desk have stopped hurting you. Extras make a good setup better. They cannot make a bad setup good.
One more thing about the order: it protects your budget across years, not just across one Saturday. The three builds below are nested. Every dollar you spend in the cheaper tiers stays useful in the more expensive ones. You never replace, you add. That's the upgrade path, and it's the whole reason this guide works the way it does.
First, the Honest Math: What These Builds Actually Cost
Before the picks, the fine print, because there isn't much of it. All prices below are the current listed prices on Rackora.com, in US dollars. The L2 chair ships free across the US. Every total in this guide is the sum of the listed prices, shown in a table, so you can add it up yourself if you don't trust the arithmetic. You should. That's the point.
Here are the three builds at a glance.
| Build | What's in it | Itemized prices | Total |
|---|---|---|---|
| $500 build (laptop-first tier) | Ergo Laptop Stand Elite Edition, Adjustable Tablet Stand for Home Office, and Laptop computer cart | $79.99 + $49.99 + $158.46 | $288.44 |
| $1000 build (comfort sweet spot) | L2 Ergonomic Office Chair, Ergo Laptop Stand Elite Edition, Single monitor arm, and Adjustable Tablet Stand | $389.00 + $79.99 + $139.99 + $49.99 | $658.97 |
| $1500 build (full workstation) | 40×24 electric standing desk, L2 Ergonomic Office Chair, Ergo Laptop Stand Elite Edition, Single monitor arm, and Pro Stand 100 | $599.99 + $389.00 + $79.99 + $139.99 + $59.99 | $1,268.96 |
Read that table again, because it contains the most honest thing in this guide: two of the three builds come in under budget. The $1000 build is $658.97, not $1000. The $1500 build is $1,268.96, not $1500. We are not trying to spend your money for you. These budgets are ceilings, not targets. If a build comes in under its ceiling, the difference stays in your bank account, and we'll tell you exactly what it can and cannot buy at each tier.
The $500 Home Office Build: The Laptop-First Tier
Let's be honest about what $500 can and cannot do, because the internet is full of "$500 setup" videos that are secretly $900 with discounts you can't get.

At $500, from this lineup, you cannot buy a chair and a desk together. The L2 Ergonomic Office Chair is $389.00, and the 40×24 electric standing desk is $599.99. Put them in one cart and you're at $988.99, which is a $1000 build problem, not a $500 one. So at this tier you choose what your setup is for, and you accept that it's a partial build with a clear upgrade path. Two configurations actually fit, and both are honest about what they leave out.
Configuration A is the laptop-first mobile setup, and it's the exact tier list: the Laptop computer cart at $158.46, the Ergo Laptop Stand Elite Edition at $79.99, and the Adjustable Tablet Stand for Home Office at $49.99. Total: $288.44. The cart gives you a real work surface on wheels that moves with you from the kitchen to the living room to wherever the Wi-Fi reaches. The Elite stand lifts your laptop screen to eye level, which fixes the hunched-over-a-laptop posture that wrecks people's necks. The tablet stand keeps your phone or tablet at a glanceable angle instead of flat on the surface. It's not a full office. It's a complete laptop workstation that happens to be portable, and for a lot of people, that's the office they actually live in.
Configuration B is the ergonomics-first setup: the L2 Ergonomic Office Chair at $389.00 plus the Ergo Laptop Stand Elite Edition at $79.99. Total: $468.99. This one skips the desk entirely and assumes you already have a stable table or counter to work on. In exchange, it gives you the two purchases that do the most for your body: a real ergonomic chair with a mesh back and recline, and a laptop at eye level. If you already own a decent table, this configuration is the better deal, and it's the one that follows the chair-first rule most directly.
| $500 configuration | What's in it | Total | Covers | Leaves out |
|---|---|---|---|---|
| A: Laptop-first mobile | Cart $158.46 + Elite stand $79.99 + tablet stand $49.99 | $288.44 | Work surface, eye-level laptop, device angle | Chair, monitor arm, desk |
| B: Ergonomics-first | L2 chair $389.00 + Elite stand $79.99 | $468.99 | Spine support, eye-level laptop | Desk, tablet stand, monitor arm |
Which one should you pick? If you have a stable table and you sit in one place all day, Configuration B. If you move around, work in different rooms, or don't have a real surface at all, Configuration A. And if neither feels like enough, that's not a failure of the budget. It's a sign you should be looking at the next tier up. Which, conveniently, is where we're heading.
Two more honest notes about this tier. If you already own a decent chair, even a non-ergonomic one, the smart $500 play changes again: build the full laptop-first setup at $288.44 now, and upgrade the chair when the budget allows, because your current chair is still holding your spine better than the kitchen stool does. And if you're buying for a student or a first job, Configuration A is the one that survives dorm rooms and first apartments, because it tucks into a corner and moves without a truck. This tier isn't the smallest version of a big office. It's the office that fits the life you're actually living.
The $1000 Home Office Build: The Comfort Sweet Spot
This is the build we'd recommend to the most people, and it's also the one that proves the ceilings-are-not-targets point, because it totals $658.97, not $1000.

Here's the list: the L2 Ergonomic Office Chair at $389.00, the Ergo Laptop Stand Elite Edition at $79.99, the Full-Motion Adjustable Single Monitor Arm at $139.99, and the Adjustable Tablet Stand for Home Office at $49.99. Add it up: $389.00 + $79.99 + $139.99 + $49.99 = $658.97.
What you get is the comfort sweet spot: everything that touches your body is handled, and handled well. The L2 covers your spine with mesh support and recline. The Elite stand lifts your laptop to eye level for the days you work off the lid. The monitor arm gets your external monitor off the desk and floating at the right height, which frees up the whole surface for actual work. The tablet stand angles your phone, tablet, or a reference document so you're not craning down at it. Every part of your posture has a piece of furniture behind it. That's what this tier is for.
The monitor arm deserves a moment of its own, because it's the piece people skip and then regret skipping. It's full-motion, so you can push, pull, and rotate the monitor into the position your neck actually wants, instead of the position your desk forces. At $139.99 (regularly $169.00), it's the most "extra" of the extras in this build, but it's the one that turns a good setup into a setup that stops hurting you.
Now the honest part: you're $341.03 under budget. What do you do with it? Option one: nothing. Bank it. There's no rule that says a budget has to be spent. Option two: add the Pro Stand 100 at $59.99 (regularly $99.99), bringing the total to $718.96, and still keep $281.04. Option three: start saving toward the standing desk, because that's the natural next step, and our standing desk buyers guide will tell you exactly what to look for when you get there. If you don't have any usable surface at all, swap the tablet stand for the Laptop computer cart at $158.46, and the total becomes $767.44: chair, eye-level laptop, monitor arm, and a mobile desk. The point of this tier is that you don't have to spend the whole thousand to get the whole comfort.
A word on who this build is for. It's for the full-time sitter with a stable surface who wants the setup finished in one order: chair, laptop height, monitor height, device angles, done. It's also the build that shows the honest-math philosophy best, because the total is $658.97 and nobody is going to make you spend the other $341.03. If you read one section of this guide and skip the rest, this is the one to reread.
The $1500 Home Office Build: The Full Workstation
At $1500, the foundation finally gets into the picture. This is the tier where you add the desk, and it changes the character of the whole setup.
Here's the list: the 40×24 electric standing desk at $599.99 (regularly $879.99), the L2 Ergonomic Office Chair at $389.00, the Ergo Laptop Stand Elite Edition at $79.99, the Full-Motion Adjustable Single Monitor Arm at $139.99, and the Pro Stand 100 at $59.99. Add it up: $599.99 + $389.00 + $79.99 + $139.99 + $59.99 = $1,268.96.
The desk is the star here, and it earns it. It's electric, so height adjustment is a button push, not a crank and a grunt. It has memory presets, so your sitting height and your standing height are saved, and you can switch between them without re-aiming anything. The surface is 40 by 24 inches, which is a genuinely useful footprint: room for a monitor arm, a laptop stand, a keyboard, and a coffee mug that doesn't have to live on the floor. At $599.99 against a regular price of $879.99, it's the single biggest line item in any build in this guide, and it's the one that turns a chair-and-stand setup into a room you'd call an office.
The rest of the list follows the rule. The L2 is the chair-first foundation. The Elite stand keeps your laptop at eye level. The monitor arm floats your main display. And the Pro Stand 100, at $59.99 (regularly $99.99), handles the odds and ends that always end up flat on the desk: a phone, a tablet, a reference doc, whatever you need within reach. It's a small product doing a small job, and it's on the list because small jobs still need doing.
The honest total is $1,268.96, which leaves $231.04 under the $1500 ceiling. If you want to spend some of it, the cleanest add-on is the Adjustable Tablet Stand for Home Office at $49.99, which brings the total to $1,318.95 and gives you both stands, the arm, the desk, and the chair: everything in this lineup that a desk worker actually needs. Or you bank the difference. Both are legitimate.
What you end up with at this tier is a complete single-person workstation. Sit or stand at the push of a button. Monitor at eye level. Laptop at eye level. Documents at hand. A spine supported by a chair that was built and tested for full workdays. The only things missing are the ones this guide deliberately skips, and we'll name those in a minute.
One more honest note about the $1500 tier. It's the only build in this guide that assumes you have space for a full-size desk and a real desire to stand part of the day. If you're in a tight corner or you never stand, the desk is a large purchase doing a job you don't need done, and the $1000 build plus a banked $841.03 is the smarter move. The $1500 build is the full workstation for the person who wants it, not the person who was told to want it. Wanting it is the whole point: the desk's job is to make the choice between sitting and standing effortless, and if you'd never push the button, the button isn't earning its rent.
Why the Order Matters: What You Actually Sit In All Day
Let's spend a moment on why chair-before-desk-before-extras isn't just a slogan, because it's the difference between a setup that works and a setup that looks good in a photo and hurts in real life.
Start with the arithmetic of your workday. The average work-from-home person sits in their chair for the largest single block of furniture contact they have: more than the couch, more than the car seat, more than anything else they own. Every hour in a chair is an hour your spine, hips, and neck are trusting that piece of furniture. When the chair is wrong, everything above it compensates. Your shoulders hike, your neck reaches forward, your lower back slumps, and by three in the afternoon you're paying for it with your concentration, not just your comfort.
The desk is second because it controls the height of your hands, and your hands control your shoulders, and your shoulders control your neck. This is the setup interaction people miss: you can own the best chair in the world, and if your desk is six inches too high, you'll still spend your day with your shoulders around your ears. The chair sets your base. The desk sets your posture. Neither can fully fix the other's mistake.
Extras are last because they're multipliers, not fixes. A monitor arm multiplies the goodness of a monitor that's already at the right height. A tablet stand multiplies the usefulness of a phone you can already glance at comfortably. None of them can multiply a bad chair into a good one. Buy in the right order and every dollar multiplies. Buy in the wrong order and you're decorating a house with no foundation, then wondering why the walls crack.
There's a second, less obvious reason the order saves money: it makes your upgrades free of waste. Because the builds in this guide are nested, every item in the $1000 build is still in the room after you upgrade to the $1500 build. Nothing gets sold at a loss on a marketplace app. Nothing sits in a closet collecting dust. The order doesn't just protect your body. It protects the budget across years, not just across the one Saturday you spend shopping.
The Upgrade Path: How These Tiers Chain Together
Since the builds are nested, let's make the upgrade path explicit, with the math, because "you can upgrade later" is a lot more useful when you can see the totals.
Say you start with the $500 laptop-first setup: cart $158.46, Elite stand $79.99, tablet stand $49.99. That's $288.44. Here's the ladder from there:
| Step | What you add | Running total |
|---|---|---|
| Start | Cart + Elite stand + tablet stand | $288.44 |
| Step 1 | L2 Ergonomic Office Chair $389.00 | $677.44 |
| Step 2 | Single monitor arm $139.99 | $817.43 |
| Step 3 | Pro Stand 100 $59.99 | $877.42 |
| Step 4 | 40×24 electric standing desk $599.99 | $1,477.41 |
Or take the ergonomics-first route, which matches the build order rule more closely. Start with the L2 and the Elite stand at $468.99. Add the tablet stand for $518.98. Add the monitor arm for $658.97, which is exactly the $1000 build total. Add the Pro Stand 100 for $718.96. Add the desk for $1,318.95, and you've assembled the full workstation plus the tablet stand, every item still in use.
The takeaway: you can get from a $288.44 laptop cart to a $1,477.41 full workstation without ever throwing anything away. That's what "upgrade path" means in this guide. It's not a slogan. It's a spreadsheet, and the spreadsheet is on the page.
What These Tiers Intentionally Skip
Every honest build guide tells you what it's not giving you, so here's the list, and it's short.
These builds skip cable management, and they skip it on purpose. Cable trays, sleeve kits, under-desk baskets: they're real products with real uses, but they're organization, not ergonomics, and you can always add them in an afternoon later.
They skip lighting. A desk lamp, a monitor light bar, a ring light: all useful, none of them a posture issue. If you work in a dim room, buy a lamp before you buy anything else on this list, but that's a separate budget for a separate problem.
They skip decor and storage. Plants, acoustic panels, shelves, filing cabinets: wonderful, but they don't touch your spine, and this guide is about the spine first.
They skip a second monitor. The builds here assume one external display plus a laptop, which is what the monitor arm, the Elite stand, and the tablet stand are built around. If you run three screens, the $1500 build still works, but you'll be shopping for a second arm, and that's an addition, not a replacement.
And they skip accessories: wrist rests, footrests, headset stands, webcams. These are cheap, personal, and easy to get wrong in both directions. The builds are the foundation. Everything on this skip list is a "later," not a "never."
Which Build Is Yours: How to Choose
You've seen all three builds, and there's a real chance you're staring at the tables wondering which one is "you." Here's the decision framework we use when our own friends ask, and it's three questions instead of a quiz.
First, what do you already own? This is the biggest variable in the whole guide, and it changes everything. If you already have a solid table or counter, the $500 ergonomics-first build (L2 plus Elite stand at $468.99) does more for you than any other $500 in this article, because you're spending on the two things your body touches: your spine and your laptop height. If you have no usable surface at all, the same budget is better spent on the laptop-first tier at $288.44, because the cart is your desk, and without a surface you'd be working from the sofa arm and the coffee table.
Second, how many hours do you sit? If your workday is a couple of hours a day, honestly, the $500 tier is enough, because your body doesn't spend enough time in the setup to need the full treatment. If you sit a full workday, every single day, then the chair stops being a nice-to-have and becomes the most important purchase in the room, and the $1000 build is where the money starts doing real work. A full-time sitter should treat the L2 tier as the floor, not the ceiling.
Third, do you stand? If you already know you want to switch between sitting and standing during the day, the desk moves up your priority list, and the $1500 build is the one that includes it. If you're happy seated all day, the desk can wait, and the $1000 build is the sweet spot. There's no wrong answer. There's just the order: chair first, surface second, everything else after.
And the tiebreaker: what's your upgrade timeline? If you're going to add one thing a year, start at the tier that leaves room to grow, which all three of these do, because they're nested. The $500 build becomes the $1000 build becomes the $1500 build without a single wasted purchase. That's the point of the framework: every build here is a step on the same staircase, not a separate staircase. Pick the step that fits today, and the next step is already priced and waiting in the tables above.
FAQ
Can I set up a home office for $500?
Yes, with honest limits. The $500 tier covers a complete laptop-first setup (cart, Elite laptop stand, and tablet stand at $288.44) or an ergonomics-first setup (the L2 chair and Elite stand at $468.99). What it can't cover is a chair and desk together, because that combination starts at $988.99 with this lineup.
What should I buy first?
The chair. The L2 Ergonomic Office Chair at $389.00 (regularly $449.00) is the piece you sit in for the most hours, and it's the foundation of every build in this guide. Desk second, extras last, in that order, always.
Is the $1000 build worth it?
It's the one we recommend to the most people. The full list totals $658.97, not $1000, and it covers your chair, your laptop at eye level, your monitor off the desk, and your devices at the right angle. You keep $341.03, or you spend part of it on the Pro Stand 100 and still stay well under budget.
Do I need a standing desk?
No. A good chair and the right surface heights matter more than sitting versus standing. That said, the 40×24 electric standing desk with memory presets at $599.99 is the centerpiece of the $1500 build, and switching between sitting and standing heights through the day is a real benefit for a lot of people.
What's the best budget chair?
In this lineup, the L2 Ergonomic Office Chair at $389.00 (regularly $449.00). It's mesh, it reclines, it carries 4.9 stars across 418 reviews, it ships free in the US, and it has a 30-day money-back guarantee. At the $500 tier it fits as part of the ergonomics-first configuration.
Can I upgrade later?
Yes, and the whole guide is built around it. The builds are nested, so every item in a cheaper tier is still in use after you upgrade. Going from the $288.44 laptop-first setup to a $1,477.41 full workstation never requires throwing anything away.
Are these prices real?
Yes. Every price in this guide is the current listed Rackora price in USD, and every total is the exact sum of those prices, shown in the tables so you can verify: $288.44, $658.97, and $1,268.96. We're not inventing discounts to make the math look better.
What does the $1500 build include?
The 40×24 electric standing desk ($599.99), the L2 Ergonomic Office Chair ($389.00), the Ergo Laptop Stand Elite Edition ($79.99), the Full-Motion Adjustable Single Monitor Arm ($139.99), and the Pro Stand 100 ($59.99), for a total of $1,268.96.
Three budgets, three exact lists, one rule. At $500 you get an honest partial build and you know exactly what it leaves out. At $1000 you get the comfort sweet spot for $658.97 and you keep the difference. At $1500 you get the full workstation, desk included, for $1,268.96.
The anchor of all three is the L2 Ergonomic Office Chair: $389.00 (regularly $449.00), mesh back, recline, 4.9 stars from 418 reviews, free US shipping, and a 30-day money-back guarantee that makes your first week a risk-free test. Pair it with the Ergo Laptop Stand Elite Edition at $79.99, add the Full-Motion Adjustable Single Monitor Arm at $139.99 when you're ready, and build out from there in the order that actually protects your back and your budget.
Start with the chair. That's the whole secret.
