
When your solar street light suddenly stops working, you might feel frustrated or unsure about the next step. Most problems with solar street lights have simple fixes if you know what to look for. Some of the most common issues include:
- No light from the solar street lamp
- Lighting time that is too short
- Lights staying on during the day
- Flickering or dim lights
- Sensor or charging failures
- Poor installation or material quality
You can often restore your solar street lights by following a few basic Troubleshoot Problems steps and observing the system closely.
Key Takeaways
- Regularly clean solar panels to keep them free from dirt and debris, which improves energy absorption and lighting performance.
- Check the battery health often by measuring voltage and replacing old or damaged batteries to ensure long lighting duration.
- Inspect wiring and connections for looseness, corrosion, or damage to prevent flickering, dim lights, or system failure.
- Test and clean sensors regularly to maintain proper light activation and avoid lights staying on during the day or not turning on at night.
- Ensure proper installation by positioning solar panels to face the sun directly, securing poles firmly, and avoiding shading from trees or buildings.
- Look for signs of water damage inside fixtures and battery compartments, and repair seals or replace parts to prevent electrical failures.
- Perform routine maintenance every few months, including cleaning, inspection, and adjustment, to extend the life and efficiency of your solar street light.
- Seek professional help immediately if you notice sparks, burning smells, exposed wires, or persistent problems after basic troubleshooting to stay safe and protect your system.
Identify Issues
No Light
When your solar street light does not light up at night, you face one of the most common issues. You can spot this problem by observing several clear symptoms:
- The solar street light does not turn on at all after sunset.
- The LED light source may flicker briefly or only a few LED beads illuminate.
- You cannot activate the light manually.
- You notice significantly reduced lighting duration or insufficient working hours at night.
- The motion sensor does not trigger the light as expected.
These symptoms often point to problems such as a faulty or low-charge battery, a solar panel blocked by dirt or obstacles, a damaged controller, or a sensor malfunction. If you see no lighting at night, start troubleshooting by checking for these signs. Note any recent changes in weather, installation, or maintenance that might have affected the system.
Tip: Keep a log of when the light fails and any unusual behavior. This record helps you identify patterns and speeds up troubleshooting.
Dim or Flickering
Dim or flickering lights signal a different set of issues. You can distinguish these from other malfunctions by following a few steps:
- Check if the LED lights appear much dimmer than usual or flicker on and off.
- Inspect the battery health. Low battery voltage often causes dim lighting.
- Examine all wiring connections. Loose, corroded, or damaged wires can lead to flickering or weak light output.
- Clean the solar panel. Dust or dirt reduces sunlight absorption, which leads to lower energy storage.
- Make sure the solar panel faces the sun directly and is not shaded by trees or buildings.
- Consider the age of your LED driver. An outdated or incompatible driver can cause irregular performance.
Dim lighting can also result from insufficient sunlight exposure, dirty panels, or aging batteries. Flickering may indicate loose wiring or intermittent shading of the solar panel. By systematically checking each component, you can pinpoint the cause and restore normal operation.
Short Lighting Duration
If your solar street light works but only for a short time, you likely have a short lighting time or shorter lighting time than expected. This issue often appears as the light turning off much earlier than it should, even though it turns on at dusk. Common causes include:
- Solar panel obstruction by objects, dirt, or debris.
- Battery damage, corrosion, or poor connections.
- Dirty solar panel surfaces.
- Damaged wiring or loose connections.
- Incorrect controller settings.
- Poor-quality components or batteries reaching the end of their service life.
- Insufficient solar energy absorption due to shading from trees or buildings.
You can address these issues by cleaning the solar panel, inspecting and replacing the battery if needed, and checking all wiring and controller settings. Sometimes, the problem is not with the internal components but with the installation site. If the solar panel receives limited sunlight during the day, even a large battery cannot provide enough power for the whole night. To prevent insufficient working hours, install solar street lights in open areas with maximum sun exposure.
Note: Regular cleaning and proper installation help avoid most short lighting duration problems.
Sensor Problems
You may notice your solar street light does not respond to movement or changes in daylight. Sensor problems often cause this issue. The sensor controls when the light turns on or off. If the sensor fails, the light may stay on during the day or not turn on at night.
Start by checking the sensor lens. Dirt, dust, or spider webs can block the sensor. Clean the lens with a soft cloth. Next, observe if the sensor reacts to movement or darkness. If the light does not respond, you may have a sensor malfunction.
Tip: Stand near the light and wave your hand to test the motion sensor. If nothing happens, check if the light can be activated manually.
Sometimes, wiring issues or water damage affect the sensor. Inspect the wires for any signs of corrosion or loose connections. If you see water inside the sensor housing, dry it out and seal any gaps. If the sensor still does not work, you may need to replace it.
Charging Failures
Charging failures can prevent your solar street light from working properly. If the battery does not charge during the day, the light will not work at night. You may notice the charging status indicator does not light up or shows an error.
Begin by inspecting the solar panel for dirt, leaves, or bird droppings. Clean the panel to allow maximum sunlight. Check for a solar panel malfunction by looking for cracks or damage. Damaged panels cannot charge the battery.
Next, examine the wiring between the solar panel and the battery. Loose or broken wires stop the charging process. Use a multimeter to test the voltage from the panel. If you get no reading, the panel or wiring may be faulty.
Battery problems also cause charging failures. Old or damaged batteries cannot hold a charge. Replace the battery if you notice swelling, leaks, or low voltage readings.
Installation Issues
Improper installation can lead to many problems with solar street lights. If you installed the light in a shaded area, the solar panel will not receive enough sunlight. This reduces charging and lighting time.
Check the alignment of the solar panel. Make sure it faces the sun directly for most of the day. The pole should stand straight and stable. Loose poles can cause wiring to disconnect or the panel to shift.
Review all connections and mounting hardware. Tighten any loose screws or bolts. If you moved the light recently, double-check the installation steps. Proper installation prevents many common issues, including sensor and charging failures.
Note: Good installation practices help your solar street light work efficiently and last longer.
Troubleshoot Problems
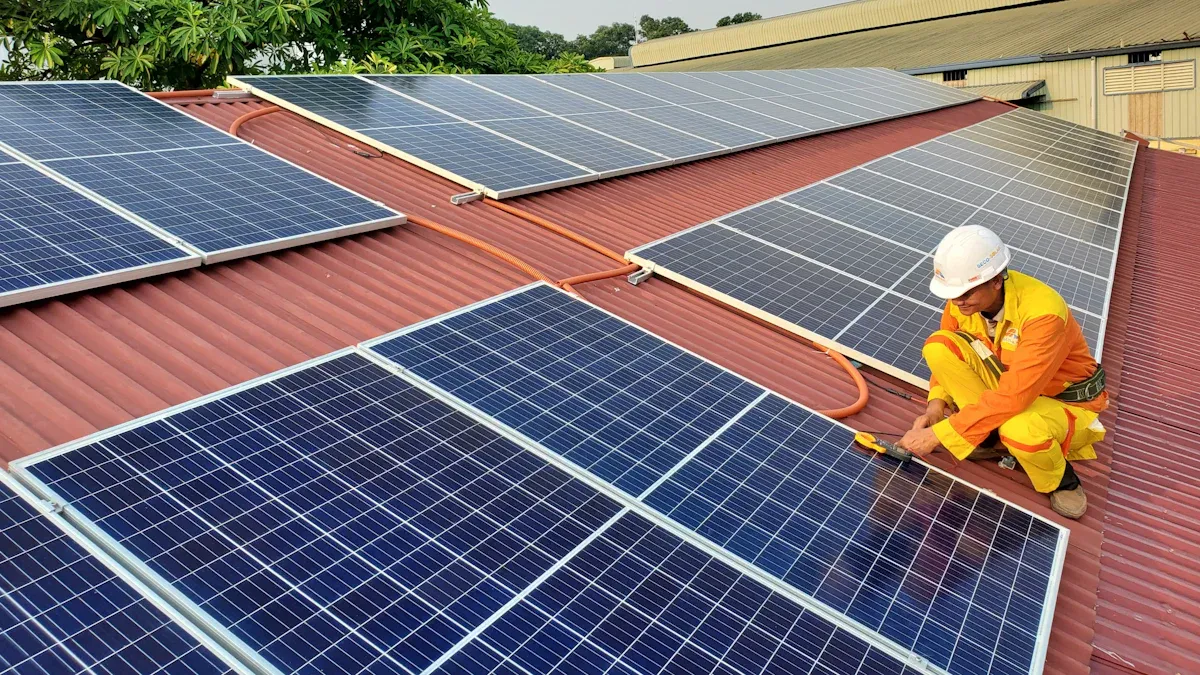
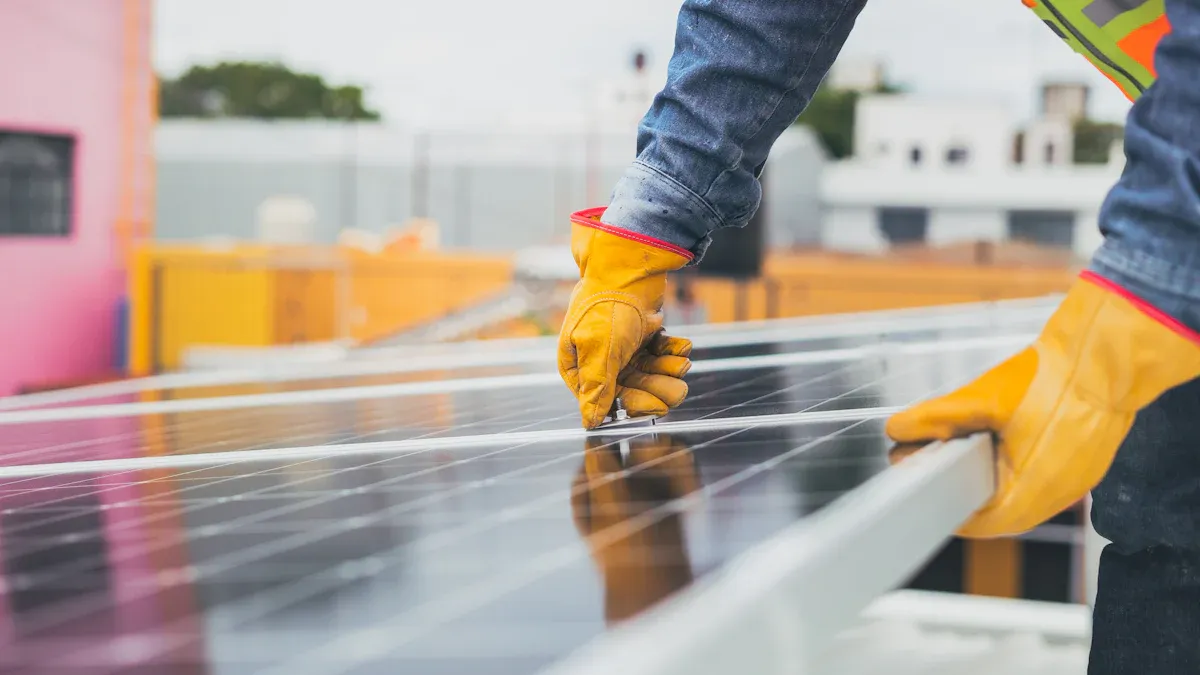
Check Solar Panel
A clean and well-maintained solar panel is essential for efficient operation. Many common issues with solar street lights start with the panel. You can troubleshoot problems by following these steps:
Clean Surface
- Gather safety gear such as gloves, goggles, and a hard hat. Prepare cleaning supplies like a soft cloth, non-abrasive cleaner, and water.
- Choose a clear, dry day for cleaning. This prevents water spots and ensures safety.
- Remove dust, dirt, and debris from the panel using a soft cloth or brush. Avoid abrasive materials that can scratch the surface.
- Rinse the panel with clean water. For stubborn dirt, use a squeegee or soft brush.
- Inspect the panel for any signs of damage while cleaning.
- Document the condition of the panel before and after cleaning.
Routine cleaning can improve energy output by up to 15%. Even a thin layer of dust can reduce efficiency by 5–10%. In some cases, bird droppings or industrial pollutants can cause a 30% drop in output. Rainwater alone does not clean panels effectively, so manual cleaning is necessary.
Inspect for Damage
- Look for cracks, dents, or corrosion on the panel surface.
- Check mounting brackets and seals for wear or rust.
- Inspect for moisture or water ingress, which can damage internal components.
- Confirm that all components are intact and secure.
If you find any damage, arrange for repair or replacement as soon as possible. Damaged panels cannot generate enough power, leading to short lighting duration or no light at all.
Remove Obstructions
- Check whether the solar panel is blocked by leaves, branches, or nearby buildings.
- Remove any objects that cast shadows on the panel during the day.
- Recheck alignment and angle to ensure the panel faces the sun directly.
You should check whether the solar panel is blocked regularly, especially after storms or in areas with heavy tree cover. Obstructions reduce sunlight exposure and cause charging failures.
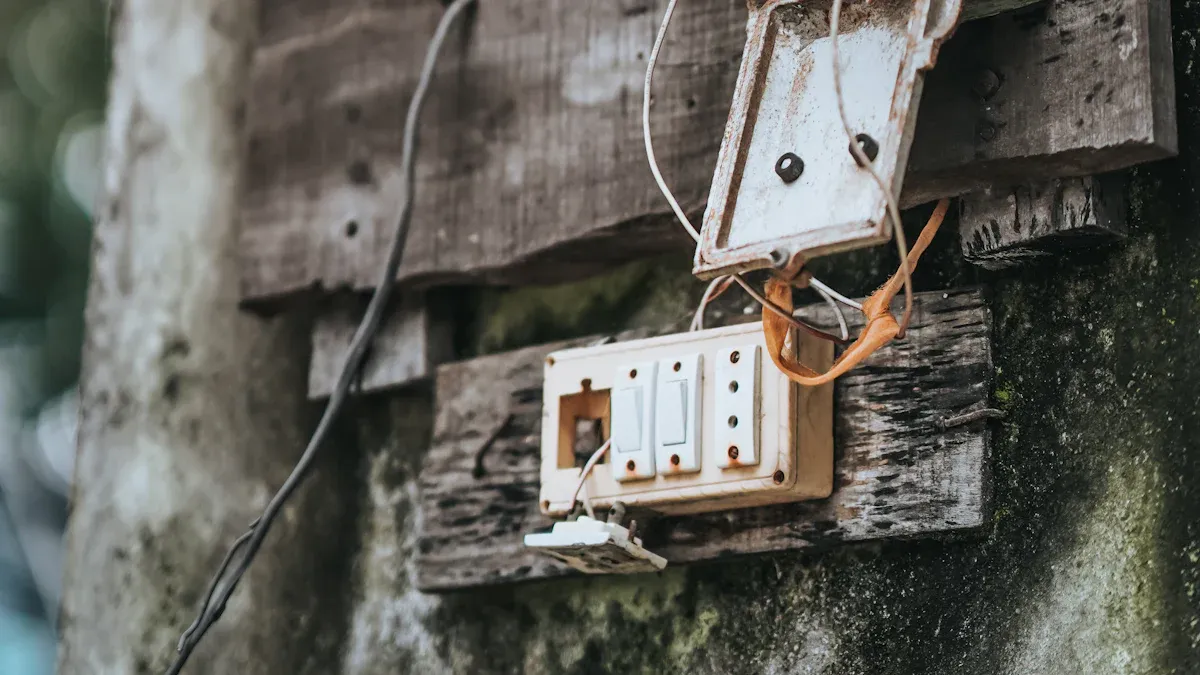
Inspect Wiring
Wiring problems are a frequent source of electrical failures in solar street lights. You can troubleshoot problems by inspecting all connections and cables.
Tighten Connections
- Inspect solar panel connections for looseness or corrosion.
- Use waterproof connectors and apply silicone sealant to prevent moisture ingress.
- Tighten all electrical connections to avoid power disruptions and inconsistent lighting.
Loose connections can cause flickering, dim lights, or complete system failure. Address minor issues early to avoid costly repair later.
Look for Damage
- Inspect wiring for signs of wear, corrosion, or physical damage.
- Replace or repair any defective wires immediately.
- Label all wires and connections to make future troubleshooting easier.
Regular inspection and maintenance of wiring help prevent common issues and ensure stable operation. If you find complex faults or major system failures, contact a professional for repair.
Test Battery
The battery stores energy for nighttime lighting. If you notice short lighting duration or dim lights, the battery may be the cause. Use these troubleshooting methods to check battery health.
Measure Voltage
- Wear protective gear such as gloves and goggles.
- Use a multimeter to measure the battery voltage.
- For a 12V system, a healthy battery should read between 13.2V and 13.8V. For a 24V system, look for 26.4V to 27.6V.
|
System Voltage |
Healthy Battery Voltage Range |
Indicator of Battery Health |
|---|---|---|
|
12V |
13.2V to 13.8V |
Fully charged; below 12V suggests undercharging or battery issues |
|
24V |
26.4V to 27.6V |
Fully charged; lower values indicate problems |
- If the voltage drops rapidly after charging or use, the battery may have internal faults or be near the end of its life.
Replace if Needed
- Inspect the battery for bulging, leaks, or loose connections.
- If the voltage is consistently low or the battery shows physical damage, replace it with a compatible unit.
- Ensure the charge controller is properly calibrated to avoid overcharging.
Always disconnect the power supply before testing or replacing the battery. Avoid working during rainy or extreme weather to reduce electrical hazards.
Regular battery checks and timely replacement help maintain reliable lighting and prevent unexpected failures.
Reset Controller
A solar street light controller manages the charging and discharging process. If you notice irregular lighting patterns or the system does not respond to changes in sunlight, you may have a controller failure. You can troubleshoot problems with the controller using these troubleshooting methods.
Power Cycle
- Turn off the power supply to the solar street light.
- Wait for at least 30 seconds. This pause allows the controller to reset.
- Turn the power back on and observe the system.
A simple power cycle often resolves minor glitches. If the light resumes normal operation, you have fixed the issue. If not, continue to the next step.
Check Indicators
Most controllers have indicator lights that show system status. Look for these lights after you power cycle the controller.
- A green light usually means the system works correctly.
- A red or blinking light may signal a fault or error.
- If you see no indicator light, the controller may not receive power or could be damaged.
Tip: Refer to your controller’s manual for specific indicator meanings. Each manufacturer uses different codes.
If you see no indicator light or the lights show an error, inspect the wiring and battery connections. Loose or corroded wires can cause controller failure. If you confirm the wiring is secure and the controller still does not work, you may need to repair or replace the controller.
Examine Light Fixture
The light fixture contains the LEDs and housing. Problems here can cause dim, flickering, or no light at all. You can troubleshoot problems by checking both the LEDs and the housing.
Check LEDs
- Inspect the LEDs for dark spots, discoloration, or broken beads.
- If only some LEDs light up, you may need to replace the bulb or LED module.
- Use a multimeter to test the voltage at the LED terminals. A healthy LED should show the correct voltage as specified in the manual.
If you find damaged LEDs, replace the bulb or the entire LED board. This step restores full brightness and ensures even lighting.
Inspect Housing
- Look for cracks, water inside the fixture, or loose covers.
- Water or dust inside the housing can damage the LEDs and wiring.
- Tighten all screws and seals to keep the fixture weatherproof.
Note: A damaged housing can lead to repeated failures. Always repair or replace broken parts to protect the internal components.
Assess Sensor
Sensors control when the light turns on or off. If the light does not respond to movement or changes in daylight, focus your troubleshooting on the sensor.
Clean Lens
- Gently wipe the sensor lens with a soft, dry cloth.
- Remove any dirt, spider webs, or water spots that may block the sensor.
A clean lens helps the sensor detect movement and light levels accurately.
Test Function
- Stand near the light and wave your hand in front of the sensor.
- Observe if the light turns on or changes brightness.
- If the sensor does not respond, check the wiring for loose or corroded connections.
If cleaning and checking the wiring do not solve the problem, the sensor may have failed. You may need to repair or replace the sensor to restore proper function.
Remember: Sensors are sensitive to both dirt and electrical issues. Regular cleaning and inspection prevent most sensor failures.
By following these steps, you can troubleshoot problems in your solar street light system. Careful observation and basic tools help you identify and fix most issues without professional help.
Evaluate Installation
Proper installation plays a crucial role in the performance and lifespan of your solar street light. Even if all components work well, poor installation can lead to frequent failures or reduced efficiency. You should always check the physical setup when troubleshooting persistent issues.
Check Pole Stability
A stable pole ensures that your solar street light remains upright and secure in all weather conditions. An unstable pole can cause wiring to disconnect, the solar panel to shift, or even the entire light to fall.
How to check pole stability:
- Inspect the base: Look at the foundation of the pole. Make sure it sits firmly in the ground or on its mounting platform. If you see cracks, loose bolts, or signs of movement, address these issues immediately.
- Test for movement: Gently push the pole from different directions. The pole should not wobble or tilt. Any movement can loosen electrical connections or misalign the solar panel.
- Check for rust or corrosion: Examine metal parts for rust, especially near the base and mounting brackets. Rust weakens the structure and can lead to failure.
- Review anchoring hardware: Tighten all bolts, nuts, and screws. Replace any missing or damaged hardware.
Tip: After storms or strong winds, always inspect the pole for new signs of instability.
A stable pole protects your investment and keeps your solar street light working safely.
Verify Panel Alignment
The angle and direction of your solar panel determine how much sunlight it receives. Poor alignment reduces charging efficiency and shortens lighting duration.
Steps to verify panel alignment:
- Check the direction: The solar panel should face true south if you live in the Northern Hemisphere, or true north in the Southern Hemisphere. Use a compass or a smartphone app to confirm the direction.
- Measure the tilt angle: The panel should tilt at an angle close to your local latitude. For example, if your latitude is 30°, set the panel tilt to about 30°. This angle maximizes sunlight absorption throughout the year.
- Look for shading: Stand near the panel during midday. Make sure no trees, buildings, or other objects cast shadows on the panel. Even partial shading can reduce charging by more than 50%.
- Observe seasonal changes: Sun angles change with the seasons. Adjust the panel tilt if possible, especially before winter or summer.
|
Alignment Factor |
What to Check |
Why It Matters |
|---|---|---|
|
Direction |
Faces true south/north |
Maximizes daily sunlight |
|
Tilt Angle |
Matches local latitude |
Improves yearly energy collection |
|
Shading |
No shadows during the day |
Prevents charging failures |
|
Seasonal Adjustment |
Adjusts for sun’s position |
Maintains efficiency year-round |
Note: If you cannot adjust the panel easily, choose the best compromise angle for your location. Regularly check for new sources of shade, such as growing trees.
By evaluating both pole stability and panel alignment, you ensure your solar street light operates at peak performance. These checks help prevent many common issues and extend the life of your system.
Preventive Maintenance
Clean Panels Regularly
You can keep your solar energy street light working at its best by cleaning the panels on a regular schedule. Dust, pollen, leaves, and bird droppings block sunlight and lower energy production. Use a soft cloth and mild soap to wipe away dirt. Avoid harsh chemicals or rough brushes that might scratch the surface. Always turn off and disconnect the solar energy street light before you start cleaning.
A seasonal approach helps you stay organized. The table below shows a recommended maintenance schedule:
|
Season |
Recommended Maintenance Tasks |
Purpose/Notes |
|---|---|---|
|
Spring |
Clean dust, debris, pollen from panels using soft cloth and mild soap; inspect fixtures, poles, wiring |
Maintain efficiency and reliability; prevent damage |
|
Summer |
Inspect for overheating, sun damage, discoloration, cracks; check battery compartment ventilation |
Prevent heat damage; maintain component lifespan |
|
Fall |
Remove leaves, twigs, dirt; adjust panel angles for lower sun; check for snow/ice accumulation; inspect wiring |
Maximize sunlight absorption; prepare for winter conditions |
|
Winter |
Clear snow and ice regularly with soft brush; inspect for ice damage, cracks; ensure battery compartments sealed |
Maintain efficiency during short days; prevent moisture damage |
|
General |
Schedule inspections every 3 months; keep maintenance records; consider professional maintenance; update protocols per manufacturer |
Early issue detection; extend lifespan; ensure system reliability |
Tip: After storms or heavy winds, check your solar energy street light for new debris or damage.
Inspect Wiring and Connections
Loose or damaged wiring can cause your solar energy street light to fail. You should inspect all electrical connections at least once a year. Look for signs of wear, corrosion, or frayed wires. Use a multimeter to test the firmness of each connection. Replace or tighten any faulty parts right away to avoid bigger problems.
- Check for exposed wires or cracked insulation.
- Make sure all connectors are waterproof and secure.
- Inspect the wiring after extreme weather events.
Annual inspections help you catch issues early. If you notice flickering lights or sudden outages, check the wiring first. Professional inspections every one to two years can reveal hidden problems and keep your solar energy street light running safely.
Replace Batteries Periodically
Batteries store the energy that powers your solar energy street light at night. Over time, battery capacity drops, which leads to shorter lighting hours or dimmer lights. You should plan to replace batteries every three to five years, depending on the type and usage.
|
Battery Type |
Average Lifespan |
Recommended Replacement Frequency |
Notes on Maintenance and Environment Impact |
|---|---|---|---|
|
Lead-Acid |
3-5 years |
Replace every 3-5 years |
Minimal maintenance; frequent replacement needed |
|
Sealed Gel |
4-6 years |
Replace every 3-5 years |
Occasional servicing; good for deep discharges and temperature stability |
|
Lithium-Ion |
5-10 years |
Potentially up to 8 years without replacement |
Longest lifespan; high performance; maintenance and environment can extend life by 2-3 years |
Check battery voltage and look for swelling or leaks. If you see any damage or the voltage drops quickly, replace the battery right away. Regular maintenance, such as quarterly cleaning and semi-annual inspections, can extend battery life by two to three years. High-quality lithium batteries, when cared for properly, can keep your solar energy street light working for more than ten years.
Note: Always follow the manufacturer's instructions for battery replacement and disposal.
Check for Water Damage
Water damage can cause serious problems for your solar energy street light. Moisture can enter the system through cracks, loose seals, or damaged housing. When water gets inside, it can corrode wires, short-circuit the controller, or damage the battery. You need to check for water damage as part of your regular maintenance routine.
Start by inspecting the light fixture and battery compartment. Look for signs of rust, water stains, or condensation inside the housing. If you see any water droplets or corrosion, dry the area with a clean cloth. Remove the battery and let it air out if you find moisture. Check the seals and gaskets around the fixture. Replace any that look worn or cracked.
Next, examine the wiring and connectors. Water can cause wires to rust or connectors to loosen. Use a flashlight to look for green or white powder on metal parts. This powder means corrosion has started. Clean the affected area with a dry brush. If the damage is severe, replace the wires or connectors.
You should also check the solar panel for water damage. Look for foggy spots or water trapped under the glass. If you see these signs, the panel may have a broken seal. Contact the manufacturer for advice or replacement.
Tip: After heavy rain or storms, inspect your solar energy street light for water entry. Early detection helps you avoid bigger repairs.
A simple checklist can help you remember what to look for:
- Inspect all seals and gaskets for cracks.
- Check for rust or corrosion on metal parts.
- Look for water stains or condensation inside the housing.
- Test the battery compartment for moisture.
- Examine wiring and connectors for signs of water damage.
Regular checks for water damage keep your solar energy street light working safely and efficiently.
Ensure Proper Installation
Proper installation is key to the long-term success of your solar energy street light. Even the best equipment will fail if you do not install it correctly. You should review the installation as part of your maintenance plan.
First, make sure the solar panel faces the right direction. In the Northern Hemisphere, the panel should face south. In the Southern Hemisphere, it should face north. The panel should tilt at an angle close to your local latitude. This position helps the solar energy street light collect the most sunlight each day.
Check that the pole stands straight and secure. A leaning or unstable pole can cause the panel to shift or the light to fall. Tighten all bolts and screws. If you see rust or loose hardware, replace it right away.
Look at the mounting brackets and hardware. Make sure they hold the solar energy street light firmly in place. If you notice any movement or wobbling, adjust the brackets and retighten the fasteners.
You should also check for shading. Trees, buildings, or other objects can block sunlight from reaching the panel. Trim branches or move obstacles to keep the panel in full sun.
A table can help you track your installation checks:
|
Installation Check |
What to Look For |
Action to Take |
|---|---|---|
|
Panel Direction |
Faces correct direction |
Adjust if needed |
|
Panel Tilt |
Matches local latitude |
Change angle if incorrect |
|
Pole Stability |
No leaning or wobbling |
Tighten or replace hardware |
|
Mounting Hardware |
Secure and rust-free |
Replace or tighten as needed |
|
Shading |
No objects blocking sunlight |
Trim or remove obstacles |
Note: Review the installation every six months or after severe weather. Good installation practices reduce the risk of future problems and make maintenance easier.
By checking for water damage and ensuring proper installation, you protect your solar energy street light from common failures. These steps help you get the most value and longest life from your system.
When to Get Help
Persistent Issues
Sometimes, you may notice that your solar street light continues to have problems even after you follow all the basic troubleshooting steps. These persistent issues often signal deeper faults that require professional help. Watch for these warning signs:
- The light stays dim or flickers, even after you clean the panel and check the battery.
- You smell burning or see sparks near the wiring or outlets.
- Wires look loose, frayed, or damaged, causing the light to behave abnormally.
- You hear buzzing or humming from electrical parts, which can mean arcing or loose connections.
- Outlets show burn marks, discoloration, or do not work at all.
- The battery voltage drops below 70% of its rated value, or you see abnormal flashing and brightness decay.
- The solar panel or internal wiring shows physical damage.
- The light keeps acting up after you perform regular cleaning and maintenance.
If you see any of these signs, stop using the light and contact a qualified technician. Persistent problems can lead to bigger failures or safety hazards.
Electrical Failures
Electrical failures in solar street lights can pose serious risks. You should never ignore these problems, as they can cause fires, electrical shocks, or equipment damage. Some common electrical failures include:
- Under-voltage failures: The light appears dim, starts up slowly, or shows battery warnings. These issues often come from depleted batteries, corroded terminals, or poor solar charging. Poor visibility from dim lights can increase accident risk.
- Over-voltage failures: You may notice blown fuses, flickering or failing LEDs, or overheating. Faulty inverters, battery overcharge, or unstable power sources often cause these problems. Over-voltage can damage components and create fire hazards.
- Voltage fluctuations: The light brightness changes often, or the LEDs turn on and off unexpectedly. Loose connections, moisture, aging parts, or bad grounding can cause these fluctuations. This creates a hazardous environment and increases the risk of electrical shock.
You should test voltage regularly and follow the manufacturer’s guidelines for maintenance. Only certified technicians should handle repairs or inspections for these failures. They have the right tools and training to keep your solar powered street light safe and compliant.
Never try to fix electrical failures yourself if you see sparks, smell burning, or notice overheating. Call a professional right away.
Warranty Support
Most major manufacturers offer warranty support for solar street lights. These warranties can help you save money on repairs and replacements. The table below shows typical warranty options:
|
Manufacturer |
Warranty Duration |
Coverage Details |
Notes |
|---|---|---|---|
|
SOL by Sunna Design |
10 years |
Covers the entire solar street lighting system, including batteries |
Industry-leading; covers all-in-one, all-in-two, and high-power systems |
|
E-Lite |
5 years |
Warranty on LED outdoor solar street lights; batteries replaced every 3-5 or 7-12 years |
Offers standard and premium battery options based on environment and location |
|
SEPCO |
5 years (GEL batteries), 25+ years (panels) |
Solar panels have a 25+ year field life warranty; GEL batteries have a 5-year pro-rated warranty |
LifePO4 batteries available for longer life; panels have strong durability and support |
If your solar street light is still under warranty, contact the manufacturer or supplier before making repairs. Many companies will send replacement parts or arrange for service at no extra cost. Always keep your purchase records and warranty documents in a safe place.
Tip: Review your warranty terms when you buy a new system. A longer and more comprehensive warranty can reduce your long-term maintenance costs.
Safety Concerns
When you work with a solar powered street light, safety should always come first. Some problems can put you at risk of injury or cause damage to your equipment. You need to know when a situation is too dangerous to handle on your own.
Common Safety Hazards:
- Electric Shock: Even though solar systems use low voltage, you can still get shocked if you touch exposed wires or terminals. Wet conditions increase this risk.
- Fire Hazards: Damaged batteries, short circuits, or faulty wiring can start a fire. If you see smoke, sparks, or smell burning plastic, step away from the light.
- Water Damage: Water inside the battery compartment or light fixture can cause short circuits. This can lead to electrical failure or even explosions in rare cases.
- Structural Instability: A loose or leaning pole can fall over, especially during storms or high winds. This can injure people or damage property.
Alert: Never try to repair a solar powered street light if you see exposed wires, smell burning, or notice water inside the electrical parts. These signs mean you need professional help.
What You Should Do:
- Turn Off Power: If you suspect a problem, turn off the power supply before you inspect or touch any part of the system.
- Keep Area Clear: Keep children and pets away from the light while you check for hazards.
- Wear Safety Gear: Use gloves and safety glasses when you inspect wiring or batteries.
- Check Weather: Avoid working on the light during rain, storms, or when the ground is wet.
- Call a Professional: If you feel unsure or see any warning signs, contact a licensed electrician or the manufacturer’s support team.
Warning Signs That Require Immediate Help:
|
Warning Sign |
What It Means |
What You Should Do |
|---|---|---|
|
Smoke or burning smell |
Possible fire or short circuit |
Move away and call for help |
|
Exposed wires |
Risk of electric shock |
Do not touch, get help |
|
Water inside housing |
Electrical hazard |
Disconnect and call expert |
|
Pole is unstable |
Risk of falling |
Stay clear, call installer |
Tip: Always read the user manual before you attempt any repairs. The manual gives you important safety instructions and tells you when to seek professional help.
You protect yourself and others when you recognize safety concerns and act quickly. Never ignore warning signs. Your safety matters more than fixing the light right away.
You can keep your solar street light working well by following simple troubleshooting and maintenance steps.
- Clean the solar panels and check battery connections regularly.
- Inspect wiring, test sensors, and monitor light output.
- Experts recommend cleaning solar street lights every six months to prevent dust buildup and maintain efficiency.
Most problems with a solar street light are easy to fix with regular care. With these habits, you will enjoy reliable lighting and long-lasting performance. 🌞
FAQ
What should you do if your solar street light does not turn on at night?
First, check the solar panel for dirt or obstructions. Clean the panel and make sure it faces the sun. Inspect the battery and wiring for damage. Replace faulty parts if needed.
How often should you clean the solar panels?
You should clean the panels every three to six months. Dust, leaves, and bird droppings can block sunlight. Regular cleaning helps your solar street light work efficiently.
Can you replace the battery yourself?
Yes, you can replace the battery if you follow the manufacturer’s instructions. Always turn off the power before starting. Wear gloves and safety glasses for protection.
Why does your solar street light flicker or appear dim?
A dim or flickering light often means the battery is low or the wiring is loose. Clean the solar panel and check all connections. Replace the battery if it cannot hold a charge.
What is the best way to test if the sensor works?
Stand near the light and wave your hand in front of the sensor. The light should turn on or change brightness. If nothing happens, clean the sensor lens and check the wiring.
How can you prevent water damage in your solar street light?
Inspect all seals and gaskets for cracks. Make sure the housing is tight and waterproof. After heavy rain, check for water inside the fixture. Replace damaged seals right away.
When should you call a professional for help?
Call a professional if you see sparks, smell burning, or notice water inside electrical parts. Persistent problems after basic troubleshooting also need expert attention.
Do solar street lights work during cloudy or rainy days?
Solar street lights still work on cloudy days, but they may run for shorter periods. The panels collect less sunlight, so the battery may not fully charge. You may notice dimmer light or shorter lighting time.