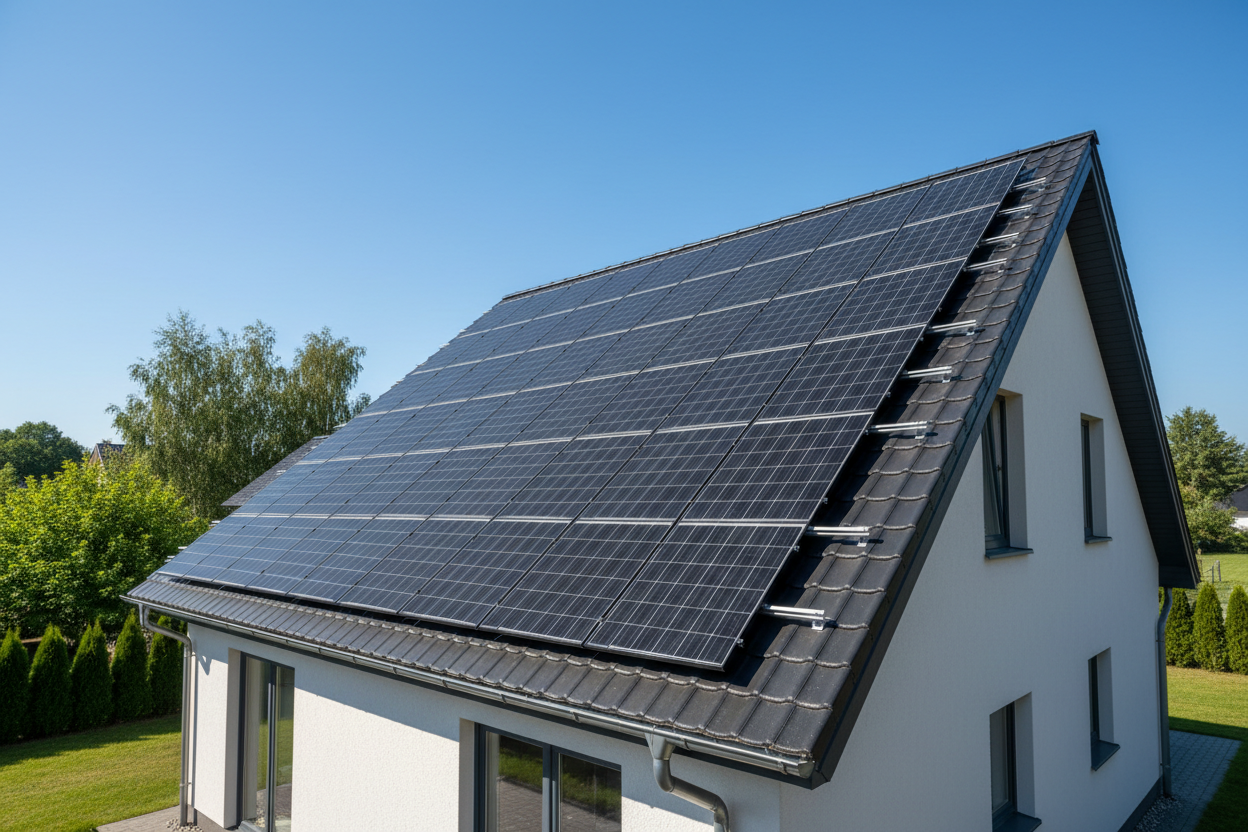
Choosing the right solar panel rack starts with knowing your roof. Each roofing material affects how well your system performs over time. For example, metal roofs can last 40-70 years, matching the lifespan of most panels. Heavier tiles, like clay and concrete, may need extra support. Check out the table below to see how different materials compare:
|
Roofing Material |
Weight (lbs/sq ft) |
Load-Bearing Capacity |
Durability |
|---|---|---|---|
|
Asphalt Shingles |
2.5 - 4 |
Moderate |
Moderate |
|
Clay Tiles |
8 - 12 |
High |
High |
|
Concrete Tiles |
9 - 12 |
High |
High |
|
Wood Shingles/Shakes |
2.5 - 4 |
Low |
Moderate |
|
Metal Roofs |
1.4 - 1.6 |
Very High |
Very High |
Think about your local weather, your roof’s strength, and your panel specs. These steps help you avoid problems later and keep your solar setup safe and strong.
Key Takeaways
- Understand your roof type and material. Different roofs require specific mounting systems to ensure safety and efficiency.
- Choose durable materials for your solar rack. Look for corrosion-resistant options like aluminum or stainless steel to withstand harsh weather.
- Ensure your solar rack meets local building codes. Compliance helps avoid costly repairs and ensures safety during extreme weather.
- Consider installation ease. Opt for systems with modular parts and clear instructions to simplify the setup process.
- Evaluate the total cost of ownership. A higher upfront cost for quality racks can save you money on repairs and replacements in the long run.
- Prioritize safety certifications. Select racks that meet national safety standards to protect your home and investment.
- Assess your roof's load-bearing capacity. Ensure it can support the weight of the solar panels and racking system, especially in snowy areas.
- Think about aesthetics. Choose a solar rack that complements your home’s style and consider eco-friendly materials for sustainability.
What Makes a Solar Panel Rack Perfect
Finding the right solar racking for your home can feel overwhelming. You want a system that fits your roof, stands up to the weather, and keeps your solar panel system working at its best for years. Let’s break down what you should look for so you can make a confident choice.
Key Criteria for Selection
Roof Compatibility
Your roof is unique. The best solar mounting system always matches the shape, slope, and material of your roof. Asphalt shingles, tile, metal, and flat roofs each need different approaches. If you pick a solar panel rack that fits your roof type, you avoid leaks, damage, and costly repairs. Local building codes may also require certain mounting styles, especially in areas with heavy snow or strong winds. Always check that your solar racking works with your roof and meets local rules.
Durability & Weather Resistance
You want your solar racking to last as long as your panels. Durability matters most in places with harsh weather. Look for corrosion-resistant materials like aluminum or stainless steel. These materials handle rain, snow, and sun without rusting or weakening. Weather ratings tell you how much wind, snow, or hail your system can take. Here’s a quick look at what to expect from top models:
|
Specification |
Rating |
Importance |
|---|---|---|
|
Snow Load |
5,000Pa (~2-4 feet) |
Keeps your system safe in snowy regions |
|
Wind Load |
2,400Pa (~141mph) |
Protects against strong coastal winds |
|
Fire Resistance |
Class A, B, C |
Shields your home from fire hazards |
|
Hail Resistance |
Up to 25mm hail |
Withstands hailstorms |
|
Hurricane Protection |
High wind/snow ratings |
Survives extreme weather |
If you live in a hurricane or wildfire zone, choose a solar panel rack with high wind and fire ratings. This keeps your solar panel system safe and lowers your risk of damage.
Installation Ease
No one wants a complicated setup. The best solar mounting system uses modular parts and comes with clear instructions. Some solar racking systems even snap together, making installation faster. If you plan to install the system yourself, look for racks with fewer parts and simple tools. Easy installation also means less time on your roof and fewer chances for mistakes.
Cost & Value
Price matters, but value matters more. A cheap rack may save you money now, but it could cost more in repairs or replacements later. High-quality solar racking lasts longer and needs less maintenance. Think about the total cost over the life of your solar panel system, not just the upfront price. Some racks use recyclable materials, which can help you save on disposal costs and support sustainability.
Safety Standards
Safety should always come first. Choose solar racking that meets national and local safety codes. Look for certifications from trusted organizations. Features like secure fasteners, fire-resistant materials, and strong load ratings protect your home and your investment. A safe solar panel rack gives you peace of mind, especially during storms or emergencies.
Tip: Always ask your installer about safety certifications and local code compliance before you buy.
Long-Term Benefits
When you match your solar racking to your roof and local climate, you get more than just a sturdy setup. You boost the performance of your solar panel system and cut down on maintenance costs. Adjustable racks let you change the tilt for better sunlight, which means more energy and bigger savings. Durable materials and weatherproof designs keep your system running longer, even in tough conditions.
- You spend less on repairs and replacements.
- Your panels work better and last longer.
- You protect your roof and your home.
Choosing the right solar panel rack is not just about today. It’s about making sure your solar panel system delivers value and reliability for years to come.
Identify Roof Type & Space
Before you pick a solar panel rack, you need to know your roof inside and out. The type, condition, and size of your roof all play a big role in how your solar system will fit and perform. Let’s walk through what you need to check.
Common Roof Types
You’ll find a few roof types that show up most often in homes with solar panels:
- Composite (Asphalt) Shingles: These are the most common roofs for solar. They give you lots of options for racks and installers.
- Tile Roofs: You’ll see these a lot in the Western US. Tiles can be clay, concrete, or slate. They need special care and hardware for solar.
- Metal Standing Seam Roofs: These make solar installation easier. You can attach racks with clamps, which means fewer holes in your roof.
- Flat Roofs (Tar and Gravel): These need extra brackets or ballasted racks to keep panels secure.
Asphalt Shingle
Asphalt shingle roofs work well with most solar mounting systems. You can use rail-based or rail-less racks with standard L-foot attachments. This makes installation straightforward and cost-effective.
Tile
Tile roofs need a bit more attention. You’ll need specialized tile hooks or replacement tiles with built-in mounting points. This helps avoid cracking tiles and keeps your roof watertight.
Metal
Metal standing seam roofs are a favorite for solar. Installers use clamps that grip the seams, so you don’t have to drill holes. This keeps your roof strong and leak-free.
Flat Roof
Flat roofs, often covered with tar and gravel or membrane, usually need ballasted racks. Sometimes, installers use penetrating mounts with strong flashing to keep everything secure.
Here’s a quick table to show how each roof type matches with mounting systems:
|
Roof Type |
Mounting System Description |
|---|---|
|
Asphalt Shingle |
Works with most rail-based and rail-less systems using standard L-foot attachments. |
|
Tile |
Needs specialized tile hooks or replacement tiles with mounting points. |
|
Metal (Standing Seam) |
Uses clamps that attach without roof penetrations. |
|
Flat Membrane |
Needs ballasted systems or penetrating mounts with robust flashing. |
Assessing Roof Condition
You want your solar panels to last, so your roof needs to be in good shape. Here’s how the pros check it out:
- A site visit helps spot the age of your roof and any obstacles.
- They measure your roof and check the pitch and layout.
- They look for damage or wear and recommend repairs if needed.
- They check the wiring paths and make sure your roof can handle the extra weight.
- They figure out how many years your roof has left.
- They make sure your setup meets local building codes.
Tip: If your roof is older or has damage, fix it before you install solar. This saves you money and hassle down the road.
Measuring Available Space
You need to know how much space you have for solar panels. A professional site assessment gives you the most accurate results. The assessor uses measuring tapes, cameras, and tools like the SunEye or Solar Pathfinder. These tools help measure your roof, check for shade, and find the best spots for panels. This step makes sure you get the most energy from your system and avoid surprises later.
Solar Panel Mounting System Options
When you start looking for a solar panel mounting system, you’ll see a lot of choices. Each design has its own strengths for different roofs and climates. Let’s break down the main rack designs and attachment methods so you can pick the best solar mounting system for your home.
Rack Designs
Rail-Based
Rail-based solar racking is the most common choice for roof-mounted systems. You attach long rails to your roof, then mount the panels on top. This setup works well for many roof types, especially asphalt shingles and tile. You get strong support and flexibility in panel placement. Rail-based racks offer great durability and make it easy to line up your panels for the best performance. Many installers prefer this solar panel mounting system because it handles heavy loads and tough weather.
Rail-Less
Rail-less solar racking skips the long rails and uses brackets that attach directly to the roof. This design cuts down on material and weight. You’ll find rail-less racks easier to handle if you want a faster installation. Some teardrop and speed rack systems snap together without tools, which saves time and effort. Rail-less racks work best on simple roof layouts. You get a clean look and fewer roof penetrations, which helps protect your roof’s integrity.
Ballasted
Ballasted solar racking sits on flat roofs. Instead of drilling holes, you use heavy blocks to hold the system in place. This solar panel mounting system keeps your roof watertight and avoids leaks. Ballasted racks are popular for commercial buildings, but you can use them on homes with flat roofs too. You get solid stability and easy installation, but you need to make sure your roof can handle the extra weight.
Tip: Besides these main types, you might see ground mounting, floating systems, carport racks, flexible racks, BIPV, and tracking systems. Most homeowners stick with roof mounting for simplicity and cost.
Attachment Methods
Penetrating vs. Non-Penetrating
You have two main ways to attach your solar racking: penetrating and non-penetrating. Penetrating mounts use bolts or screws that go into your roof structure. They give you strong support and work well for most homes. Non-penetrating mounts, like ballasted racks or clamps for standing seam metal roofs, avoid holes. These protect your roof warranty and reduce the risk of leaks.
Here’s a quick look at how different attachment methods match with roof types:
|
Roof Type |
Attachment Method |
Benefits |
|---|---|---|
|
Asphalt Shingle Roofs |
IronRidge FlashFoot² |
Prevents leaks and distributes loads evenly. |
|
Tile Roofs |
Pegasus Scissor Mount |
Reduces breakage and keeps extra tiles for repairs. |
|
Stone-Coated Steel & Tile |
QuickBOLT and Unirac Tile Hooks |
Provides a watertight, low-impact solution. |
|
Flat Roofs |
Q Base and Fast Jack |
Creates a strong, waterproof connection. |
|
Standing Seam Metal Roofs |
S-5! Clamps |
No penetrations, preserving roof warranty and integrity. |
|
Flat Roofs |
Ballasted Racking Systems |
Reduces or eliminates the need for roof penetrations while maintaining stability. |
Penetrating mounts give you maximum strength, but you need proper flashing to keep water out. Non-penetrating options work best if you want to avoid roof damage.
Flashing & Waterproofing
Flashing is a must for any solar racking system that uses roof penetrations. Installers place thin metal flashing under your shingles or tiles to direct water away from the mounting points. This step protects your roof from leaks and extends its life. Without flashing, water can seep in, causing rot, mold, and expensive repairs.
|
Key Benefit |
Description |
|---|---|
|
Water Protection |
Flashing redirects water away from vulnerable areas, preventing leaks and structural damage. |
|
Increased Longevity |
Proper installation of flashing extends the lifespan of the roof by reducing water damage. |
|
Mold Prevention |
Effective flashing prevents water infiltration that can lead to mold and mildew growth. |
|
Cost Savings |
Reduces the risk of expensive repairs to the home’s structure, insulation, or electrical systems. |
|
Peace of Mind |
Ensures the home remains safe, dry, and protected during harsh weather conditions. |
Proper flashing and waterproofing keep your solar panel system safe and your roof strong. You get peace of mind knowing your investment will last for years.
Match Rack to Roof Material
Choosing the best solar mounting system starts with understanding how your roof material interacts with solar racks. You want a setup that fits your roof and stands up to the elements. Let’s look at how different materials affect installation and long-term performance.
Material Compatibility
Every roof material brings its own challenges and benefits. You need to match your rack to your roof for the best results. Here’s a quick table to help you compare:
|
Roofing Material |
Durability |
Compatibility with Solar Panels |
|---|---|---|
|
Asphalt Shingles |
15-30 years |
Complicates installation; absorbs heat, reducing solar efficiency. |
|
Metal Roofs |
40-70 years |
Highly durable; often does not require drilling for installation; reflective qualities enhance efficiency. |
|
Clay/Concrete Tiles |
50+ years |
Durable but complicates installation; may require panels to be mounted above the roof surface. |
|
Wood/Slate Roofs |
Long-lasting |
Can chip or break under weight; some jurisdictions restrict solar panels on wooden roofs. |
Tile & Metal Considerations
Tile roofs look great and last a long time, but they need special care. You might need racks that mount above the tiles to avoid cracking them. Some installers use replacement tiles with built-in mounting points. This keeps your roof watertight and protects the tiles. Metal roofs make things easier. You can use clamps that grip the seams, so you don’t have to drill holes. Metal roofs offer the best solar mounting system for strength and durability. They also reflect sunlight, which helps your panels work more efficiently.
- Metal roofs are rated the best for solar panel compatibility due to their strength and durability.
- Asphalt roofs may need replacement every 12 years, which can lead to extra costs and complications for solar panel systems.
Tip: Always check your roof’s age before installing solar. If you have asphalt shingles, you might want to replace them first to avoid future headaches.
Flat Roof Adaptations
Flat roofs need a different approach. Ballasted racks use heavy blocks to hold your panels in place. This method avoids drilling and keeps your roof watertight. You must make sure your roof can handle the extra weight. Some flat roofs work better with penetrating mounts and strong flashing for added security. Material quality and durability matter most here, since flat roofs often face standing water and harsh weather.
Manufacturer Guidelines
You want your solar rack to last and stay safe. Following manufacturer guidelines is key. Every rack comes with a manual that shows you how to install it right. Here’s a table that breaks down the most important steps:
|
Step |
Description |
Importance |
|---|---|---|
|
Review Manual |
Read the installation manual for your rack and roof type. |
Critical |
|
Tool Preparation |
Gather all tools listed in the manual. |
High |
|
Clean Attachment Area |
Clean the roof where the rack will attach. |
High |
|
Placement |
Place towers, pads, and bars as shown in the manual diagrams. |
Critical |
|
Initial Tightening |
Hand-tighten bolts and fasteners to align everything. |
High |
|
Torque Fasteners |
Use a torque wrench for final tightening. |
Critical |
|
Test Security |
Push and pull on the rack to check for movement. |
High |
|
Re-check Fasteners |
Check all fasteners after your first use. |
Critical |
|
Regular Inspection |
Inspect hardware for wear and tightness regularly. |
High |
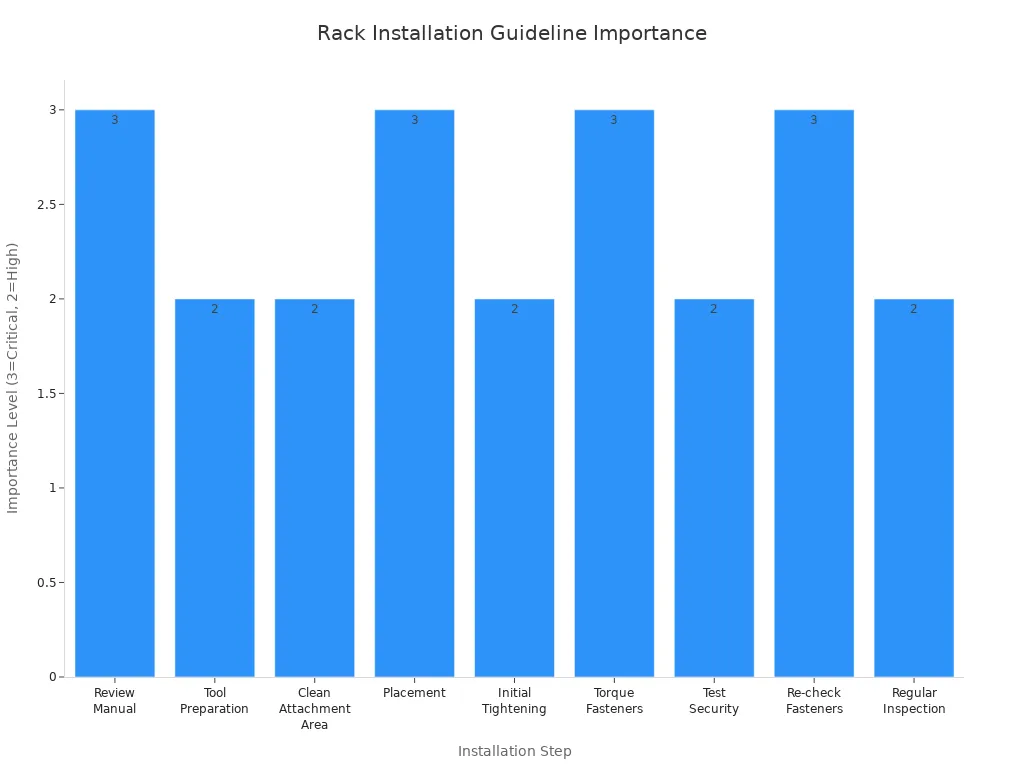
Proper preparation makes installation smoother. You avoid mistakes by gathering the right tools and reading the manual. Ignoring manufacturer weight limits can lead to rack failure. Not testing the installation before loading panels creates risk. Create a checklist for each step, including torque specs and alignment. This keeps your system safe and extends its life.
Note: Regular inspections help you catch problems early. Tighten loose bolts and check for signs of wear to keep your solar rack secure.
By matching your rack to your roof material and following manufacturer guidelines, you get the best solar mounting system for your home. You boost durability and protect your investment for years to come.
Evaluate Strength & Safety
When you choose solar racking for your home, you want to make sure it stands up to the demands of your environment. Strength and safety features matter just as much as the look and fit of your system. Let’s break down what you need to check before you commit.
Load-Bearing Capacity
Your roof needs to support both the weight of the solar racking and the panels themselves. You also have to think about extra loads from snow or maintenance. Building codes set minimum standards, but your local climate may require more. Here’s what you should know:
- Most roofs must handle a live load of at least 20 pounds per square foot. This covers snow, wind, and people working on the roof.
- Solar racking and panels add a dead load of about 3-4 pounds per square foot.
- If you live in a snowy area, your roof may need to support 20-60 pounds per square foot or more.
You can ask your installer to check your roof’s structure. They will look at the rafters, trusses, and decking to make sure everything is solid. If your roof falls short, you might need extra support before installing solar racking.
Tip: Always check local building codes and weather history. A strong roof means a safer solar setup.
Wind & Snow Ratings
Solar racking must handle the worst weather your area can throw at it. Wind and snow ratings help you compare products and pick the right system for your home. Take a look at how these factors play out:
|
Factor |
Description |
|---|---|
|
Basic Wind Speed |
Changes by location. Coastal and hurricane-prone areas need higher wind ratings. |
|
Exposure Category |
Open fields get more wind than city rooftops. |
|
Array Height and Geometry |
Taller racks and steeper tilts face stronger wind forces. |
|
Snow Load Behavior |
Snow can drift, slide, or freeze, creating uneven weight on your solar racking. |
|
Ground Snow Load |
Based on past snowfall, adjusted for roof slope and insulation. |
If you live near the coast or in the mountains, ask about wind and snow ratings before you buy. Some solar racking systems come with extra bracing or special anchors for tough conditions. You want your panels to stay put, even in a storm.
Safety Certifications
Safety features are not just a bonus—they are a must. You want solar racking that meets strict standards for electrical, mechanical, and fire safety. Look for these certifications when you shop:
- IEC 61730 covers construction, electrical, mechanical, thermal, and fire safety for solar panels.
- NFPA 70 (National Electrical Code) sets rules for wiring, grounding, and disconnects in solar installations.
These certifications mean your solar racking has passed tough tests. You get peace of mind knowing your system is built to last and protect your home.
Note: Ask your installer for proof of certification. Certified solar racking keeps your warranty valid and your family safe.
Choosing solar racking with the right strength and safety features helps you avoid problems and enjoy reliable energy for years.
Installation & Cost Factors
DIY vs. Professional Install
When you think about solar panel rack installation, you might wonder if you should do it yourself or hire a professional. Both options have their own advantages and drawbacks. Let’s break it down:
Pros of DIY Installation:
- You can save a lot of money by skipping labor and overhead costs.
- You get a sense of pride from finishing the project on your own.
Cons of DIY Installation:
- Working on your roof can be risky, especially when you deal with heights and electrical systems.
- If you make mistakes, you might lose out on warranties or face expensive repairs.
Pros of Professional Installation:
- Experts know how to get the job done right, so your system works at its best.
- Professionals handle permits and make sure your installation meets local rules.
- You get warranty protection from trusted companies.
Cons of Professional Installation:
- You pay more upfront for labor and service.
- You rely on someone else’s schedule and expertise.
DIY installation can save you up to $7,000 for an 8 kW system, but professional installation gives you peace of mind and long-term reliability. Here’s a quick checklist to help you decide:
- Choose DIY only for small, off-grid systems.
- Always talk to a pro for bigger installations to stay safe and follow the rules.
- Think about the long-term benefits of professional installation before you focus on saving money.
Tip: If you want to protect your investment and avoid headaches, professional installation is usually the best choice for most homeowners.
Installation Time
How long does installation take? The answer depends on your roof type, the size of your solar system, and whether you go DIY or hire a pro. Professional installers usually finish the job in one to three days. They work fast because they have experience and the right tools. DIY installation can take much longer, especially if you run into problems or need extra help.
Here’s a simple table to compare:
|
Installation Type |
Typical Timeframe |
What to Expect |
|---|---|---|
|
Professional |
1-3 days |
Fast, efficient, less hassle |
|
DIY |
3-7 days (or more) |
Slower, more learning required |
If you want a quick and smooth installation, hiring a professional is the way to go. You avoid delays and get your solar panels up and running faster.
Cost & Warranty
Cost is always a big factor when you plan a solar panel rack installation. DIY installation saves you money upfront, but you risk losing warranty coverage if you don’t follow the manufacturer’s instructions. Professional installation costs more, but you get warranty protection and support if something goes wrong.
Most solar rack manufacturers offer warranties that last 10 to 25 years. These warranties cover defects and sometimes even installation errors, but only if a certified installer does the work. If you install the system yourself, read the warranty terms carefully. Some companies won’t honor the warranty unless a professional handles the installation.
Note: Always ask about warranty details before you choose your installation method. A strong warranty can save you thousands in repairs over the life of your solar system.
When you weigh installation options, think about both the upfront cost and the long-term value. Professional installation may cost more now, but it protects your investment and gives you peace of mind for years.
Support & Service
When you choose a solar panel rack, support and service matter just as much as the hardware. You want to feel confident from the first phone call to the final installation. Good companies make sure you stay informed and comfortable every step of the way.
Let’s look at what you can expect from top solar rack providers:
|
Aspect of Support |
Description |
|---|---|
|
Open Communication |
You get clear updates and answers during every stage of installation. |
|
Dedicated Support Staff |
One person handles your questions and keeps you in the loop. |
|
Post-Installation Training |
You learn how to read your inverter and track your energy production after installation. |
You never want to feel lost or ignored during installation. Open communication helps you understand what’s happening on your roof. If you have questions about the process, a dedicated support staff member gives you quick answers. This personal touch makes the installation smoother and less stressful.
After installation, training becomes important. You learn how to monitor your system and spot any issues early. Many companies walk you through the inverter display and show you how to check your energy output. This hands-on approach helps you get the most from your solar setup.
Here’s what else you should look for in support and service:
- Guidance on optimizing your solar system for better performance.
- Education about the benefits of renewable energy.
- Fast response times for troubleshooting or warranty claims.
- Clear instructions for maintenance and cleaning after installation.
If you run into problems, strong support makes a big difference. You want a team that responds quickly and solves issues without delay. Some companies offer online chat, phone support, or even in-person visits. You should ask about these options before you sign any contract.
Warranty service also matters. If something goes wrong after installation, you need to know who to call. Reliable providers honor their warranties and help you fix problems fast. They keep records of your installation and make sure you get the right parts or repairs.
Tip: Before you choose a solar rack, ask about support channels and post-installation training. Good service helps you avoid headaches and keeps your system running smoothly.
Support and service turn a good installation into a great experience. You stay informed, get help when you need it, and enjoy peace of mind for years.
Aesthetics & Sustainability
Visual Impact
You want your solar panels to look good on your roof, not just work well. The way your solar rack blends with your home can make a big difference in how you feel about your investment. Many homeowners care about curb appeal. You probably do too. Solar shingles get high marks because they blend with traditional roofing materials. They look sleek and almost invisible from the street. If you want your solar system to match your home’s style, solar shingles might be your best choice.
Traditional rack-mounted panels stand out more. They sit above your roof and can break up the visual harmony. Some people don’t mind the look, especially if energy savings matter most. Others want a cleaner design. You can choose low-profile racks or edge trims to help panels blend in better. Black frames and all-black panels also look more modern and less noticeable.
Here are a few ways you can improve the visual impact of your solar rack:
- Pick a rack color that matches your roof.
- Use edge trims for a smooth finish.
- Choose panels with black frames for a sleek look.
- Ask your installer about solar shingles if you want the most seamless design.
Tip: If you live in a neighborhood with strict HOA rules, check their guidelines before you install. Some areas have limits on how visible solar panels can be.
Eco-Friendly Materials
You care about the planet, so you want your solar rack to be as green as your panels. Manufacturers now offer racks made from recycled aluminum and stainless steel. These materials last a long time and resist rust. You help reduce waste when you pick recycled metal. Some companies use powder-coated finishes that don’t release harmful chemicals.
Here’s a quick table to show eco-friendly rack options:
|
Material |
Sustainability Benefit |
Durability |
|---|---|---|
|
Recycled Aluminum |
Low energy to produce |
High |
|
Stainless Steel |
100% recyclable |
Very High |
|
Composite Plastics |
Made from recycled plastics |
Moderate |
You can ask your installer about the source of the rack materials. Some brands even publish their carbon footprint. If you want to go further, look for racks certified by environmental groups. These racks meet strict standards for sustainability.
-
Recycled materials help cut down on mining and pollution.
-
Durable racks mean fewer replacements and less waste.
-
Eco-friendly finishes protect your roof and the environment.
🌱 Choosing a sustainable rack supports your values and helps the planet. You get clean energy and a cleaner conscience.
When you think about aesthetics and sustainability, you make choices that fit your style and your values. Your solar rack can look great and do good at the same time.
When you pick a solar panel rack, focus on what matters most for your home and future.
-
Safety: Choose durable materials and proper installation to protect your solar panel system.
-
Compatibility: Make sure your rack fits your roof and meets local rules.
-
Long-term value: Look for strong warranties and easy maintenance to keep your solar panel system running smoothly.
You can talk with a professional to design a solar panel system that fits your needs. As new technology arrives, you’ll stay ready for upgrades and more savings.
FAQ
How do I know if my roof can support solar panels?
You can ask a solar installer to check your roof. They look at the structure, age, and material. If your roof needs repairs or extra support, they will let you know before you start.
Can I install a solar panel rack myself?
You can install some racks if you have DIY skills. Most people hire professionals for safety and warranty reasons. Mistakes can lead to leaks or damage. Always read the instructions and check your warranty first.
What maintenance does a solar rack need?
Solar racks need little maintenance. You should check for loose bolts and rust once a year. Clean off leaves or debris. If you see damage, call your installer for help.
Will solar racks damage my roof?
A properly installed rack will not damage your roof. Installers use flashing and waterproofing to protect your home. If you choose the right system and follow the guidelines, your roof stays safe.
How long do solar panel racks last?
Most racks last 25 years or more. They use strong materials like aluminum or stainless steel. You get a warranty with most systems, so you stay protected for a long time.
Are there racks for flat roofs?
Yes! Ballasted racks work well on flat roofs. They use heavy blocks to hold panels in place. You do not need to drill holes, so your roof stays watertight.
What if I need to replace my roof later?
You can remove and reinstall your solar panels and racks. It takes extra time and money. If your roof is old, replace it before you install solar. This saves you trouble later.