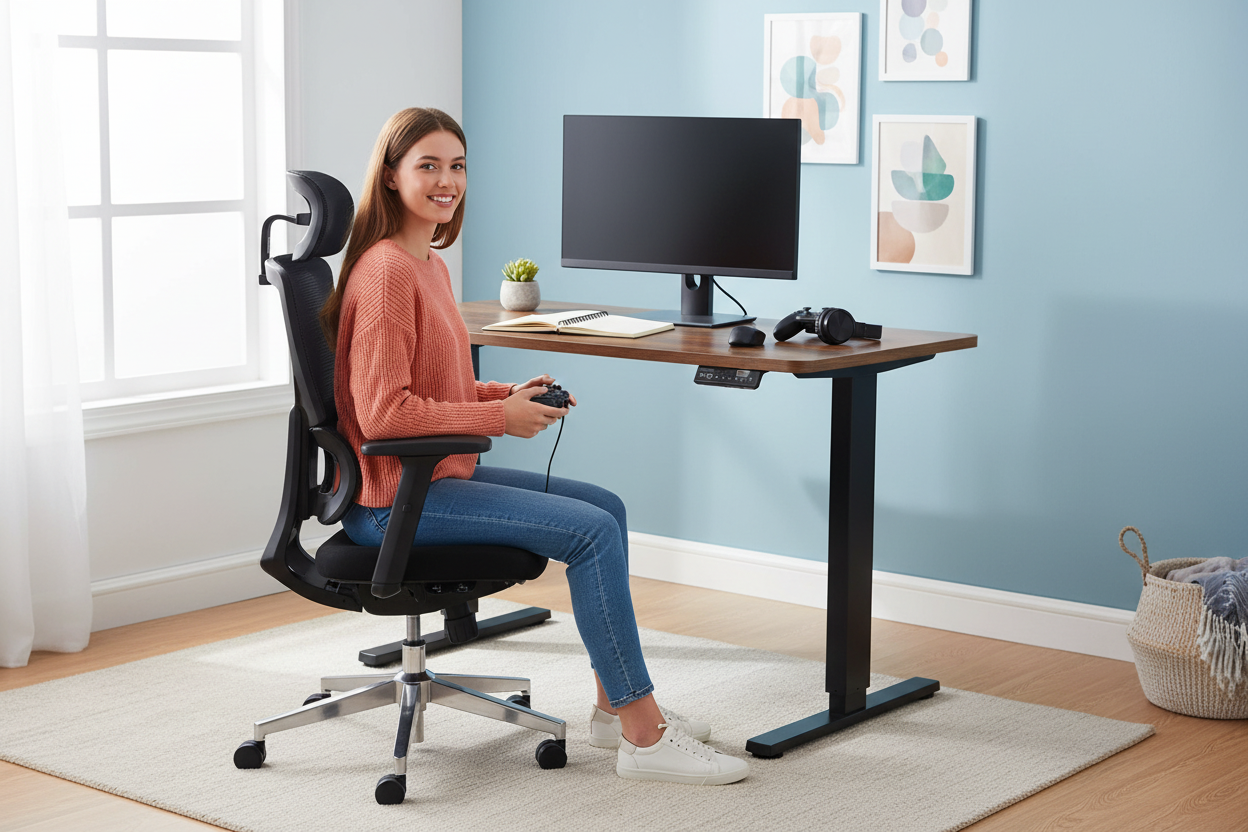
It's 11:40 on a Tuesday night, and you said "one more ranked game" at 10:15. The notes from your 9 AM lecture are still open on the left side of the desk, pinned under the corner of a textbook you will absolutely need tomorrow morning. Your shoulders are doing an impression of earrings, your chin is drifting toward your collarbone, and the desk lamp is glowing at the exact spot where your forearm needs to be. You know this feeling. It's the two-life desk problem, and it has been quietly winning the argument all semester.
Here's the strange part: the desk itself isn't the problem. The same surface that held you upright and alert through two solid hours of studying at noon is the same surface that holds you folded over like a paperback at midnight. Same desk, same chair, completely different human being. The daytime version of you has posture they'd defend in a job interview. The nighttime version is a lowercase C.
So this isn't a story about buying your way out of a lazy habit, and it isn't a lecture about posture. It's about building a setup that makes the good version of you the default, every single time, in both lives. You don't need two desks. You don't need to rearrange the room every evening like some kind of furniture DJ. You need one desk and one chair that can honestly do two jobs, plus a few habits that cost nothing.
That's what this guide is: the study-by-day, game-by-night setup, built properly, without pretending the two lives have the same needs. Because they don't. And once you accept that, the whole thing gets a lot easier to design.
The Two-Life Desk Problem
Let's be honest about what daytime-you and nighttime-you actually need, because they are not the same thing wearing different clothes.
Study-you needs the screen at eye level, forearms resting at a relaxed right angle, feet flat on the floor, and enough light to read a textbook without squinting. Study-you sits forward, engaged, leaning in to highlight a sentence or scribble in the margin. This is the posture that keeps you sharp through the third hour of a study block, and it's the posture most people can hold for about twenty minutes before the shoulders start their slow creep toward the ears.
Game-you is different. Game-you leans back, controller or mouse in hand, head tilted forward toward the action, shoulders rolled in. Game-you does not care about a right angle at the elbow. Game-you cares about the clutch play, the respawn, the objective. And here's the uncomfortable part: game-you is the version of you that wins the argument most nights. You don't intend to slump. You just stop paying attention to your body the moment the match starts, and the desk height that was perfect for studying is quietly wrong for everything else.
The real problem isn't laziness and it isn't the desk. It's that most dual-purpose setups are built for one height, one posture, and one version of you. The desk gets set to "good enough for studying" and then stays there forever, which means every gaming session starts with a slow, silent compromise. A little chin-forward here, a little wrist bend there. Night after night, that's how a "relaxing" evening leaves you with a neck that feels like it's been holding up a bowling ball. If that sounds familiar, it has a name, and we've written about it in detail: text neck.
The fix is a setup with a memory. A desk that remembers the height that works for studying, the height that works for standing breaks, and the height that works for gaming. A chair that holds your lower back in place through all three. And a layout where switching modes takes one button instead of a ten-minute furniture rearrangement.
That's the whole plan. Let's build it piece by piece.

Why the Chair Is the Shared Asset
Here's the detail most dual-purpose desk guides skip: the desk changes height, the monitor moves, the keyboard slides around, but the chair is the one thing in the room that stays in contact with your body through both lives. It's the shared asset. Which means it's the thing you should be pickiest about, and also the thing people usually buy last and cheapest.
Think about the two postures again. When you study, you're forward in the chair, elbows out, leaning into the work. When you game, you're back in the chair, arms reaching forward, head tilted down toward the screen. Those are two different jobs, and a chair that's great at one is often bad at the other.
This is where we need to have an honest conversation about gaming chairs, because you've probably been tempted. Racing-style gaming chairs look incredible. They've got the bucket-seat look, the bright colors, the aggressive bolsters that make you feel like you're about to be launched down a straightaway. And for an hour of gaming, they're fine. But here's what the ads don't mention: that same chair is often miserable for studying. The hard, flat seat. The fixed bolsters that fight your elbows when you lean in to write. The lumbar support that's decorative instead of adjustable. When you sit forward in a racing chair to take notes, you notice. We wrote a full breakdown of that debate, and the short version is this: a chair that looks like a race car usually treats your back like a spectator. You can read the whole thing here: ergonomic vs gaming chairs.
An ergonomic chair is a different animal. It doesn't try to be a throne. It tries to hold you in a neutral position no matter which way you lean. That means lumbar support that actually moves to where your spine is, seat depth that fits your legs instead of forcing one position, and armrests that adjust in enough directions that your elbows can find their right angle whether you're typing notes or gripping a controller.
For most people, that's the L1 Ergo Upgrade 518, $329.00, regularly $399.00. It's the chair I'd recommend to about eight out of ten people who ask, because it does the two-life job without pretending to be a piece of furniture art. The lumbar support moves, the seat depth adjusts, and the armrests get out of the way when you need them to. It's the "study chair that also games," and it's honest about that role.
If you're tall, if you've got long legs, or if you've sat in a lot of chairs and found them all a size too small, that's the L2 Ergo Pro 633, $379.00, regularly $449.00. It's the L1 with more range, more adjustment, and more room. I'd rather sell you the right chair once than sell you two wrong chairs, and if your body has been fighting every chair you've ever sat in, the L2 is the one that stops fighting back.
One chair, both lives. Because here's the practical truth: nobody swaps chairs between study and game. Nobody. You'll buy a second chair with the best intentions, and it will live against the wall for three months before you list it on Facebook Marketplace for a third of what you paid. The chair that works for both is the chair you'll actually use for both.
The Memory-Preset Desk Trick
Now the desk, and this is where the magic happens, if we can call an electric motor magic.
The core insight is that your ideal desk height is different for studying, for standing breaks, and for gaming. Most people have never measured any of them. They just have "the height the desk came at," and they adapt to it every single day like it's a law of physics. It is not a law of physics. It's a setting.
Height number one: study. This is typing height. Your elbows sit at about a right angle, forearms parallel to the floor, feet flat, screen at eye level. You live here for hours, so it's the one most people get right by accident.
Height number two: standing break. This is the height where you can stand comfortably with your hands on the keyboard, elbows still at a right angle but legs straight. You don't live here, you visit. The whole point is that sitting for four hours straight is a slow-motion problem, and a standing break every hour or so is the cheapest fix in ergonomics. The desk goes up, you stand, you stretch, your blood remembers it exists, and you sit back down. It's the difference between a desk that's a surface and a desk that's a tool.
Height number three: gaming. This one surprises people, because it's often a little different from study height. When you game, you tend to lean back in the chair, and a reclined position changes where your eyes and hands land. For many players, the screen wants to come down a touch, or the whole desk wants to be a hair lower, so your arms sit at a relaxed angle instead of a formal typing angle. Some players keep game height identical to study height, and that's fine too. The point isn't the exact number. The point is that it's a number, and you get to choose it instead of accepting it.
Here's the trick that makes all three real: memory presets. The 40×24 electric standing desk, $599.99, regularly $879.99, stores multiple heights and returns to them with one button. You dial in study height once, standing height once, game height once, and from then on, switching modes is a button press. Not a crank, not a measurement session, not "close enough." One button, and the desk glides to the height your body needs right now.
Why does this matter so much for a dual-purpose setup? Because the failure mode of most two-life desks is friction. If switching modes takes effort, you stop switching. You game at study height or study at game height, and the setup quietly becomes a single-purpose desk that you pretend is dual-purpose. Memory presets remove the friction, and when switching is free, you actually do it. That's the whole secret. The desk doesn't just hold your stuff. It holds your modes.
Lighting and Layout for Dual Mode
You can have the perfect desk and the perfect chair, and a bad light will still ruin both lives. Lighting is the most underrated part of a dual-purpose setup, because the same room has to work for daytime concentration and nighttime vibes, and those two goals fight each other.
Let's start with the daytime rule: light should fall on your work, not on your screen. The classic mistake is putting the desk facing a window, which sounds great and is terrible, because every window becomes a glare machine aimed directly at your monitor. The better setup puts the desk perpendicular to the window, so daylight comes in from the side, lights your textbook, and leaves the screen alone. If your room doesn't allow for that, a simple curtain or blind that you actually use at screen hours solves most of the problem.
Nighttime is where dual-mode lighting gets interesting, because you need the same desk to do "focus" and "wind down." The trick is layering. Keep one neutral, brighter light for study mode: a desk lamp or an overhead light that's bright enough to read without squinting. Then add a warm, dim light for game mode: a small lamp behind or beside the monitor, or a bias light on the back of the screen. Bias lighting is one of those cheap tricks that feels like a hack: a soft light behind the monitor reduces the contrast between the bright screen and the dark room, which means your eyes do less work, and the room suddenly feels like a proper setup instead of a cave with a glowing rectangle.
The layout part is simpler than people make it. On a 40-inch-wide desk, you have room to define two zones without building a wall between them. The study zone lives on the left: textbook, notebook, pen, maybe a lamp. The game zone lives on the right: controller, headset, snacks. The center is sacred, and it belongs to the screen. Keyboard in the middle, monitor straight ahead, mouse within reach. That's the rule.
Why does this matter for a dual-purpose desk? Because if the zones overlap and tangle, every mode switch becomes a cleanup operation. If the study zone is just "wherever the textbook landed," then gaming tonight means moving a textbook, a notebook, three pens, and a coffee mug before you can start. That's friction again, and friction kills the switch. Keep the zones defined and the switch takes thirty seconds. The desk does the heavy lifting with its height presets, and the layout just needs to not fight you.

The Honest Budget
Let's talk money, because every setup guide eventually has to, and most of them do it with a fake spreadsheet and a cheerful "you'll save so much!" line. Here's the honest version.
The combo this guide is built around costs $599.99 for the 40×24 electric standing desk, regularly $879.99, plus $329.00 for the L1 Ergo Upgrade 518, regularly $399.00. That's $928.99 all in. If you go with the L2 Ergo Pro 633 at $379.00, regularly $449.00, you're at $978.99. Call it a grand. That's real money, and I'm not going to pretend it's pocket change.
But here's what that roughly one thousand dollars replaces, and this is the part worth thinking about honestly. The average "gaming desk" you'll find online is a laminate table with RGB strips glued to the edge, sold for $150 to $300, with a height that's whatever the box says it is. The average "gaming chair" is a racing-style bucket seat that looks incredible in the product photos and gives you a flat seat and a decorative lumbar pillow, for $200 to $400. If you bought both of those, you'd spend $350 to $700 and end up with a desk that can't stand up and a chair that's bad at studying. That's not a setup. That's a collection of Instagram props.
Now look at the other direction. A genuinely good study setup isn't cheap either. A solid desk and a solid ergonomic chair from any reputable brand will run you into the same territory, and you'd still be missing the standing feature and the memory presets.
The honest math of the dual-purpose approach is that you're not buying two things that each do one job. You're buying one desk that does two jobs and one chair that does two jobs. The desk's standing feature replaces the need for a second desk entirely, because the standing height is effectively a second surface you didn't have to buy. And the chair's adjustability means it works for both the forward study posture and the reclined gaming posture. That's the whole pitch, and it's a fair one.
One more piece of the honest budget: think about how long this lasts. A desk and a chair like these are bought for a season of life, not a semester. The 40×24 desk isn't a dorm-room-only purchase. It's the desk you take to the apartment, then the house, then the home office. The chair is the same. Spread the cost over the years you'll actually use them, and the $20 gaming-chair-shaped impulse buy starts looking like the expensive option.
Small-Room and Dorm Builds
If you're reading this from a dorm room, a small apartment, or a bedroom that's mostly bed, this section is for you, and the news is good: the dual-purpose setup is actually easier in a small space, because it replaces two pieces of furniture with one.

The 40×24 desk has a footprint of 40 inches wide by 24 inches deep. That's roughly the size of a standard desk, which means it fits where a standard desk fits. It goes against a wall, leaves room for the chair to roll back, and when you raise it to standing height, it doesn't need any extra floor space, because the whole point of a standing desk is that it rises in place. That last part matters more in a dorm than anywhere else, because floor space is the real currency in a small room. We wrote a whole guide on building a back-to-school standing desk setup in a dorm, and it covers the room-by-room details: back to school dorm setup.
The small-room version of the two-zone layout is the same as the big-room version, just tighter. Study zone on the left, game zone on the right, screen in the middle. In a dorm, the game zone often shrinks to a controller in the drawer and a headset on a hook, and that's fine. The console or the tower goes on the floor or on a small shelf beside the desk, and the desk surface stays dedicated to the two lives that matter.
A few dorm-specific notes. First, keep the desk's underside clear, because a standing desk's clearance is one of its quiet superpowers. Under-desk storage boxes and footrests work great when the desk is at sitting height, and they don't interfere when it rises. Second, use the wall. Monitor arms and headphone hooks keep the surface clear, and a clear surface is what makes the mode switch fast. Third, if your room is truly tiny, don't feel obligated to have a second monitor. One good monitor and the laptop screen as a secondary display is plenty for both studying and gaming, and it keeps the desk from becoming a screen farm.
The last dorm note is about roommates, because the desk is yours but the room is shared. The standing feature is actually a social advantage here: when you raise the desk to standing height, it signals "study mode, do not disturb" without you having to say a word. That's a real feature, and it's free.
Cable Management That Survives the Switch
Here's the part that makes or breaks every dual-purpose setup, and it's the part almost nobody plans for: the cables. A setup that switches modes every day puts stress on its cables that a single-purpose desk never sees, and the cables are the first thing to fight back.
The rule that makes everything else work is simple: give every cable slack for the full height range of the desk. This is the mistake I see constantly. Someone builds a beautiful setup, routes the cables perfectly tight, and then raises the desk to standing height for the first time, and the mouse cable yanks the mouse off the desk, or the monitor cable goes taut and the monitor wobbles. Cables need a service loop. Route them so there's a gentle curve of extra length at the bottom of the travel range, and the same cable will be comfortable at the top of the range too. It's a five-minute fix that prevents a lifetime of "why is my desk fighting me."
Second rule: group the cables by job. Power cables in one bundle, display and data cables in another, peripherals in a third. Velcro ties, not zip ties, because you will need to undo these bundles when you move the setup or swap a device, and zip ties mean scissors and regret. The goal is that you can identify and free any single cable in under ten seconds, which is the difference between a cable system and a cable nightmare.
Third rule: keep the moving parts of the cable system off the desk surface. The only cables that should live on top of the desk are the ones that connect to things you use on the desk, and even those should have a defined path to the edge. Everything else routes underneath, where it can move with the desk without becoming a trip hazard or a tangle. If your setup has a power strip, it goes under the desk, mounted or resting on the frame, so the whole station plugs into one place and the visible desk stays clean.
Here's the honest truth about cable management and the dual-purpose desk: you don't do it because it looks nice, although it does. You do it because the mode switch is only fast if the cables don't fight you. A tangled cable bundle turns a one-button desk switch into a ten-minute wrestling match, and friction kills the switch. Do the slack, do the bundles, and the switch stays free. That's the whole game.
The Setup Afternoon: Putting It All Together
None of this works if it stays a list of good ideas, so here's how the whole thing goes together in one afternoon, in the order that actually makes sense.
Start with the desk. Build it, place it, and then set the heights with your real gear on the desk, not with an empty surface and a tape measure. Study height is where you naturally sit to write or type, elbows at a right angle. Standing height is where your hands land on the keyboard when you're standing straight. Game height is where you naturally settle when you lean back with the controller or the mouse. Save all three, in that order. From here on, the desk knows your modes, and you never think about heights again.
Second, the chair. Set the seat height so your feet are flat and your thighs are roughly parallel to the floor. Set the lumbar support so it hits the small of your back, not your lower ribs and not your hips. Set the armrests so your forearms rest at desk height when you're sitting up. Then lean back, game-style, and make sure the chair still holds you. The L1 is built for exactly that, and the whole adjustment takes ten minutes once.
Third, the lighting and the zones. Move the lamp so it lights the study zone, add the bias light behind the monitor for game mode, and put the textbook and the controller where they belong. This is the thirty-minute step, and it's the one that makes the daily switch feel effortless instead of like a production.
Fourth, the cables, with slack and bundles as described above. Twenty minutes, once.
When you're done, the test is simple: switch from study to game and back, twice. If both switches take under a minute and nothing yanks, wobbles, or tangles, you're done. That's the whole build. One afternoon, one desk, one chair, two lives, and a switch that's finally free.
FAQ
Can one chair work for study and gaming?
Yes, if it's the right kind of chair. An ergonomic chair with adjustable lumbar support, seat depth, and armrests holds you through both a study session and a gaming session, because both need the same thing underneath: neutral spine support. Racing-style gaming chairs struggle with the study half, which is why an ergonomic chair that games comfortably beats a gaming chair that studies poorly.
Is a standing desk worth it for a gamer?
If you play for more than an hour at a time, yes, but not for the reason most people think. The desk's real value for gamers is the height presets: one button down to game height, one button up for a standing break between matches. You don't have to stand while gaming. You just need the option, and the option is what makes it worth it.
What height should I game at?
Slightly lower than typing height, for most people. When you lean back to game, your eyes and hands settle lower than when you're sitting forward to type, and a slightly lower desk keeps your arms relaxed instead of reaching up. The exact number is personal, which is exactly why a memory preset beats a guess.
How do I switch between modes fast?
Save each mode as a memory preset on the desk and keep the layout zones defined. The monitor stays centered, the keyboard stays in front of it, and only the zone items move: textbook off, controller on. If the switch needs a full rearrangement, you'll stop doing it, so design it as a one-button move from the start.
Will a $599 desk fit a dorm room?
Yes. The 40×24 footprint is 40 inches wide and 24 inches deep, which fits against most dorm walls with room left for the chair. It rises in place for standing breaks, so it never demands extra floor space, and the compact footprint keeps a small room from feeling like a furniture store.
Do I need a second monitor?
No, and you shouldn't buy one just because every setup photo online has two. A single monitor centered in front of you is better for both studying and gaming than a pair that splits your attention. One good monitor plus the laptop screen as a secondary display is plenty for either life.
Is the L1 good enough for tall gamers?
For most tall players, yes. The L1's adjustable lumbar support, seat depth, and armrests cover the vast majority of body types. If you're over six feet and every chair you've ever sat in feels undersized, the L2 Ergo Pro 633 adds more range and more room, and it's the safer call.
What if I only game on weekends?
Then you're mostly a study-desk person who games occasionally, and the setup should say so. Keep study height as the default, game at whatever preset feels right on Saturday, and spend the chair budget on comfort rather than looks. The same desk and chair combo works perfectly for you, because the presets don't care how often you use them.
The two-life desk isn't a problem you have to solve with two desks, two chairs, or a nightly furniture rearrangement. It's a problem you solve with one desk that remembers its modes and one chair that holds you properly through all of them. That's the whole system, and it's simpler than the setup photos on social media make it look.
The combo that does the job: the 40×24 electric standing desk at $599.99, regularly $879.99, paired with the L1 Ergo Upgrade 518 at $329.00, regularly $399.00. Study height, standing break height, and game height, all saved and one button away. The L1 holds your back through both lives, and if you're taller or want more range, the L2 Ergo Pro 633 at $379.00, regularly $449.00, is the step up.
Both ship free anywhere in the US, and both come with a 30-day money-back guarantee, so you can live with the setup for a month and decide for yourself whether the switch really is that fast. I think you'll find it is. Study by day, game by night, one desk, no compromises, and no more 11:40 PM neck.
