
Thinking about adding smart lighting to your home? You’re not alone. As of 2024, 93% of American households use at least one smart home device, and 34% already enjoy smart lighting. With beginner-friendly products, you can control your lights with your voice, making everyday tasks easier and your home feel more modern. No tech skills needed—just start with one room or even a single bulb. You’ll find options for every budget, from affordable switches to full-featured systems, so you can pick what works best for your setup.
Key Takeaways
- Smart lighting lets you control your home lights using your phone or voice with Alexa or Google Home.
- Smart bulbs save energy, last longer, and offer features like scheduling, dimming, and color changes.
- Check compatibility before buying smart bulbs to ensure they work with your devices and Wi-Fi.
- Installing smart lighting is simple: turn off power, replace bulbs or switches, then connect to your app.
- Use clear names and group your lights by room to make voice commands easier and more accurate.
- Practice basic voice commands to control lights hands-free and create routines for daily convenience.
- Troubleshoot common issues by checking Wi-Fi, updating apps, and resetting devices when needed.
- Automation features like routines and scenes help save energy and create the perfect mood effortlessly.
Smart Lighting Basics
What Is Smart Lighting
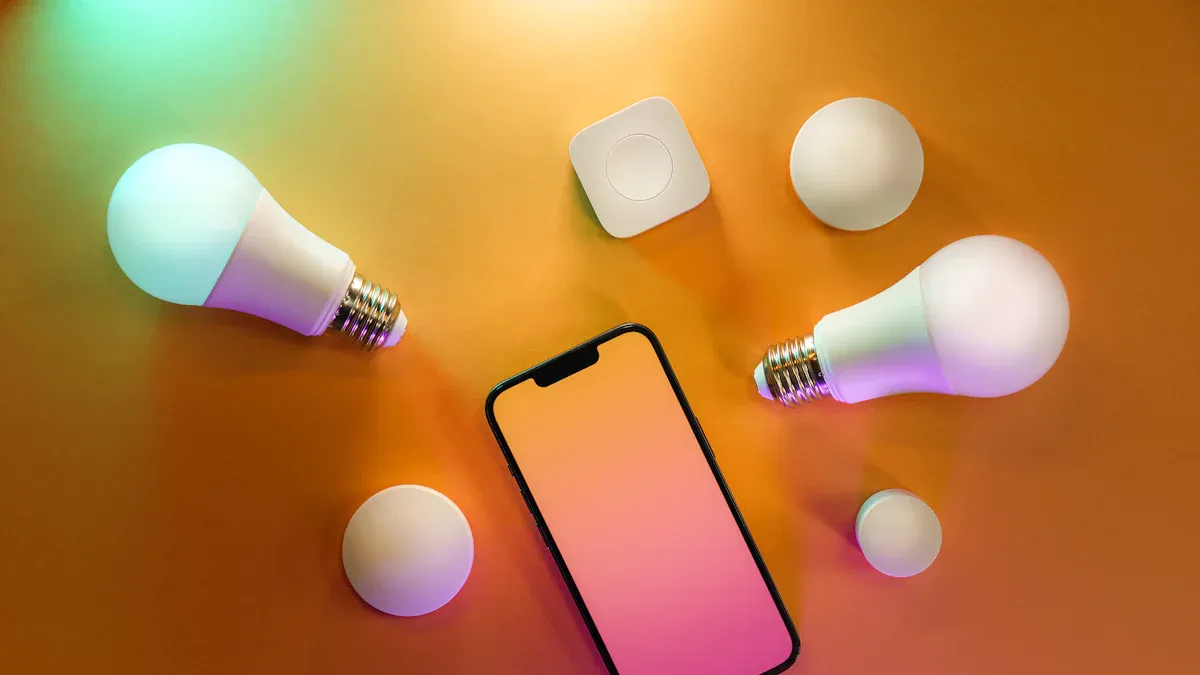
Smart lighting is a modern way to control the lights in your home. Instead of flipping a switch, you use your phone, voice, or even sensors to turn lights on and off. These systems connect to your Wi-Fi and work with smart assistants like Alexa or Google Home. You can set schedules, change brightness, and even pick different colors if you want.
Here’s a quick look at how smart lighting compares to traditional lighting:
|
Feature |
Traditional Lighting (Incandescent/HID) |
Smart LED Lighting Systems |
|---|---|---|
|
Energy Consumption |
High (approx. 4,500 kWh/year) |
Low (900–1,200 kWh/year) |
|
Lifespan |
Short (~1,000–2,000 hours) |
Long (~50,000+ hours) |
|
Maintenance Frequency |
Frequent (4–6 times/year) |
Infrequent (0.5–1 times/year) |
|
Automation/Smart Features |
None (manual control only) |
Advanced (sensors, IoT, automation, emergency response) |
|
Safety Rating |
Low (2/5) |
High (5/5) |
|
Environmental Impact |
High energy use, hazardous disposal |
Minimal, supports sustainability goals |
Smart lighting stands out because it uses sensors and smart technology to adjust to your needs. You get more control, better safety, and less hassle with maintenance.
Benefits
Why should you consider smart lighting for your home? Here are the top three reasons:
- Energy Efficiency: Smart lighting uses LED bulbs and lets you set schedules or use motion sensors. This means lights only turn on when you need them, which leads to real energy savings.
- Enhanced Convenience and Control: You can control your lights from anywhere using your phone or voice. Want to dim the lights for movie night or turn them off without getting out of bed? It’s easy.
- Improved Security and Safety: Smart lighting can turn on automatically when you walk into a room or when it gets dark outside. This helps prevent accidents and can even scare off intruders.
Tip: Many people start with smart lighting in one room and expand as they see the benefits. You don’t have to upgrade your whole home at once.
How It Works
Smart lighting systems use sensors and Wi-Fi to make your life easier. When you walk into a room, a sensor can turn the lights on for you. If you leave, the lights turn off to save energy. You can also set up routines, like having your lights slowly brighten in the morning to help you wake up.
These systems connect to your home network and work with voice assistants. You just say, “Turn on the kitchen lights,” and it happens. The technology behind smart lighting lets you automate, customize, and control your lighting in ways that old systems can’t match.
Smart lighting doesn’t just make your home look cool—it helps you save money, stay safe, and enjoy more comfort every day.
Choosing Smart Bulbs
Compatibility
Before you buy any smart bulbs, you need to make sure they will work with your setup. Not every bulb works with every smart home system. Look for packaging or product descriptions that say “Works with Alexa” or “Works with Google Assistant.” This label makes your life much easier.
Here are some things you should check for compatibility:
- The smart bulbs should support 2.4GHz Wi-Fi or Bluetooth. Most home networks use 2.4GHz, so this is important.
- Make sure your phone or tablet runs Android 9.0+ or iOS 15.0+. You need these versions for the app that controls your bulbs.
- The bulbs must have voice integration with Alexa or Google Assistant. This lets you control them hands-free.
- Most smart bulbs use a standard E26 base. This fits most lamps and ceiling fixtures in the U.S.
- Avoid using smart bulbs with dimmer switches. If you want to dim your lights, use the app or your voice instead.
Tip: Always double-check the compatibility list before you buy. This step saves you from headaches later.
Types of Smart Bulbs
You have a lot of choices when it comes to smart bulbs. Each type offers something different for your home. Here are the most popular options:
- White smart bulbs: These give you basic on/off and dimming features. They work well in bedrooms, hallways, or anywhere you want simple lighting.
- Color smart bulbs: These bulbs let you pick from millions of colors. You can set the mood for parties, movie nights, or just a relaxing evening.
- Dimmable smart bulbs: You can adjust the brightness to fit your needs. Use your voice or the app to make the room brighter or softer.
- Smart plugs: These let you control regular lamps or string lights with your voice or app. Plug any lamp into a smart plug, and it becomes part of your smart home.
- Smart switches: If you want to control ceiling lights or fixtures that use regular bulbs, smart switches are a great choice. They replace your old wall switch and work with Alexa or Google Home.
|
Type |
Best For |
Voice Control |
Color Options |
Dimming |
|---|---|---|---|---|
|
White Bulbs |
Everyday lighting |
Yes |
No |
Yes |
|
Color Bulbs |
Mood and accent lighting |
Yes |
Yes |
Yes |
|
Smart Plugs |
Lamps, holiday lights |
Yes |
No |
On/Off |
|
Smart Switches |
Ceiling fixtures |
Yes |
No |
Yes |
Features to Consider
When you shop for smart bulbs, you want to get the most out of your purchase. Here are some features to keep in mind:
- Scheduling: Set your lights to turn on or off at certain times. This helps with security and saves energy.
- Grouping: Control several smart bulbs, smart plugs, or smart switches together. You can turn off all the lights in a room with one command.
- App control: Use your phone to control your lights from anywhere. This is handy if you forget to turn off a light before leaving home.
- Energy monitoring: Some smart plugs and smart switches track how much power your devices use. This helps you save money on your electric bill.
- Scene setting: Create custom lighting scenes for different moods or activities. For example, set a “movie night” scene with dimmed lights and a “wake up” scene with bright lights.
Note: The right features depend on your lifestyle. Think about what matters most to you—convenience, energy savings, or fun lighting effects.
Choosing the right smart bulbs, smart plugs, and smart switches can make your smart home experience smooth and enjoyable. Take your time, compare features, and pick what fits your needs best.
Easy Installation Tips
Preparing for Setup
Getting ready for smart lighting installation can feel overwhelming, but you can make it simple with a little planning. Start by gathering everything you need. You want to avoid running back and forth for missing tools. Here’s a quick checklist:
- Wall brackets and screws
- Power drill
- Voltage tester
- Wire connectors
- Ladder
- Level
- Safety gloves and goggles
Before you touch anything electrical, turn off the power at your main circuit breaker. Double-check with a voltage tester to make sure it’s safe. This step keeps you protected from shocks.
Think about where you want your lights. Pick spots that make sense for how you use each room. For example, place bulbs where you need task lighting or want to set a mood. Mark the installation spots so your fixtures look straight and balanced.
Tip: If your project involves new wiring or feels too complex, consider hiring a professional. DIY works well for simple upgrades, but pros handle tricky jobs safely and up to code.
Installation Steps
You can handle most smart lighting installation projects yourself, especially if you’re just swapping out bulbs or adding smart plugs. Follow these steps for a smooth process:
- Turn off the power at the breaker.
- Remove the old bulb or fixture.
- Install the new smart bulb, plug, or switch. Make sure you match up the wires correctly—live, neutral, and ground.
- Secure everything with wire connectors and electrical tape.
- Attach the fixture or plug, then restore power.
- Test your lights to make sure they work without flickering or overheating.
Avoid common mistakes like over-lighting a space or placing fixtures where they cause glare. Use weatherproof products for outdoor areas. Mix different types of lighting to create a cozy atmosphere. Don’t forget regular maintenance—clean your bulbs and replace them as needed.
Note: For hardwired systems or multi-zone designs, a professional can help you avoid headaches and ensure everything meets safety standards.
Wi-Fi and App Setup
Now you’re ready for the digital part of the setup. Connect all your devices to the same Wi-Fi network. Most smart lighting products use 2.4GHz Wi-Fi, so check your router settings if you have trouble.
You’ll need the right apps and integrations to control your lights. For Alexa, download the Amazon Alexa app. For Google Home, get the Google Home app. Some brands, like GE Cync, have their own apps that let you schedule lights, control them remotely, and set up voice commands. These apps work on both iOS and Android devices.
Create accounts for each app if you don’t have them already. Follow the in-app instructions to add your new smart lighting devices. You can now control your lights from anywhere, set schedules, and even simulate someone being home for extra security.
Callout: Always connect your smart lighting devices to the same Wi-Fi network as your phone or smart speaker. This step makes the setup process much smoother.
With these easy installation tips, you’ll have your smart lighting up and running in no time. Enjoy the convenience and flexibility that comes with smart home technology!
Smart Lighting Setup
Ready to bring your smart lighting to life? This step-by-step guide will walk you through the process for both Alexa and Google Home. You’ll see just how easy it is to control your lights with your voice or phone. Let’s get started!
Step-by-Step Guide: Alexa
Setting up your smart lighting with Alexa takes just a few minutes. Here’s how you can do it:
App Download
- Grab your smartphone or tablet.
- Download the Amazon Alexa app from the App Store or Google Play.
- Open the app and sign in with your Amazon account. If you don’t have one, you can create it in the app.
Tip: Make sure your Alexa device and your phone are on the same Wi-Fi network. This helps avoid connection issues during setup.
Device Connection
- Plug in your Alexa-enabled device (like an Echo Dot) and connect it to Wi-Fi.
- Set up your smart bulb using its brand app (for example, Tapo or Kasa). Make sure the bulb is online and the app is updated.
- Update the firmware for both your smart bulb and its app if prompted.
Enable Skill
- In the Alexa app, tap “More” at the bottom right.
- Go to “Skills & Games.”
- Search for the skill that matches your smart bulb brand (like “Tapo” or “Kasa”).
- Tap “Enable to Use.”
- Follow the prompts to link your smart bulb account with Alexa.
Note: Linking the correct skill is key. If you skip this step, Alexa won’t recognize your smart lighting devices.
Discover Devices
- After linking, Alexa will try to find your new smart bulb automatically.
- If Alexa doesn’t find it, say, “Alexa, discover devices.”
- Wait for Alexa to finish searching. Your smart bulb should now appear in the Alexa app.
- You can now control your smart lighting with voice commands like, “Alexa, turn on the living room light.”
If you ever rename your smart bulb, ask Alexa to rediscover devices so she can update the name.
Step-by-Step Guide: Google Home
If you prefer using smart lighting with Google Assistant, follow this step-by-step guide to get everything connected.
App Download
- Download the Google Home app from the App Store or Google Play.
- Open the app and sign in with your Google account.
Device Connection
- Plug in your Google Home device and connect it to Wi-Fi.
- Download the app for your smart bulb brand (for example, AiDot).
- Open the brand app and log in or create an account.
- Add your smart bulb by selecting the correct model and following the instructions in the app.
- Make sure your phone and Google Home are on the same 2.4 GHz Wi-Fi network.
Link Services
- In the Google Home app, tap the “+” icon to add a new device.
- Choose “Set up device” and then “Works with Google.”
- Search for your smart bulb brand and select it.
- Log in with your smart bulb account to link the service.
- Follow the prompts to finish linking.
Callout: Keep your Google Home app and device firmware updated. This ensures the latest features and best compatibility with your smart lighting.
Discover Devices
- After linking, Google Home will search for your smart bulb.
- If prompted, enter or scan the pairing code from your smart bulb app.
- Wait for Google Home to finish discovering your device.
- Once found, you can assign your smart bulb to a room in your home.
- Try a voice command like, “Hey Google, turn on the bedroom light,” to test your setup.
If you run into trouble, restart your smart bulb, Google Home device, and phone. Sometimes a quick reboot solves most setup issues.
With this smart lighting setup, you can enjoy hands-free control and create the perfect mood in any room. Whether you use Alexa or Google Home, the process is beginner-friendly and only takes a few steps. Now you’re ready to explore routines, schedules, and more advanced features as you get comfortable using smart lighting with Google Assistant or Alexa.
Organizing and Naming
Naming Lights
Getting your smart lights organized starts with good names. Alexa and Google Home both work better when you use clear, specific names for each light. If you call a light “Light 4,” your voice assistant might get confused. Instead, pick names that make sense for you and your family.
Here are some best practices for naming your smart lights:
- Use descriptive names like “bedroom lamp,” “kitchen ceiling,” or “desk light.” This helps your voice assistant understand exactly which light you want to control.
- Avoid generic names or numbers. “Living room lamp” is much easier for Alexa or Google Home to recognize than “Lamp 2.”
- Match the name to the light’s location or purpose. For example, “nightstand lamp” or “corner lamp” makes it clear which light you mean.
- When you add a new device in the Google Home app, go to the “Device” tab, tap “Add,” and follow the prompts to connect and name your light.
Tip: If you ever have trouble with voice commands, check your device names. A quick rename can make a big difference!
Creating Groups
Once you have good names, you can make things even easier by creating groups. Grouping lets you control several lights at once with a single command. For example, you can say, “Turn off the living room lights,” and all the lights in that group will respond together.
To create a group in the Google Home app, go to “Settings,” select “Devices, groups, and rooms,” then tap “Speaker groups” and choose “Create speaker group.” You can add as many lights as you want to each group.
Grouping by room or zone makes your smart home feel more organized. You don’t have to remember every single light’s name. Instead, you can control lights in a whole area with one simple voice command. This makes your daily routine smoother and saves you time.
Assigning Rooms
Assigning your smart lights to rooms is the final step for a tidy setup. In both Alexa and Google Home, you can assign each device to a specific room. This helps you manage your home more easily, especially as you add more devices.
When you assign a light to a room, you can use commands like, “Turn on the kitchen lights,” or “Dim the bedroom lights.” Your voice assistant knows exactly which lights you mean. This setup also helps when you want to control lights from your phone, since you can see all the devices in each room at a glance.
Note: As your smart home grows, keeping your devices organized by room and group will help you stay in control. You’ll spend less time searching for the right light and more time enjoying the comfort and convenience of your smart lighting system.
Voice Commands

Basic Commands
You might feel a little awkward talking to your lights at first, but using voice commands quickly becomes second nature. With Alexa or Google Home, you can control lights in almost any way you want. The most common voice commands let you turn lights on or off, adjust brightness, and even change colors. For example, you can say, “Alexa, turn on the living room lights,” or “Hey Google, set the kitchen lights to 50% brightness.” These simple phrases help you control lights without lifting a finger.
Here’s a quick table with some popular voice commands you can try right away:
|
Device |
Voice Command |
Action |
|---|---|---|
|
"Alexa, turn on the living room lights" |
Turns on living room lights |
|
|
Smart Lights |
"Alexa, turn off the bedroom lights" |
Turns off bedroom lights |
|
Smart Lights |
"Alexa, set the kitchen lights to 50% brightness" |
Adjusts brightness of kitchen lights |
|
Smart Lights |
"Alexa, change the living room lights to blue" |
Changes color of living room lights |
You can also use voice commands to set the mood. Try saying, “Set the lights to blue,” or “Dim the lights for movie night.” Many smart lighting systems, like Philips Hue, let you create color scenes or moods with just your voice. If you want to make things even easier, add your lights to routines. For example, you can say, “Goodnight,” and all your lights will turn off automatically.
Best Practices
To get the best results from your smart lighting, keep a few tips in mind when using voice commands. First, always use clear and specific names for your lights. If you have several lights in one room, give each one a unique name. This helps your voice assistant understand exactly which light you want to control.
Speak at a normal pace and volume. You don’t need to shout or talk like a robot. Your voice assistant works best when you use natural speech. If a command doesn’t work, try rephrasing it. Sometimes saying, “Turn off the desk lamp,” instead of, “Turn off the lamp,” makes a difference.
You can also group lights by room or activity. This way, you can control lights in a whole area with one command. For example, “Turn off all downstairs lights.” If you set up routines, you can use a single voice command to control lights, music, and more at once.
Tip: Practice a few basic voice commands every day. Soon, you’ll control lights without even thinking about it!
Using voice commands to control lights makes your home feel smarter and your daily routine easier. Once you get comfortable, you’ll wonder how you ever lived without it.
Troubleshooting
Connectivity Issues
Smart lighting depends on a strong Wi-Fi connection. If your lights stop working or respond slowly, the problem often starts with your network. First, check if your Wi-Fi is working for other devices like your phone or laptop. If you see issues, try restarting your router. Unplug it, wait 30 seconds, then plug it back in. This simple step fixes many problems.
Most smart bulbs use the 2.4GHz Wi-Fi band. Some routers have both 2.4GHz and 5GHz bands. Make sure your smart lights and your phone connect to the same band. If your lights still do not connect, move your router closer or remove obstacles like thick walls. Sometimes, too many devices on your network can slow things down. Disconnect a few devices and see if your lights respond better.
Tip: Place your smart speaker or hub in a central spot. This helps it “hear” your commands and keeps your devices connected.
Device Not Responding
Sometimes, your smart lights ignore your voice commands. This can feel frustrating, but you can fix it with a few steps. Here’s what you should try if your device does not respond to Alexa or Google Home:
- Open the Alexa or Google Home app. Try to control the light from the app. If it works, the problem might be with your voice assistant.
- Make sure you use the main account for Alexa or Google Home. Household or guest accounts may not have full control.
- Ask your voice assistant to “discover my devices.” This refreshes the connection.
- Disable and re-enable the smart bulb’s skill or service in the app. For example, turn off and on the Tapo or Kasa skill.
- Reset the smart bulb using the instructions from the manufacturer. Then, add it back in the app.
- Try controlling the light from the bulb’s own app using cellular data. This helps you see if the issue is with your Wi-Fi.
- Update both the smart bulb app and the Alexa or Google Home app. If you still have trouble, uninstall and reinstall the apps.
- If nothing works, note the time you tried and contact the brand’s support team for help.
Note: Most problems come from Wi-Fi drops or outdated apps. A quick update or reboot often solves the issue.
Resetting Devices
Resetting your smart lighting device can solve stubborn problems. Each brand has its own reset method, so check the manual or the manufacturer’s website for exact steps. Usually, you turn the bulb on and off several times or hold a button until it blinks.
After resetting, open your smart bulb’s app and add the device again. You may need to re-link it to Alexa or Google Home. This fresh start often clears up glitches and gets your lights working smoothly.
Callout: Always write down your device names and groups before resetting. This makes it easier to set everything up again.
Troubleshooting smart lighting can seem tricky, but most issues have simple fixes. With a little patience, you’ll have your lights back under control in no time.
Automation Ideas
Smart lighting gets even better when you start using home automation features. You can set up routines, schedules, and scenes that make your daily life easier and more comfortable. Let’s look at some simple ways to get started.
Routines
Routines are the heart of home automation. You can set up your lights to react to your habits or needs. For example, you might want your lights to turn on when you get home or fade in gently to help you wake up. Here are a few beginner-friendly routines you can try:
- Welcome Home: Your lights turn on automatically when your phone connects to Wi-Fi. You never walk into a dark house again.
- Good Morning: Lights slowly brighten at 7:00 AM. You can even add smart switches to start your coffee maker or open the blinds.
- Security Watch: Porch lights turn on if motion is detected while you’re away.
- Eco Mode: All lights and smart switches turn off when everyone leaves the house.
Setting up routines is easy. In most apps, you just pick a trigger (like time or presence) and an action (like turning on a light). You don’t need to know any coding. Some apps even let you add delays, so you can have your bedroom lights turn on at 7:00 AM, your coffee maker start at 7:15, and your curtains open at 7:30. This makes your morning smooth and stress-free.
Tip: Use confirmation prompts for routines if you have a busy household. This helps prevent accidental triggers.
Schedules
Schedules help you save energy and add convenience to your home automation setup. You can program your lights to turn off when you leave for work or dim in empty rooms. This means you never waste electricity on lights you don’t need.
- Set your living room lights to turn off at 9:00 AM when you leave.
- Schedule porch lights to turn on at sunset and off at sunrise.
- Run appliances or lights during times when electricity is cheaper.
Remote control through your phone also means you can adjust schedules on the go. You get more comfort and less hassle, all while lowering your energy bill.
Scenes
Scenes let you set the mood with just one tap or voice command. You can create different lighting setups for activities like watching movies, reading, or having friends over. Here are some popular scene ideas:
- Ambient Lighting: Use dimmable ceiling lights for general brightness. Adjust them for movie night or cleaning.
- Task Lighting: Place soft wall sconces near your favorite chair for reading or snacking.
- Accent Lighting: Add LED strips behind your TV or under furniture. Change the colors to match your mood.
- Cove Lighting: Install LEDs behind molding for a gentle glow that makes your room feel cozy.
Smart controls and smart switches let you fine-tune brightness and color. You can even create a “star ceiling” effect with tiny lights for a magical movie night.
Note: Scenes are a fun way to show off your home automation skills and impress your guests.
With routines, schedules, and scenes, you unlock the full power of smart lighting and home automation. Start simple, experiment, and soon you’ll have a home that feels truly smart.
You’ve learned how easy it is to set up smart lighting in your home. Start with one room or a single bulb to build confidence. As you get comfortable, you can expand your system and enjoy more control throughout your home. Smart lighting offers flexibility, energy savings, and convenience. When you’re ready for more, you’ll find plenty of resources to help you:
- Explore automation, scheduling, and scene setting
- Integrate with other smart home devices
- Access guides, case studies, and troubleshooting tips
Your home can grow smarter with every step you take.
FAQ
How many smart bulbs can you control with Alexa or Google Home?
You can control dozens of smart bulbs at once. Most people never hit the limit. If you have a big house, you might need a second hub or speaker for the best results.
Do smart bulbs work if your Wi-Fi goes out?
Smart bulbs need Wi-Fi for voice and app control. If your Wi-Fi drops, you can still use the wall switch to turn lights on or off. Automation and remote features pause until your network returns.
Can you use smart bulbs in any lamp or fixture?
You can use smart bulbs in most lamps and fixtures with a standard E26 base. Avoid using them with dimmer switches. For special fixtures, check the bulb’s size and voltage before installing.
Is it safe to leave smart bulbs on all night?
Yes, smart bulbs use LED technology and stay cool. You can leave them on overnight without worry. For extra safety, set schedules or use motion sensors to turn them off automatically.
Do smart lights use a lot of electricity?
Smart bulbs use much less power than old incandescent bulbs. You save energy and money over time. Many smart plugs and switches also track your usage so you can see your savings.
Can you mix different brands of smart bulbs?
You can mix brands if they work with Alexa or Google Home. Use the same app or link each brand’s app to your voice assistant. Grouping and naming help keep everything organized.
What happens if you move or change your Wi-Fi?
If you move or change your Wi-Fi, you need to reset your smart bulbs and reconnect them to the new network. Most apps guide you through this process. Write down your device names to make setup easier.
Do smart lights work with other smart home devices?
Yes! You can connect smart lights with sensors, cameras, or thermostats. Create routines like turning on lights when you unlock the door. Explore your app’s automation options for more ideas.